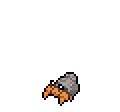
Stats & Training
Defense leads and Sp. Atk gets almost nothing. That's Stonjourner's stat line in a nutshell. 3 stats sit in respectable range, but the spread is brutal. Moderately hard to find and yields 2 Defense EVs.
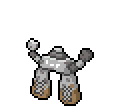
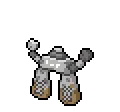
It stands in grasslands, watching the sun’s descent from zenith to horizon. This Pokémon has a talent for delivering dynamic kicks.
Once a year, on a specific date and at a specific time, they gather out of nowhere and form up in a circle.
Stonjourner Weakness
Type-wise, Stonjourner takes extra damage from Water, Grass, Fighting, Ground, and Steel. 4 resistances help offset the weaknesses. Stonjourner's physical bulk (base 135 Def) helps cushion physical weakness hits, but special attackers are the bigger threat.
| Damage | Types |
|---|---|
| 2x (Weak) | Water, Grass, Fighting, Ground, Steel |
| 0.5x (Resist) | Normal, Fire, Poison, Flying |
Corviknight Steel | A | |
Diggersby NormalGround | B | |
Available Moves Moves
Damage vs Stonjourner View Diggersby builds →Mud Shot 2x63-75% Double Kick 2x11-13% Mud-Slap 2x26-32% | ||
Mudbray Ground | C | |
Available Moves Moves
Damage vs Stonjourner View Mudbray builds →Bulldoze 2x37-43% Rock Smash 2x17-21% Double Kick 2x13-16% Mud-Slap 2x26-32% | ||
Palpitoad WaterGround | D | |
Available Moves Moves
Damage vs Stonjourner View Palpitoad builds →Bubble Beam 2x89-107%KO Mud Shot 2x76-91% | ||
Pancham Fighting | D | |
Available Moves Moves
Damage vs Stonjourner View Pancham builds →Low Sweep 2x33-39% Circle Throw 2x33-39% Arm Thrust 2x13-16% | ||
Corviknight Steel | A | |
Diggersby NormalGround | B | |
Available Moves Moves
Damage vs Stonjourner View Diggersby builds →Bulldoze 2x22-27% Mud Shot 2x60-71% Sand Tomb 2x13-17% Double Kick 2x9-11% | ||
Onix RockGround | C | |
Mudbray Ground | C | |
Available Moves Moves
Damage vs Stonjourner View Mudbray builds →Bulldoze 2x34-40% Rock Smash 2x15-18% Sand Tomb 2x22-27% Double Kick 2x12-16% | ||
Palpitoad WaterGround | D | |
Available Moves Moves
Damage vs Stonjourner View Palpitoad builds →Bubble Beam 2x82-98% Mud Shot 2x71-84% | ||
Corviknight Steel | A | |
Diggersby NormalGround | B | |
Available Moves Moves
Damage vs Stonjourner View Diggersby builds →Bulldoze 2x22-27% Mud Shot 2x62-73% Sand Tomb 2x15-18% Double Kick 2x8-10% | ||
Throh Fighting | C | |
Available Moves Moves
Damage vs Stonjourner View Throh builds →Circle Throw 2x33-39% Revenge 2x33-39% | ||
Sawk Fighting | C | |
Available Moves Moves
Damage vs Stonjourner View Sawk builds →Low Sweep 2x40-48% Rock Smash 2x25-30% Double Kick 2x20-24% | ||
Onix RockGround | C | |
Hippowdon Ground | A | |
Available Moves Moves
Damage vs Stonjourner View Hippowdon builds →Dig 2x45-53% Revenge 2x23-28% Mud Shot 2x79-93% Sand Tomb 2x22-26% | ||
Excadrill GroundSteel | A | |
Available Moves Moves
Damage vs Stonjourner View Excadrill builds →Dig 2x53-63% Mud Shot 2x63-74% Metal Claw 2x35-42% Sand Tomb 2x26-30% | ||
Corviknight Steel | A | |
Available Moves Moves
Damage vs Stonjourner View Corviknight builds →Steel Wing 2x33-40% Revenge 2x19-23% | ||
Stunfisk GroundElectric | A | |
Available Moves Moves
Damage vs Stonjourner View Stunfisk builds →Dig 2x31-37% Revenge 2x16-19% Mud Shot 2x88-105%KO Water Gun 2x43-51% | ||
Hawlucha Fighting | B | |
Available Moves Moves
Damage vs Stonjourner View Hawlucha builds →Submission 2x40-47% Dig 2x26-31% Steel Wing 2x23-28% Low Sweep 2x33-40% | ||
Hippowdon Ground | A | |
Available Moves Moves
Damage vs Stonjourner View Hippowdon builds →Dig 2x47-56% Revenge 2x24-28% Mud Shot 2x81-96% Sand Tomb 2x22-27% | ||
Excadrill GroundSteel | A | |
Available Moves Moves
Damage vs Stonjourner View Excadrill builds →Dig 2x54-64% Mud Shot 2x64-76% Metal Claw 2x36-42% Sand Tomb 2x24-29% | ||
Corviknight Steel | A | |
Available Moves Moves
Damage vs Stonjourner View Corviknight builds →Steel Wing 2x33-40% Revenge 2x20-24% | ||
Hawlucha Fighting | B | |
Available Moves Moves
Damage vs Stonjourner View Hawlucha builds →Submission 2x39-47% Dig 2x26-31% Steel Wing 2x24-28% Low Sweep 2x32-38% | ||
Passimian Fighting | C | |
Available Moves Moves
Damage vs Stonjourner View Passimian builds →Low Sweep 2x39-47% Revenge 2x38-44% Rock Smash 2x26-31% | ||
Hippowdon Ground | A | |
Available Moves Moves
Damage vs Stonjourner View Hippowdon builds →Dig 2x44-52% Bulldoze 2x34-40% Revenge 2x23-27% Mud Shot 2x77-91% | ||
Excadrill GroundSteel | A | |
Available Moves Moves
Damage vs Stonjourner View Excadrill builds →Dig 2x51-60% Brick Break 2x33-39% Smart Strike 2x46-54% Bulldoze 2x39-46% | ||
Hawlucha Fighting | B | |
Available Moves Moves
Damage vs Stonjourner View Hawlucha builds →Submission 2x38-44% Dig 2x25-30% Brick Break 2x36-42% Steel Wing 2x23-27% | ||
Sandaconda Ground | C | |
Available Moves Moves
Damage vs Stonjourner View Sandaconda builds →Dig 2x42-50% Bulldoze 2x32-38% Mud Shot 2x73-87% Sand Tomb 2x20-24% | ||
Seismitoad WaterGround | C | |
Available Moves Moves
Damage vs Stonjourner View Seismitoad builds →Dig 2x39-46% Drain Punch 2x23-28% Brick Break 2x23-28% Bubble Beam 2x10⁷-127%KO | ||
Hippowdon Ground | A | |
Available Moves Moves
Damage vs Stonjourner View Hippowdon builds →Earthquake 2x55-66% Dig 2x44-52% Bulldoze 2x34-41% Revenge 2x23-27% | ||
Excadrill GroundSteel | A | |
Available Moves Moves
Damage vs Stonjourner View Excadrill builds →Dig 2x52-62% Brick Break 2x33-39% Smart Strike 2x46-54% Bulldoze 2x39-46% | ||
Hawlucha Fighting | B | |
Available Moves Moves
Damage vs Stonjourner View Hawlucha builds →Flying Press 2x47-56% Submission 2x37-45% Dig 2x25-30% Brick Break 2x36-43% | ||
Sandaconda Ground | C | |
Available Moves Moves
Damage vs Stonjourner View Sandaconda builds →Dig 2x43-50% Bulldoze 2x33-39% Mud Shot 2x74-87% Sand Tomb 2x19-23% | ||
Seismitoad WaterGround | C | |
Available Moves Moves
Damage vs Stonjourner View Seismitoad builds →Dig 2x39-46% Dive 2x39-46% Drain Punch 2x25-30% Brick Break 2x25-30% | ||
Hippowdon Ground | A | |
Available Moves Moves
Damage vs Stonjourner View Hippowdon builds →Earthquake 2x56-66% Dig 2x45-54% Stomping Tantrum 2x42-50% Bulldoze 2x35-41% | ||
Excadrill GroundSteel | A | |
Available Moves Moves
Damage vs Stonjourner View Excadrill builds →Dig 2x53-63% Drill Run 2x53-63% Brick Break 2x33-39% Stomping Tantrum 2x50-59% | ||
Hawlucha Fighting | B | |
Available Moves Moves
Damage vs Stonjourner View Hawlucha builds →High Jump Kick 2x62-73% Flying Press 2x48-57% Submission 2x39-46% Dig 2x26-31% | ||
Sandaconda Ground | C | |
Available Moves Moves
Damage vs Stonjourner View Sandaconda builds →Dig 2x43-52% Bulldoze 2x33-39% Mud Shot 2x76-89% Sand Tomb 2x21-25% | ||
Seismitoad WaterGround | C | |
Available Moves Moves
Damage vs Stonjourner View Seismitoad builds →Dig 2x40-48% Dive 2x40-48% Drain Punch 2x25-30% Brick Break 2x25-30% | ||
In Sword & Shield, Excadrill's Earthquake hits Stonjourner for 76-90%. Rillaboom's Wood Hammer also KOs at 95-112%.
Heatran FireSteel | S | |
Recommended Build AbilityFlashfire ItemLeftovers NatureTimid Moves View Heatran builds →
| ||
Excadrill GroundSteel | A | |
Recommended Build AbilityMold Breaker ItemLeftovers NatureJolly Moves
Damage vs Stonjourner View Excadrill builds →Earthquake 2x76-90% Rapid Spin6-8% | ||
Rillaboom Grass | A | |
Recommended Build AbilityGrassy Surge ItemAssault Vest NatureAdamant Moves
Damage vs Stonjourner View Rillaboom builds →U Turn18-22% Wood Hammer 2x95-112%KO | ||
Conkeldurr Fighting | A | |
Recommended Build AbilityGuts ItemFlame Orb NatureAdamant Moves
Damage vs Stonjourner View Conkeldurr builds →Mach Punch 2x35-41% Drain Punch 2x65-77% Knock Off18-22% Facade10-12% | ||
Slowking WaterPsychic | A | |
Recommended Build AbilityRegenerator ItemColbur Berry NatureRelaxed Moves
Damage vs Stonjourner View Slowking builds →Scald 2x157-185%KO | ||
Sword & Shield Evolution
What you see is what you get. Stonjourner sits outside any evolution chain, so focus on the egg moves and plenty of partners from one egg group. Eggs are average hatch time. View every chain in the Evolution Chart.
How to Evolve
Breeding
Breed Stonjourner easily with 61 breeding partners from the Mineral egg group. Pass egg moves like Ancient Power, Curse to offspring.


Sword & Shield Stonjourner Best Moveset
the remaining moves gives Stonjourner answers even while choice-locked. Choice Scarf provides speed patching through item lock, and max Attack and Speed EVs with Powerspot mean every prediction that lands hits hard.
Best Build
Stonjourner best EVs are Attack and Speed
Doubles Physical Revenge Killer Moveset
- Heat Crash
- Rock Slide
- Body Press
- Stomping Tantrum
Recommended Teammates
Physical Revenge Killer Moveset
- Heat Crash
- Earthquake
- Stone Edge
- Body Press
Recommended Teammates
Moves
TMs carry this one. Stonjourner learns Meteor Beam and Stone Edge naturally for STAB, but the offensive range comes almost entirely from technical machines. Normal and Steel and beyond give it real matchup play.
Level-Up Moves
TM Moves
Egg Moves
Tutor Moves
Sword & Shield Stonjourner Locations
decent spawn rates across 19 locations for Stonjourner in late-game routes. Scroll the sorted list below and pick whichever spot sits closest to your current route. The rate differences between locations are worth comparing.
Best Locations to Catch Stonjourner in Sword & Shield
Stonjourner won't take long. 19 walking spots from Lv. 44-65 with solid rates across most of them. The top locations at each game stage are listed first.
Stonjourner Guide
For Sword & Shield, we rate Stonjourner C-Tier: a niche pick in Sword & Shield's meta. At 470 BST, it fits the wallbreaker role. Heatcrash with Choice Scarf is the standard set.
Power Spot is the go-to ability for Stonjourner. It just being next to the Pokémon powers up moves. It's Stonjourner's only ability.
Base 70 Speed is workable. Faster than some, slower than many. On offense, Stonjourner is a physical attacker with base 125 Attack. Defensively? Enough bulk to take a hit or two. Best used as a wallbreaker.
For Sword & Shield, the core moveset is Heatcrash, Rock Slide, Bodypress, and Stompingtantrum. Heatcrash leads at 17% usage. This set covers the wallbreaker role with a mix of damage and utility.
Game Availability
Stonjourner joined the series in Sword & Shield and has been available in 2 titles so far. With 3 generations of appearances, it's established itself despite the later start.
Click a game to view version-specific details
- Gen 1Y
 Yellow
 - Gen 1RB

 Red & Blue
 - Gen 2GS

 Gold & Silver
 - Gen 2C
 Crystal
 - Gen 3RS

 Ruby & Sapphire
 - Gen 3FRLG

 FireRed & LeafGreen
 - Gen 3E
 Emerald
 - Gen 4Pt
 Platinum
 - Gen 4HGSS

 HeartGold & SoulSilver
 - Gen 4DP

 Diamond & Pearl
 - Gen 5BW

 Black & White
 - Gen 5B2W2

 Black 2 & White 2
 - Gen 6XY

 X & Y
X & Y - Gen 6ORAS

 Omega Ruby & Alpha Sapphire
 - Gen 7USUM

 Ultra Sun & Ultra Moon
 - Gen 7SM

 Sun & Moon
 - Gen 7LGPE

 Let's Go Pikachu & Eevee
 - Gen 8SwShDebut

 Sword & Shield
 - Gen 8PLA
 Legends: Arceus
 - Gen 8BDSP

 Brilliant Diamond & Shining Pearl
 - Gen 9SV

 Scarlet & Violet
 - Gen 9LZA
 Legends: Z-A
 - Gen 10WW

 Winds & Waves