Stats & Training
Attack leads and Sp. Atk gets almost nothing. That's Passimian's stat line in a nutshell. 4 stats sit in respectable range, but the spread is brutal. Tough to catch and yields 2 Attack EVs.
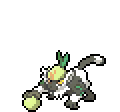
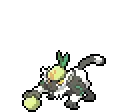
Displaying amazing teamwork, they follow the orders of their boss as they all help out in the search for their favorite berries.
Passimian live in groups of about 20, with each member performing an assigned role. Through cooperation, the group survives.
Passimian Weakness
Type-wise, Passimian takes extra damage from Flying, Psychic, and Fairy. Passimian's physical bulk (base 90 Def) helps cushion physical weakness hits, but special attackers are the bigger threat.
| Damage | Types |
|---|---|
| 2x (Weak) | Flying, Psychic, Fairy |
| 0.5x (Resist) | Bug, Rock, Dark |
Orbeetle BugPsychic | A | |
Available Moves Moves
Damage vs Passimian View Orbeetle builds →Psycho Cut 2x33-39% Psybeam 2x57-67% Confusion 2x46-55% | ||
Corviknight Steel | A | |
Available Moves Moves
Damage vs Passimian View Corviknight builds →Pluck 2x43-51% Peck 2x26-32% | ||
Drifloon Ghost | D | |
Woobat Psychic | D | |
Available Moves Moves
Damage vs Passimian View Woobat builds →Psycho Cut 2x33-39% Air Cutter 2x43-51% Confusion 2x37-43% Gust 2x29-36% | ||
Natu Psychic | D | |
Available Moves Moves
Damage vs Passimian View Natu builds →Peck 2x20-24% Stored Power 2x20-24% | ||
Orbeetle BugPsychic | A | |
Available Moves Moves
Damage vs Passimian View Orbeetle builds →Psycho Cut 2x31-37% Psybeam 2x54-64% Confusion 2x43-51% | ||
Corviknight Steel | A | |
Available Moves Moves
Damage vs Passimian View Corviknight builds →Pluck 2x39-47% Peck 2x25-30% | ||
Butterfree Bug | C | |
Available Moves Moves
Damage vs Passimian View Butterfree builds →Air Slash 2x69-81% Psybeam 2x39-47% Confusion 2x30-36% Gust 2x37-44% | ||
Drifloon Ghost | D | |
Farfetch'd Normal | D | |
Available Moves Moves
Damage vs Passimian View Farfetch'd builds →Aerial Ace 2x43-51% Peck 2x25-30% | ||
Orbeetle BugPsychic | A | |
Available Moves Moves
Damage vs Passimian View Orbeetle builds →Psycho Cut 2x30-36% Psybeam 2x54-64% Confusion 2x40-48% | ||
Corviknight Steel | A | |
Available Moves Moves
Damage vs Passimian View Corviknight builds →Pluck 2x40-48% Peck 2x25-30% | ||
Noctowl Normal | C | |
Available Moves Moves
Damage vs Passimian View Noctowl builds →Sky Attack 2x62-73% Extrasensory 2x45-55% Air Slash 2x64-76% Confusion 2x28-34% | ||
Butterfree Bug | C | |
Available Moves Moves
Damage vs Passimian View Butterfree builds →Air Slash 2x67-79% Psybeam 2x39-46% Confusion 2x30-36% Gust 2x38-45% | ||
Drifloon Ghost | D | |
Orbeetle BugPsychic | A | |
Available Moves Moves
Damage vs Passimian View Orbeetle builds →Psychic 2x73-86% Psycho Cut 2x29-35% Psybeam 2x53-63% Confusion 2x41-49% | ||
Corviknight Steel | A | |
Available Moves Moves
Damage vs Passimian View Corviknight builds →Fly 2x59-70% Drill Peck 2x51-60% Pluck 2x40-47% Peck 2x23-28% | ||
Hawlucha Fighting | B | |
Available Moves Moves
Damage vs Passimian View Hawlucha builds →Fly 2x61-72% Bounce 2x57-67% Wing Attack 2x41-49% Aerial Ace 2x41-49% | ||
Sigilyph Psychic | C | |
Available Moves Moves
Damage vs Passimian View Sigilyph builds →Fly 2x43-51% Air Slash 2x74-88% Psycho Cut 2x33-40% Psybeam 2x65-77% | ||
Drifloon Ghost | D | |
Orbeetle BugPsychic | A | |
Available Moves Moves
Damage vs Passimian View Orbeetle builds →Psychic 2x76-89% Psycho Cut 2x30-36% Psybeam 2x54-64% Confusion 2x43-51% | ||
Corviknight Steel | A | |
Available Moves Moves
Damage vs Passimian View Corviknight builds →Fly 2x59-69% Drill Peck 2x53-62% Pluck 2x39-47% Peck 2x24-29% | ||
Mimikyu GhostFairy | B | |
Hawlucha Fighting | B | |
Available Moves Moves
Damage vs Passimian View Hawlucha builds →Fly 2x60-71% Bounce 2x59-69% Wing Attack 2x41-49% Aerial Ace 2x41-49% | ||
Drifloon Ghost | D | |
Available Moves Moves
Damage vs Passimian View Drifloon builds →Acrobatics 2x24-29% Gust 2x28-33% | ||
Orbeetle BugPsychic | A | |
Available Moves Moves
Damage vs Passimian View Orbeetle builds →Psychic 2x72-85% Psycho Cut 2x27-32% Psybeam 2x53-62% Confusion 2x41-48% | ||
Mimikyu GhostFairy | B | |
Drifblim Ghost | C | |
Available Moves Moves
Damage vs Passimian View Drifblim builds →Fly 2x53-62% Acrobatics 2x34-40% Gust 2x36-42% | ||
Claydol GroundPsychic | C | |
Available Moves Moves
Damage vs Passimian View Claydol builds →Extrasensory 2x58-68% Psybeam 2x48-56% Confusion 2x38-44% | ||
Bronzong SteelPsychic | C | |
Available Moves Moves
Damage vs Passimian View Bronzong builds →Extrasensory 2x63-74% Confusion 2x41-48% | ||
Orbeetle BugPsychic | A | |
Available Moves Moves
Damage vs Passimian View Orbeetle builds →Psychic 2x72-85% Psycho Cut 2x28-33% Psybeam 2x52-62% Confusion 2x41-48% | ||
Mimikyu GhostFairy | B | |
Drifblim Ghost | C | |
Available Moves Moves
Damage vs Passimian View Drifblim builds →Fly 2x54-64% Acrobatics 2x34-41% Gust 2x36-43% | ||
Claydol GroundPsychic | C | |
Available Moves Moves
Damage vs Passimian View Claydol builds →Extrasensory 2x59-70% Psybeam 2x47-56% Confusion 2x37-45% | ||
Bronzong SteelPsychic | C | |
Available Moves Moves
Damage vs Passimian View Bronzong builds →Extrasensory 2x64-75% Confusion 2x41-48% | ||
Mimikyu GhostFairy | B | |
Togekiss Fairy | B | |
Available Moves Moves
Damage vs Passimian View Togekiss builds →Sky Attack 2x59-70% Fly 2x38-45% Air Slash 2x86-102%KO Draining Kiss 2x57-68% | ||
Gardevoir PsychicFairy | B | |
Available Moves Moves
Damage vs Passimian View Gardevoir builds →Moonblast 2x112-132%KO Psychic 2x10⁶-125%KO Dazzling Gleam 2x94-111%KO Psybeam 2x77-91% | ||
Drifblim Ghost | C | |
Available Moves Moves
Damage vs Passimian View Drifblim builds →Fly 2x54-64% Acrobatics 2x33-39% Gust 2x38-45% | ||
Noivern Dragon | C | |
Available Moves Moves
Damage vs Passimian View Noivern builds →Fly 2x50-59% Air Slash 2x73-86% Wing Attack 2x33-39% Air Cutter 2x57-68% | ||
In Sword & Shield, Celesteela can KO Passimian with Air Slash (105-123%). Clefable threatens a KO with Moonblast (87-102%). Slowking deals 38-45% with Scald.
Celesteela Steel | A | |
Recommended Build AbilityBeastboost ItemLeftovers NatureModest Moves
Damage vs Passimian View Celesteela builds →Flamethrower41-49% Air Slash 2x10⁵-123%KO | ||
Clefable Fairy | A | |
Recommended Build AbilityMagic Guard ItemLeftovers NatureBold Moves
Damage vs Passimian View Clefable builds →Moonblast 2x87-102%KO Knock Off5-6% | ||
Slowking WaterPsychic | A | |
Recommended Build AbilityRegenerator ItemColbur Berry NatureRelaxed Moves
Damage vs Passimian View Slowking builds →Scald38-45% | ||
Gardevoir PsychicFairy | B | |
Recommended Build AbilitySynchronize ItemLeftovers NatureCalm Moves View Gardevoir builds →
| ||
Sword & Shield Evolution
No evolution chain to worry about here. Passimian is a standalone Pokemon with a massive partner pool for breeding through one egg group. Eggs come out average hatch time. View every chain in the Evolution Chart.
How to Evolve
Breeding
Breed Passimian easily with 152 breeding partners from the Ground egg group. Pass egg moves like Counter, Feint, Knock Off and 4 more to offspring.


Sword & Shield Passimian Best Moveset
Ground coverage keeps opponents guessing about Passimian's real targets. Weakness Policy provides a massive attack boost after eating a super-effective hit while max Attack and Speed EVs and Jolly nature handle the stat profile. Receiver ties it together.
Best Build
Passimian best EVs are Attack and Speed
Doubles Physical Sweeper Moveset
- Earthquake
- Knock Off
- Close Combat
- Drain Punch
Recommended Teammates
Physical Revenge Killer Moveset
- U Turn
- Close Combat
- Gunk Shot
- Knock Off
Recommended Teammates
Moves
Stall teams hate this. Passimian can spread damage across 11 types, with Normal and Dark punishing common defensive pivots. STAB from Close Combat and Focus Blast keeps the pressure honest on everything else.
Level-Up Moves
TM Moves
Egg Moves
Tutor Moves
Sword & Shield Passimian Locations
11 encounter spots for Passimian at moderate rates starting from early-game routes. Best and Earliest sort options below help narrow down your approach based on odds vs. Accessibility.
Best Locations to Catch Passimian in Sword & Shield
Passimian shows up in 11 walking spots from Lv. 10-36. Plenty of options, and the list is sorted so the highest-rate locations at each progression stage come first.
Passimian Guide
For Sword & Shield, we rate Passimian C-Tier: a niche pick in Sword & Shield's meta. At 490 BST, it fits the wallbreaker role. Earthquake with Weakness Policy is the standard set.
Receiver is the go-to ability for Passimian. It when an ally faints, this Pokémon gains its Ability. Its hidden ability Defiant can work in specific setups.
Base 80 Speed is workable. Faster than some, slower than many. On offense, Passimian is a physical attacker with base 120 Attack. Defensively? Enough bulk to take a hit or two. Best used as a wallbreaker.
For Sword & Shield, the core moveset is Earthquake, Knock Off, Close Combat, and Drain Punch. Earthquake leads at 17% usage. This set covers the wallbreaker role with a mix of damage and utility.
Game Availability
Passimian joined the series in Sun & Moon and has been available in 4 titles so far. With 4 generations of appearances, it's established itself despite the later start.
Click a game to view version-specific details
- Gen 1Y
 Yellow
 - Gen 1RB

 Red & Blue
 - Gen 2GS

 Gold & Silver
 - Gen 2C
 Crystal
 - Gen 3RS

 Ruby & Sapphire
 - Gen 3FRLG

 FireRed & LeafGreen
 - Gen 3E
 Emerald
 - Gen 4Pt
 Platinum
 - Gen 4HGSS

 HeartGold & SoulSilver
 - Gen 4DP

 Diamond & Pearl
 - Gen 5BW

 Black & White
 - Gen 5B2W2

 Black 2 & White 2
 - Gen 6XY

 X & Y
X & Y - Gen 6ORAS

 Omega Ruby & Alpha Sapphire
 - Gen 7USUM

 Ultra Sun & Ultra Moon
 - Gen 7SMDebut

 Sun & Moon
 - Gen 7LGPE

 Let's Go Pikachu & Eevee
 - Gen 8SwSh

 Sword & Shield
 - Gen 8PLA
 Legends: Arceus
 - Gen 8BDSP

 Brilliant Diamond & Shining Pearl
 - Gen 9SV

 Scarlet & Violet
 - Gen 9LZA
 Legends: Z-A
 - Gen 10WW

 Winds & Waves