Stats & Training
The stat bars tell the story: Attack carries everything and Sp. Atk's dead weight. But this Karate Pokemon still yields 2 Attack EVs per fight on a medium-fast 1M XP curve.
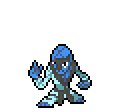
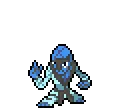
If you see a Sawk training in the mountains in its single-minded pursuit of strength, it’s best to quietly pass by.
The karate chops of a Sawk that’s trained itself to the limit can cleave the ocean itself.
Sawk Weakness
Sawk's Fighting typing leaves it vulnerable to Flying, Psychic, and Fairy. With 75 HP and balanced defenses, Sawk can afford to eat a neutral hit or two.
| Damage | Types |
|---|---|
| 2x (Weak) | Flying, Psychic, Fairy |
| 0.5x (Resist) | Bug, Rock, Dark |
Orbeetle BugPsychic | A | |
Available Moves Moves
Damage vs Sawk View Orbeetle builds →Psycho Cut 2x42-50% Psybeam 2x58-68% Confusion 2x45-55% | ||
Corviknight Steel | A | |
Available Moves Moves
Damage vs Sawk View Corviknight builds →Pluck 2x58-68% Peck 2x33-41% | ||
Drifloon Ghost | D | |
Woobat Psychic | D | |
Available Moves Moves
Damage vs Sawk View Woobat builds →Psycho Cut 2x42-50% Air Cutter 2x42-50% Confusion 2x38-45% Gust 2x30-36% | ||
Natu Psychic | D | |
Available Moves Moves
Damage vs Sawk View Natu builds →Peck 2x26-32% Stored Power 2x18-23% | ||
Orbeetle BugPsychic | A | |
Available Moves Moves
Damage vs Sawk View Orbeetle builds →Psycho Cut 2x39-47% Psybeam 2x52-62% Confusion 2x43-51% | ||
Corviknight Steel | A | |
Available Moves Moves
Damage vs Sawk View Corviknight builds →Pluck 2x52-62% Peck 2x32-39% | ||
Butterfree Bug | C | |
Available Moves Moves
Damage vs Sawk View Butterfree builds →Air Slash 2x66-78% Psybeam 2x39-47% Confusion 2x30-36% Gust 2x39-47% | ||
Drifloon Ghost | D | |
Farfetch'd Normal | D | |
Available Moves Moves
Damage vs Sawk View Farfetch'd builds →Aerial Ace 2x56-66% Peck 2x32-39% | ||
Orbeetle BugPsychic | A | |
Available Moves Moves
Damage vs Sawk View Orbeetle builds →Psycho Cut 2x39-46% Psybeam 2x53-64% Confusion 2x41-49% | ||
Corviknight Steel | A | |
Available Moves Moves
Damage vs Sawk View Corviknight builds →Pluck 2x53-64% Peck 2x33-39% | ||
Noctowl Normal | C | |
Available Moves Moves
Damage vs Sawk View Noctowl builds →Sky Attack 2x80-95% Extrasensory 2x46-54% Air Slash 2x66-78% Confusion 2x29-35% | ||
Butterfree Bug | C | |
Available Moves Moves
Damage vs Sawk View Butterfree builds →Air Slash 2x66-78% Psybeam 2x38-45% Confusion 2x29-35% Gust 2x39-46% | ||
Drifloon Ghost | D | |
Orbeetle BugPsychic | A | |
Available Moves Moves
Damage vs Sawk View Orbeetle builds →Psychic 2x73-86% Psycho Cut 2x39-46% Psybeam 2x52-62% Confusion 2x41-49% | ||
Corviknight Steel | A | |
Available Moves Moves
Damage vs Sawk View Corviknight builds →Fly 2x77-92% Drill Peck 2x68-81% Pluck 2x52-62% Peck 2x32-38% | ||
Hawlucha Fighting | B | |
Available Moves Moves
Damage vs Sawk View Hawlucha builds →Fly 2x80-95% Bounce 2x76-89% Wing Attack 2x55-65% Aerial Ace 2x55-65% | ||
Sigilyph Psychic | C | |
Available Moves Moves
Damage vs Sawk View Sigilyph builds →Fly 2x57-68% Air Slash 2x73-86% Psycho Cut 2x46-54% Psybeam 2x64-76% | ||
Drifloon Ghost | D | |
Orbeetle BugPsychic | A | |
Available Moves Moves
Damage vs Sawk View Orbeetle builds →Psychic 2x74-88% Psycho Cut 2x39-47% Psybeam 2x54-65% Confusion 2x41-49% | ||
Corviknight Steel | A | |
Available Moves Moves
Damage vs Sawk View Corviknight builds →Fly 2x78-93% Drill Peck 2x70-83% Pluck 2x53-62% Peck 2x33-39% | ||
Mimikyu GhostFairy | B | |
Hawlucha Fighting | B | |
Available Moves Moves
Damage vs Sawk View Hawlucha builds →Fly 2x83-98% Bounce 2x78-93% Wing Attack 2x57-67% Aerial Ace 2x57-67% | ||
Drifloon Ghost | D | |
Available Moves Moves
Damage vs Sawk View Drifloon builds →Acrobatics 2x33-39% Gust 2x28-34% | ||
Orbeetle BugPsychic | A | |
Available Moves Moves
Damage vs Sawk View Orbeetle builds →Psychic 2x71-84% Psycho Cut 2x38-45% Psybeam 2x52-61% Confusion 2x40-47% | ||
Mimikyu GhostFairy | B | |
Drifblim Ghost | C | |
Available Moves Moves
Damage vs Sawk View Drifblim builds →Fly 2x71-84% Acrobatics 2x44-52% Gust 2x35-42% | ||
Claydol GroundPsychic | C | |
Available Moves Moves
Damage vs Sawk View Claydol builds →Extrasensory 2x57-68% Psybeam 2x45-54% Confusion 2x35-42% | ||
Bronzong SteelPsychic | C | |
Available Moves Moves
Damage vs Sawk View Bronzong builds →Extrasensory 2x62-73% Confusion 2x40-47% | ||
Orbeetle BugPsychic | A | |
Available Moves Moves
Damage vs Sawk View Orbeetle builds →Psychic 2x72-86% Psycho Cut 2x38-45% Psybeam 2x53-63% Confusion 2x42-50% | ||
Mimikyu GhostFairy | B | |
Drifblim Ghost | C | |
Available Moves Moves
Damage vs Sawk View Drifblim builds →Fly 2x72-86% Acrobatics 2x46-54% Gust 2x36-43% | ||
Claydol GroundPsychic | C | |
Available Moves Moves
Damage vs Sawk View Claydol builds →Extrasensory 2x57-68% Psybeam 2x47-56% Confusion 2x38-45% | ||
Bronzong SteelPsychic | C | |
Available Moves Moves
Damage vs Sawk View Bronzong builds →Extrasensory 2x63-74% Confusion 2x40-47% | ||
Mimikyu GhostFairy | B | |
Togekiss Fairy | B | |
Available Moves Moves
Damage vs Sawk View Togekiss builds →Sky Attack 2x79-94% Fly 2x51-60% Air Slash 2x85-100%KO Draining Kiss 2x58-69% | ||
Gardevoir PsychicFairy | B | |
Available Moves Moves
Damage vs Sawk View Gardevoir builds →Moonblast 2x110-129%KO Psychic 2x10⁴-123%KO Dazzling Gleam 2x94-110%KO Psybeam 2x76-90% | ||
Drifblim Ghost | C | |
Available Moves Moves
Damage vs Sawk View Drifblim builds →Fly 2x72-85% Acrobatics 2x46-54% Gust 2x37-44% | ||
Noivern Dragon | C | |
Available Moves Moves
Damage vs Sawk View Noivern builds →Fly 2x67-79% Air Slash 2x72-85% Wing Attack 2x46-54% Air Cutter 2x58-69% | ||
In Sword & Shield, Celesteela can KO Sawk with Air Slash (102-121%). Clefable threatens a KO with Moonblast (86-101%). Slowking deals 37-44% with Scald.
Celesteela Steel | A | |
Recommended Build AbilityBeastboost ItemLeftovers NatureModest Moves
Damage vs Sawk View Celesteela builds →Flamethrower41-48% Air Slash 2x10²-121%KO | ||
Clefable Fairy | A | |
Recommended Build AbilityMagic Guard ItemLeftovers NatureBold Moves
Damage vs Sawk View Clefable builds →Moonblast 2x86-101%KO Knock Off7-8% | ||
Slowking WaterPsychic | A | |
Recommended Build AbilityRegenerator ItemColbur Berry NatureRelaxed Moves
Damage vs Sawk View Slowking builds →Scald37-44% | ||
Hatterene PsychicFairy | A | |
Recommended Build AbilityMagic Bounce ItemLeftovers NatureQuiet Moves
Damage vs Sawk View Hatterene builds →Dazzling Gleam 2x130-153%KO Psychic 2x145-171%KO | ||
Talonflame Fire | B | |
Recommended Build AbilityGalewings ItemHeavy-Duty Boots NatureAdamant Moves
Damage vs Sawk View Talonflame builds →Flare Blitz69-81% | ||
Sword & Shield Evolution
What you see is what you get. Sawk sits outside any evolution chain, so focus on the egg moves and plenty of partners from one egg group. Eggs are average hatch time. View every chain in the Evolution Chart.
How to Evolve
Breeding
Breed Sawk with 52 breeding partners from the Humanshape egg group.


Sword & Shield Sawk Best Moveset
Ground coverage gives Sawk answers even while choice-locked. Choice Scarf provides speed patching through item lock, and max Attack and Speed EVs with Innerfocus mean every prediction that lands hits hard.
Best Build
Sawk best EVs are HP and Attack
Doubles Physical Wallbreaker Moveset
- Close Combat
- Stone Edge
- Earthquake
- Ice Punch
Recommended Teammates
Physical Sweeper Moveset
- Earthquake
- Throat Chop
- Power Up Punch
- Reversal
Recommended Teammates
Moves
STAB runs through Close Combat and Focus Blast for the basics, but Sawk's real strength is the 10-type coverage spread. Normal and Ground hit common defensive types, and the movepool keeps going.
Level-Up Moves
TM Moves
Egg Moves
Tutor Moves
Sword & Shield Sawk Locations
Sawk starts showing up in mid-game routes at moderate rates across 5 encounter spots. The list below is sorted so you can pick what fits your current progress without scrolling through everything.
Best Locations to Catch Sawk in Sword & Shield
Walking encounters at Lv. 22-43 across 5 spots for Sawk. Sorted by progression so you can see what's reachable at your current point in the game.
Sawk Guide
In Sword & Shield, Sawk looks average on paper at 465 BST. But Mold Breaker is why it sees play. Build around that and it pulls its weight. C-Tier cannon on our tier list. Earthquake with Choice Scarf is the standard set.
Sawk gets Mold Breaker, Sturdy, and Inner Focus. But Mold Breaker is the one that matters. It's the centerpiece of every viable set. Build around that.
Sawk is a physical attacker with base 125 Attack. Enough bulk to take a hit or two, too. Speed tells the real story. Base 85 Speed is workable. Faster than some, slower than many. Fits the cannon role.
In Sword & Shield, run Earthquake, Close Combat, Stone Edge, and Knock Off on Sawk. Earthquake is the most common pick at 19% usage. This set covers the cannon role with a mix of damage and utility.
Game Availability
Since Black & White, Sawk has been obtainable in 8 games. A Generation 5 debut means a shorter history, but Sawk has appeared steadily across every generation since.
Click a game to view version-specific details
- Gen 1Y
 Yellow
 - Gen 1RB

 Red & Blue
 - Gen 2GS

 Gold & Silver
 - Gen 2C
 Crystal
 - Gen 3RS

 Ruby & Sapphire
 - Gen 3FRLG

 FireRed & LeafGreen
 - Gen 3E
 Emerald
 - Gen 4Pt
 Platinum
 - Gen 4HGSS

 HeartGold & SoulSilver
 - Gen 4DP

 Diamond & Pearl
 - Gen 5BWDebut

 Black & White
 - Gen 5B2W2

 Black 2 & White 2
 - Gen 6XY

 X & Y
X & Y - Gen 6ORAS

 Omega Ruby & Alpha Sapphire
 - Gen 7USUM

 Ultra Sun & Ultra Moon
 - Gen 7SM

 Sun & Moon
 - Gen 7LGPE

 Let's Go Pikachu & Eevee
 - Gen 8SwSh

 Sword & Shield
 - Gen 8PLA
 Legends: Arceus
 - Gen 8BDSP

 Brilliant Diamond & Shining Pearl
 - Gen 9SV

 Scarlet & Violet
 - Gen 9LZA
 Legends: Z-A
 - Gen 10WW

 Winds & Waves