

Is Glimmora Good in Scarlet & Violet Playthrough?
Rock/Poison Glimmora has massive Special Attack and Toxic Debris scattering Toxic Spikes when hit physically. Champion Geeta leads with one. Handles Fire and Bug encounters with high-powered special moves. The hazard-setting on contact is passive team support that requires zero setup turns.
Glimmet resists most of Katy's coverage and hits back hard.
Glimmet resists most of Brassius's coverage and hits back hard.
Glimmet trades roughly evenly with Iono's team.
Glimmet trades roughly evenly with Kofu's team.
Glimmet trades roughly evenly with Larry's team.
Glimmora trades roughly evenly with Ryme's team.
Glimmora trades roughly evenly with Tulip's team.
Glimmora has the type edge here and should clean up Grusha's team.
Rika's team hits Glimmora's weaknesses hard.
Poppy's team hits Glimmora's weaknesses hard.
Glimmora has the type edge here and should clean up Larry's team.
Glimmora has the type edge here and should clean up Hassel's team.
Glimmora trades roughly evenly with Geeta's team.
Catch Glimmet on South Province (Area One) (overworld, Lv 23-55).
Your Glimmet should hit Level 35 before you reach Ryme, at typical leveling pace.
How to Get Glimmora in Scarlet & Violet
A handful of locations for Glimmora with decent spawn rates across late-game routes. The sort toggle below swaps between best odds and earliest access, so you can approach it based on where you are in the game.
Where To Catch Glimmora in SV
To get Glimmora, start by catching Glimmet through walking encounters at Lv. 7-76. The chain covers 2 catchable stages before reaching the final form.
 Step 1Catch GlimmetCrystal PoolLv.7-60OverworldInfernal PassLv.7-60OverworldOni MountainLv.7-60OverworldThe Great Crater of PaldeaLv.23-55OverworldRate 72%East Province (Area One) - CaveLv.23-55OverworldRate 1%East Province (Area Three) - CaveLv.23-55OverworldRate 1%Glaseado MountainLv.23-55OverworldRate 1%North Province (Area One) - CaveLv.23-55OverworldRate 1%North Province (Area Three) - CaveLv.23-55OverworldRate 1%North Province (Area Two) - CaveLv.23-55OverworldRate 1%South Province (Area One) - CaveLv.23-55OverworldRate 1%South Province (Area Six) - CaveLv.23-55OverworldRate 1%West Province (Area One) - CaveLv.23-55OverworldRate 1%West Province (Area Three) - CaveLv.23-55OverworldRate 1%West Province (Area Two) - CaveLv.23-55OverworldRate 1%Area Zero UnderdepthsLv.63-67Overworld
- Step 2Glimmora ✓The Great Crater of PaldeaLv.35-60OverworldRate 20%Crystal PoolLv.35-76OverworldOni MountainLv.35-76OverworldArea Zero UnderdepthsLv.68-75Overworldor evolve from Glimmet (Step 1)
Glimmora Weakness
Type-wise, Glimmora takes extra damage from Ground, Water, Psychic, and Steel. Watch out for Ground attacks, those deal 4x damage. With 6 resistances, the defensive profile is strong.
| Damage | Types |
|---|---|
| 4x (Critical) | Ground |
| 2x (Weak) | Water, Psychic, Steel |
| 0.5x (Resist) | Normal, Fire, Flying, Bug, Fairy |
| 0.25x (Resist) | Poison |
What is Glimmora Weak Against
VulnerableBest Pokemon Against Glimmora
Mudsdale Ground | C | |
Available Move Moves
Damage vs Glimmora View Mudsdale builds →High Horsepower 4x185-218%KO | ||
Donphan Ground | B | |
Available Move Moves
Damage vs Glimmora View Donphan builds →Stomping Tantrum 4x143-170%KO | ||
Clodsire PoisonGround | B | |
Available Moves Moves
Damage vs Glimmora View Clodsire builds →Mud Shot 4x62-73% Surf 2x30-36% | ||
Dugtrio Ground | C | |
Vaporeon Water | B | |
Mudsdale Ground | C | |
Available Move Moves
Damage vs Glimmora View Mudsdale builds →High Horsepower 4x184-217%KO | ||
Hippowdon Ground | B | |
Gastrodon WaterGround | C | |
Available Moves Moves
Damage vs Glimmora View Gastrodon builds →Earth Power 4x145-171%KO Surf 2x72-85% | ||
Sandaconda Ground | C | |
Donphan Ground | B | |
Available Move Moves
Damage vs Glimmora View Donphan builds →Stomping Tantrum 4x141-166%KO | ||
Krookodile GroundDark | B | |
Mudsdale Ground | C | |
Hippowdon Ground | B | |
Palossand GhostGround | C | |
Gastrodon WaterGround | C | |
Available Moves Moves
Damage vs Glimmora View Gastrodon builds →Earth Power 4x140-166%KO Surf 2x70-83% | ||
Mudsdale Ground | C | |
Donphan Ground | B | |
Gastrodon WaterGround | C | |
Available Moves Moves
Damage vs Glimmora View Gastrodon builds →Earth Power 4x146-172%KO Surf 2x73-86% | ||
Whiscash WaterGround | C | |
Available Moves Moves
Damage vs Glimmora View Whiscash builds →Earthquake 4x131-155%KO Surf 2x64-76% Zen Headbutt 2x36-42% | ||
Camerupt FireGround | C | |
Available Move Moves
Damage vs Glimmora View Camerupt builds →Earth Power 4x164-193%KO | ||
Krookodile GroundDark | B | |
Available Move Moves
Damage vs Glimmora View Krookodile builds →Earthquake 4x181-213%KO | ||
Mudsdale Ground | C | |
Hippowdon Ground | B | |
Clodsire PoisonGround | B | |
Available Moves Moves
Damage vs Glimmora View Clodsire builds →Earthquake 4x127-150%KO Liquidation 2x36-42% | ||
Donphan Ground | B | |
Krookodile GroundDark | B | |
Available Move Moves
Damage vs Glimmora View Krookodile builds →Earthquake 4x181-214%KO | ||
Garchomp DragonGround | B | |
Available Moves Moves
Damage vs Glimmora View Garchomp builds →Dig 4x157-185%KO Liquidation 2x56-66% Iron Head 2x52-62% | ||
Mudsdale Ground | C | |
Available Moves Moves
Damage vs Glimmora View Mudsdale builds →Earthquake 4x190-223%KO Iron Head 2x51-60% | ||
Hippowdon Ground | B | |
Available Moves Moves
Damage vs Glimmora View Hippowdon builds →Earthquake 4x173-204%KO Iron Head 2x47-55% | ||
Dugtrio Ground | C | |
Excadrill GroundSteel | B | |
Available Moves Moves
Damage vs Glimmora View Excadrill builds →Earthquake 4x195-230%KO Iron Head 2x78-92% | ||
Krookodile GroundDark | B | |
Available Move Moves
Damage vs Glimmora View Krookodile builds →Earthquake 4x173-204%KO | ||
Garchomp DragonGround | B | |
Available Moves Moves
Damage vs Glimmora View Garchomp builds →Dig 4x153-180%KO Liquidation 2x54-63% Iron Head 2x51-60% | ||
Swampert WaterGround | B | |
Available Moves Moves
Damage vs Glimmora View Swampert builds →Earthquake 4x165-194%KO Liquidation 2x70-83% | ||
Rhydon GroundRock | B | |
Available Moves Moves
Damage vs Glimmora View Rhydon builds →Earthquake 4x189-223%KO Surf 2x27-32% | ||
Excadrill GroundSteel | B | |
Available Moves Moves
Damage vs Glimmora View Excadrill builds →Earthquake 4x201-236%KO Iron Head 2x80-95% | ||
Krookodile GroundDark | B | |
Available Move Moves
Damage vs Glimmora View Krookodile builds →Earthquake 4x178-209%KO | ||
Garchomp DragonGround | B | |
Available Moves Moves
Damage vs Glimmora View Garchomp builds →Dig 4x156-184%KO Liquidation 2x55-64% Iron Head 2x52-61% | ||
Swampert WaterGround | B | |
Available Moves Moves
Damage vs Glimmora View Swampert builds →Earthquake 4x168-197%KO Liquidation 2x71-84% | ||
Rhydon GroundRock | B | |
Available Moves Moves
Damage vs Glimmora View Rhydon builds →Earthquake 4x194-229%KO Surf 2x28-33% | ||
B | ||
Recommended Build AbilitySturdy ItemBlack Sludge NatureSassy Moves View Carbink builds →
| ||
B | ||
Recommended Build AbilityDrought ItemHeatrock NatureBold Moves
Damage vs Glimmora View Torkoal builds →Rapid Spin5-6% | ||
C | ||
Recommended Build AbilityStakeout ItemFocus Sash NatureAdamant Moves
Damage vs Glimmora View Spidops builds →Knock Off20-24% | ||
C | ||
Recommended Build AbilitySniper ItemFocus Sash NatureAdamant Moves
Damage vs Glimmora View Ariados builds →Sucker Punch23-28% | ||
C | ||
Recommended Build AbilityOvercoat ItemHeavy-Duty Boots NatureBold Moves View Mandibuzz builds →
| ||
Glimmora Evolutions
Evolved from Glimmet. Glimmora is the final form in this two-stage line. Plenty of partners for breeding via one egg group. Eggs are slow to hatch. Defense grew the most through evolution (+48 over Glimmet), and Glimmora peaks at 525 total stats. View every chain in the Evolution Chart.
How to Evolve


SV Glimmora Best Moveset
AbilityToxic Debris scatters MoveToxic Spikes whenever Glimmora is hit by a physical attack. 130 Sp. Atk at 86 Speed fires special Rock and Poison TermStab behind Held ItemFocus Sash and NatureTimid. The moveset sets hazards by existing on the field. Every physical attack the opponent uses against it poisons the next switch-in. S-Tier through passive hazard generation and raw special power.
Best Build
Glimmora best EVs are Sp. Atk and Speed
Special Sweeper Moveset
- Mortal Spin
- Earth Power
- Stealth Rock
- Power Gem
Recommended Teammates
Moves List
The egg pool carries weight here. Explosion and Memento aren't available any other way for Glimmora, and they meaningfully change what it threatens. Stack those on top of Gunk Shot and Meteor Beam for solid options.
How to Read the Moves Table
Tabs
- Level-Up
- Learned by leveling up.
- TM
- Taught by a Technical Machine.
- Egg
- Inherited via breeding.
- Tutor
- NPC tutor (cost: items, BP, money).
- Reminder
- An NPC reteaches any move this Pokemon could have learned by leveling up.
- Transfer
- Carried over from an older game using Pokemon HOME.
- Event
- Given out through Mystery Gift events.
Visual Signals
CAT (Category)
How the move deals damage and which stats it uses.
A small dot on the icon's corner marks the move as contact. That triggers abilities like Static, Flame Body, Rough Skin, or Iron Barbs, plus items like Rocky Helmet and Sticky Barb.
Tier (S to D)
Each move's competitive rank in RankedBoost's system. TM, Egg, and Tutor sort by tier by default (best first). On Level-Up, click the Tier header to do the same.
PWR (Power)
Base damage. Numbers shown in a type color include STAB (base × 1.5). Hover any colored number to see the math.
— means no power (status moves) or variable power.
Sorting & Filter
Click any column header to sort. Level-Up opens with Lv 1 at the top. TM, Egg, and Tutor open with the highest-tier moves at the top.
Search filters by move name or type. The Filter button limits the list to STAB, Physical, Special, or Status moves.
Level-Up Moves
TM Moves
Egg Moves
Tutor Moves
Base Stats
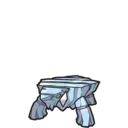
When this Pokémon detects danger, it will open up its crystalline petals and fire beams from its conical body.
Glimmora’s petals are made of crystallized poison energy. It has recently become evident that these petals resemble Tera Jewels.
Glimmora Scarlet & Violet Guide
For Scarlet & Violet, we rate Glimmora A-Tier: a strong pick in Scarlet & Violet's competitive scene. At 525 BST, it fits the hazard setter role. Mortalspin with Focus Sash is the standard set.
Toxic Debris is the go-to ability for Glimmora. It scatters poison spikes at the feet of the opposing team when the Pokémon takes damage from physical moves. Its hidden ability Corrosion can work in specific setups.
Base 86 Speed is workable. Faster than some, slower than many. On offense, Glimmora is a mixed attacker with base 55 Attack and 130 Sp. Atk. Defensively? Enough bulk to take a hit or two. Best used as a hazard setter.
In Scarlet & Violet, the best way to handle Glimmora: Super-effective STAB from faster Pokemon is the simplest answer. Ground, Water, and Psychic-type attackers hit hardest.
Game Availability
Glimmora joined the series in Scarlet & Violet and has been available in 2 titles so far. With 2 generations of appearances, it's established itself despite the later start.
Click a game to view version-specific details
- Gen 1RB

 Red & Blue
 - Gen 1Y
 Yellow
 - Gen 2GS

 Gold & Silver
 - Gen 2C
 Crystal
 - Gen 3RS

 Ruby & Sapphire
 - Gen 3E
 Emerald
 - Gen 3FRLG

 FireRed & LeafGreen
 - Gen 4DP

 Diamond & Pearl
 - Gen 4Pt
 Platinum
 - Gen 4HGSS

 HeartGold & SoulSilver
 - Gen 5BW

 Black & White
 - Gen 5B2W2

 Black 2 & White 2
 - Gen 6XY

 X & Y
X & Y - Gen 6ORAS

 Omega Ruby & Alpha Sapphire
 - Gen 7SM

 Sun & Moon
 - Gen 7USUM

 Ultra Sun & Ultra Moon
 - Gen 7LGPE

 Let's Go Pikachu & Eevee
 - Gen 8SwSh

 Sword & Shield
 - Gen 8BDSP

 Brilliant Diamond & Shining Pearl
 - Gen 8PLA
 Legends: Arceus
 - Gen 9SVDebut

 Scarlet & Violet
 - Gen 9LZA
 Legends: Z-A
 - Gen 10WW

 Winds & Waves