Stats & Training
Attack leads and Speed gets almost nothing. That's Pincurchin's stat line in a nutshell. 4 stats sit in respectable range, but the spread is brutal. Moderately hard to find and yields 2 Attack EVs.
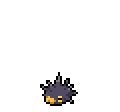
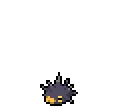
It feeds on seaweed, using its teeth to scrape it off rocks. Electric current flows from the tips of its spines.
It stores electricity in each spine. Even if one gets broken off, it still continues to emit electricity for at least three hours.
Pincurchin Weakness
Pincurchin's Electric typing leaves it vulnerable to Ground. Few weaknesses and 3 resistances make the typing clean. Lightning Rod grants an additional Electric immunity, reshaping the matchup chart. With 48 HP and balanced defenses, Pincurchin can afford to eat a neutral hit or two.
| Damage | Types |
|---|---|
| 2x (Weak) | Ground |
| 0.5x (Resist) | Electric, Flying, Steel |
Stunfisk GroundElectric | A | |
Available Moves Moves
Damage vs Pincurchin View Stunfisk builds →Mud Shot 2x55-65% Mud-Slap 2x22-27% | ||
Diggersby NormalGround | B | |
Available Moves Moves
Damage vs Pincurchin View Diggersby builds →Mud Shot 2x40-49% Mud-Slap 2x18-22% | ||
Mudbray Ground | C | |
Available Moves Moves
Damage vs Pincurchin View Mudbray builds →Bulldoze 2x64-76% Mud-Slap 2x18-22% | ||
Palpitoad WaterGround | D | |
Drilbur Ground | D | |
Stunfisk GroundElectric | A | |
Available Moves Moves
Damage vs Pincurchin View Stunfisk builds →Mud Shot 2x52-61% Mud-Slap 2x23-28% | ||
Diggersby NormalGround | B | |
Available Moves Moves
Damage vs Pincurchin View Diggersby builds →Bulldoze 2x39-47% Mud Shot 2x39-47% Sand Tomb 2x27-33% Mud-Slap 2x16-19% | ||
Onix RockGround | C | |
Mudbray Ground | C | |
Available Moves Moves
Damage vs Pincurchin View Mudbray builds →Bulldoze 2x59-70% Sand Tomb 2x34-42% Mud-Slap 2x16-19% | ||
Palpitoad WaterGround | D | |
Stunfisk GroundElectric | A | |
Available Moves Moves
Damage vs Pincurchin View Stunfisk builds →Mud Shot 2x49-59% Mud-Slap 2x21-25% | ||
Diggersby NormalGround | B | |
Available Moves Moves
Damage vs Pincurchin View Diggersby builds →Bulldoze 2x39-46% Mud Shot 2x35-42% Sand Tomb 2x24-30% Mud-Slap 2x17-21% | ||
Onix RockGround | C | |
Mudbray Ground | C | |
Available Moves Moves
Damage vs Pincurchin View Mudbray builds →Bulldoze 2x61-72% Sand Tomb 2x35-42% Mud-Slap 2x17-21% | ||
Palpitoad WaterGround | D | |
Hippowdon Ground | A | |
Available Moves Moves
Damage vs Pincurchin View Hippowdon builds →Dig 2x87-102%KO Mud Shot 2x44-53% Sand Tomb 2x38-46% | ||
Excadrill GroundSteel | A | |
Available Moves Moves
Damage vs Pincurchin View Excadrill builds →Dig 2x100-119%KO Mud Shot 2x36-43% Sand Tomb 2x47-56% Mud-Slap 2x16-20% | ||
Stunfisk GroundElectric | A | |
Available Moves Moves
Damage vs Pincurchin View Stunfisk builds →Dig 2x58-69% Mud Shot 2x49-59% Mud-Slap 2x22-26% | ||
Quagsire WaterGround | C | |
Available Moves Moves
Damage vs Pincurchin View Quagsire builds →Dig 2x69-82% Mud Shot 2x44-53% | ||
Dugtrio Ground | C | |
Available Moves Moves
Damage vs Pincurchin View Dugtrio builds →Dig 2x78-92% Bulldoze 2x62-73% Sand Tomb 2x36-43% Mud-Slap 2x16-20% | ||
Hippowdon Ground | A | |
Available Moves Moves
Damage vs Pincurchin View Hippowdon builds →Dig 2x88-103%KO Mud Shot 2x45-53% Sand Tomb 2x40-47% | ||
Excadrill GroundSteel | A | |
Available Moves Moves
Damage vs Pincurchin View Excadrill builds →Dig 2x100-119%KO Mud Shot 2x36-44% Sand Tomb 2x47-56% Mud-Slap 2x16-19% | ||
Stunfisk GroundElectric | A | |
Available Moves Moves
Damage vs Pincurchin View Stunfisk builds →Dig 2x58-69% Mud Shot 2x53-63% Mud-Slap 2x21-25% | ||
Quagsire WaterGround | C | |
Available Moves Moves
Damage vs Pincurchin View Quagsire builds →Dig 2x71-84% Mud Shot 2x45-53% | ||
Dugtrio Ground | C | |
Available Moves Moves
Damage vs Pincurchin View Dugtrio builds →Dig 2x79-94% Bulldoze 2x60-72% Sand Tomb 2x36-44% Mud-Slap 2x16-19% | ||
Hippowdon Ground | A | |
Available Moves Moves
Damage vs Pincurchin View Hippowdon builds →Dig 2x85-100%KO Bulldoze 2x63-74% Mud Shot 2x43-51% Sand Tomb 2x38-46% | ||
Excadrill GroundSteel | A | |
Available Moves Moves
Damage vs Pincurchin View Excadrill builds →Dig 2x97-114%KO Bulldoze 2x75-89% Mud Shot 2x36-43% Sand Tomb 2x46-54% | ||
Sandaconda Ground | C | |
Available Moves Moves
Damage vs Pincurchin View Sandaconda builds →Dig 2x80-94% Bulldoze 2x60-71% Mud Shot 2x43-51% Sand Tomb 2x36-43% | ||
Seismitoad WaterGround | C | |
Available Moves Moves
Damage vs Pincurchin View Seismitoad builds →Dig 2x72-86% Bulldoze 2x55-66% Mud Shot 2x50-60% | ||
Claydol GroundPsychic | C | |
Available Moves Moves
Damage vs Pincurchin View Claydol builds →Earth Power 2x70-83% Dig 2x58-69% Bulldoze 2x43-51% Sand Tomb 2x27-31% | ||
Hippowdon Ground | A | |
Available Moves Moves
Damage vs Pincurchin View Hippowdon builds →Earthquake 2x10⁵-124%KO Dig 2x83-99% Bulldoze 2x65-77% Mud Shot 2x44-52% | ||
Excadrill GroundSteel | A | |
Available Moves Moves
Damage vs Pincurchin View Excadrill builds →Dig 2x98-116%KO Bulldoze 2x74-88% Mud Shot 2x35-41% Sand Tomb 2x44-52% | ||
Sandaconda Ground | C | |
Available Moves Moves
Damage vs Pincurchin View Sandaconda builds →Dig 2x82-96% Bulldoze 2x62-74% Mud Shot 2x41-50% Sand Tomb 2x37-44% | ||
Seismitoad WaterGround | C | |
Available Moves Moves
Damage vs Pincurchin View Seismitoad builds →Dig 2x74-88% Bulldoze 2x56-66% Mud Shot 2x51-61% | ||
Claydol GroundPsychic | C | |
Available Moves Moves
Damage vs Pincurchin View Claydol builds →Earth Power 2x72-85% Dig 2x58-69% Bulldoze 2x44-52% Sand Tomb 2x28-33% | ||
Hippowdon Ground | A | |
Available Moves Moves
Damage vs Pincurchin View Hippowdon builds →Earthquake 2x10⁸-127%KO Dig 2x86-102%KO Stomping Tantrum 2x81-97% Bulldoze 2x64-76% | ||
Excadrill GroundSteel | A | |
Available Moves Moves
Damage vs Pincurchin View Excadrill builds →Dig 2x101-119%KO Drill Run 2x101-119%KO Stomping Tantrum 2x95-112%KO Bulldoze 2x75-89% | ||
Flygon GroundDragon | C | |
Available Moves Moves
Damage vs Pincurchin View Flygon builds →Earthquake 2x97-114%KO Earth Power 2x80-94% Dig 2x77-92% Bulldoze 2x60-71% | ||
Sandaconda Ground | C | |
Available Moves Moves
Damage vs Pincurchin View Sandaconda builds →Dig 2x81-97% Bulldoze 2x62-74% Mud Shot 2x43-51% Sand Tomb 2x38-46% | ||
Seismitoad WaterGround | C | |
Available Moves Moves
Damage vs Pincurchin View Seismitoad builds →Dig 2x75-89% Stomping Tantrum 2x71-84% Bulldoze 2x58-69% Mud Shot 2x53-64% | ||
In Sword & Shield, Excadrill can KO Pincurchin with Earthquake (118-139%).
Excadrill GroundSteel | A | |
Recommended Build AbilityMold Breaker ItemLeftovers NatureJolly Moves
Damage vs Pincurchin View Excadrill builds →Earthquake 2x118-139%KO Rapid Spin20-23% | ||
Sword & Shield Evolution
No evolution chain to worry about here. Pincurchin is a standalone Pokemon with a decent partner pool for breeding through two egg groups. Eggs come out average hatch time. View every chain in the Evolution Chart.
How to Evolve
Breeding
Breed Pincurchin easily with 46 breeding partners from the Indeterminate and Water1 egg groups. Pass egg moves like Memento, Sucker Punch to offspring.


Sword & Shield Pincurchin Best Moveset
Electric Surge isn't flashy, but it matters. Combined with Electricseed for extra utility and max HP and Sp. Atk EVs, Pincurchin fills the special attacker slot reliably. Quiet nature finishes the spread.
Best Build
Pincurchin best EVs are HP and Sp. Atk
Doubles Special Tank Moveset
- Thunder
- Sucker Punch
- Hydro Pump
- Rain Dance
Recommended Teammates
Hazard Setter Moveset
- Rising Voltage
- Scald
- Spikes
- Protect
Recommended Teammates
Wall Moveset
- Rising Voltage
- Spikes
- Toxic Spikes
- Recover
Recommended Teammates
Moves
Level-up moves are just the starting point for Pincurchin. TMs unlock coverage across 8 types and turn a straightforward STAB kit around Thunder and Thunderbolt into something with actual range.
Level-Up Moves
TM Moves
Egg Moves
Tutor Moves
Sword & Shield Pincurchin Locations
44 encounter spots for Pincurchin at decent spawn rates starting from early-game routes. Two different catch methods are in play here. Best and Earliest sort options below help narrow down your approach based on odds vs. Accessibility.
Best Locations to Catch Pincurchin in Sword & Shield
Which version you're playing matters for Pincurchin. 44 walking and surfing spots at Lv. 13-65 spread across Shield and Sword, and some routes only appear in one cartridge. Check the version badges below.
Pincurchin Guide
In Sword & Shield, watch for Rhydon (Ground) when using Pincurchin. They all hit it super-effectively with STAB. Only 1 weakness means fewer dedicated counters to worry about. At base 15 Speed, Pincurchin won't outrun any of these threats so switching to a resist is usually the safer play.
For Sword & Shield, it depends on your team. Pincurchin at 435 BST isn't a powerhouse, but the Electric coverage might be exactly what you're missing.
In Sword & Shield, Lightning Rod changes the entire equation for Pincurchin. The 435 BST doesn't tell the full story. Ranked C-Tier as an attacker. Thunder with Electricseed is the standard set.
Lightning Rod is what you want on Pincurchin. Every competitive set worth running is built with that ability in mind. The alternatives (Electric Surge) work on paper but Lightning Rod is what makes Pincurchin worth using.
Pincurchin's best stat is Attack at base 101. Electric gives decent defensive coverage with 3 resistances.
Game Availability
Pincurchin joined the series in Sword & Shield and has been available in 2 titles so far. With 3 generations of appearances, it's established itself despite the later start.
Click a game to view version-specific details
- Gen 1Y
 Yellow
 - Gen 1RB

 Red & Blue
 - Gen 2GS

 Gold & Silver
 - Gen 2C
 Crystal
 - Gen 3RS

 Ruby & Sapphire
 - Gen 3FRLG

 FireRed & LeafGreen
 - Gen 3E
 Emerald
 - Gen 4Pt
 Platinum
 - Gen 4HGSS

 HeartGold & SoulSilver
 - Gen 4DP

 Diamond & Pearl
 - Gen 5BW

 Black & White
 - Gen 5B2W2

 Black 2 & White 2
 - Gen 6XY

 X & Y
X & Y - Gen 6ORAS

 Omega Ruby & Alpha Sapphire
 - Gen 7USUM

 Ultra Sun & Ultra Moon
 - Gen 7SM

 Sun & Moon
 - Gen 7LGPE

 Let's Go Pikachu & Eevee
 - Gen 8SwShDebut

 Sword & Shield
 - Gen 8PLA
 Legends: Arceus
 - Gen 8BDSP

 Brilliant Diamond & Shining Pearl
 - Gen 9SV

 Scarlet & Violet
 - Gen 9LZA
 Legends: Z-A
 - Gen 10WW

 Winds & Waves