Stats & Training
Nothing fancy in Cramorant's spread. It leans mixed with Sp. Def out front. And you'll get 2 Sp. Def EVs per KO for it. Follows a medium-fast 1M XP curve.
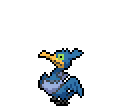
Cramorant’s gluttony led it to try to swallow an Arrokuda whole, which in turn led to Cramorant getting an Arrokuda stuck in its throat.
The slightest shock is sometimes enough to get this Pokémon to spit out the Arrokuda lodged in its throat.
Cramorant Weakness
Electric and Rock moves hit Cramorant for super-effective damage. Electric hits land at 4x, so they're the biggest threat. The upside? Ground-type moves can't touch it at all. The Flying/Water typing picks up 5 resistances to work with. Cramorant's special bulk (base 95 Sp.Def) helps absorb special-type weaknesses, though physical moves exploit the lower Defense.
| Damage | Types |
|---|---|
| 4x (Critical) | Electric |
| 2x (Weak) | Rock |
| 0.5x (Resist) | Fire, Water, Fighting, Bug, Steel |
| 0x (Immune) | Ground |
Stunfisk GroundElectric | A | |
Available Move Moves
Damage vs Cramorant View Stunfisk builds →Thunder Shock 4x70-84% | ||
Pikachu Electric | C | |
Available Moves Moves
Damage vs Cramorant View Pikachu builds →Volt Switch 4x80-94% Spark 4x119-141%KO Thunder Shock 4x55-66% Nuzzle 4x47-56% | ||
Joltik BugElectric | D | |
Available Moves Moves
Damage vs Cramorant View Joltik builds →Volt Switch 4x88-103%KO Electroweb 4x70-84% | ||
Electrike Electric | D | |
Available Moves Moves
Damage vs Cramorant View Electrike builds →Volt Switch 4x95-113%KO Shock Wave 4x88-103%KO | ||
Yamper Electric | D | |
Available Moves Moves
Damage vs Cramorant View Yamper builds →Volt Switch 4x70-84% Spark 4x10³-122%KO Nuzzle 4x39-47% | ||
Stunfisk GroundElectric | A | |
Available Moves Moves
Damage vs Cramorant View Stunfisk builds →Electroweb 4x81-96% Thunder Shock 4x60-72% | ||
Pikachu Electric | C | |
Available Moves Moves
Damage vs Cramorant View Pikachu builds →Volt Switch 4x75-88% Spark 4x10⁸-128%KO Electroweb 4x60-72% Thunder Shock 4x47-56% | ||
Joltik BugElectric | D | |
Available Moves Moves
Damage vs Cramorant View Joltik builds →Volt Switch 4x81-96% Electroweb 4x68-80% | ||
Electrike Electric | D | |
Available Moves Moves
Damage vs Cramorant View Electrike builds →Volt Switch 4x88-104%KO Thunder Fang 4x95-112%KO Shock Wave 4x75-88% | ||
Yamper Electric | D | |
Available Moves Moves
Damage vs Cramorant View Yamper builds →Volt Switch 4x68-80% Spark 4x95-112%KO Nuzzle 4x33-40% | ||
Stunfisk GroundElectric | A | |
Available Moves Moves
Damage vs Cramorant View Stunfisk builds →Electroweb 4x80-94% Thunder Shock 4x61-72% | ||
Pikachu Electric | C | |
Available Moves Moves
Damage vs Cramorant View Pikachu builds →Volt Switch 4x73-87% Spark 4x10⁴-123%KO Electroweb 4x61-72% Thunder Shock 4x48-58% | ||
Joltik BugElectric | D | |
Available Moves Moves
Damage vs Cramorant View Joltik builds →Volt Switch 4x80-94% Electroweb 4x67-80% | ||
Electrike Electric | D | |
Available Moves Moves
Damage vs Cramorant View Electrike builds →Volt Switch 4x86-101%KO Thunder Fang 4x92-108%KO Shock Wave 4x73-87% | ||
Yamper Electric | D | |
Available Moves Moves
Damage vs Cramorant View Yamper builds →Volt Switch 4x61-72% Spark 4x92-108%KO Nuzzle 4x36-43% | ||
Stunfisk GroundElectric | A | |
Available Moves Moves
Damage vs Cramorant View Stunfisk builds →Electroweb 4x80-95% Thunder Shock 4x62-73% | ||
Boltund Electric | C | |
Available Moves Moves
Damage vs Cramorant View Boltund builds →Volt Switch 4x10⁹-129%KO Spark 4x152-179%KO Nuzzle 4x52-62% | ||
Manectric Electric | C | |
Available Moves Moves
Damage vs Cramorant View Manectric builds →Discharge 4x137-163%KO Volt Switch 4x123-146%KO Thunder Fang 4x133-157%KO Shock Wave 4x10⁵-123%KO | ||
Charjabug BugElectric | C | |
Available Moves Moves
Damage vs Cramorant View Charjabug builds →Volt Switch 4x76-90% Spark 4x143-168%KO Electroweb 4x62-73% | ||
Pikachu Electric | C | |
Available Moves Moves
Damage vs Cramorant View Pikachu builds →Thunderbolt 4x90-107%KO Discharge 4x80-95% Volt Switch 4x71-84% Spark 4x10⁵-123%KO | ||
Stunfisk GroundElectric | A | |
Available Moves Moves
Damage vs Cramorant View Stunfisk builds →Electroweb 4x81-96% Thunder Shock 4x63-75% | ||
Boltund Electric | C | |
Available Moves Moves
Damage vs Cramorant View Boltund builds →Volt Switch 4x10⁹-129%KO Spark 4x154-182%KO Nuzzle 4x50-59% | ||
Manectric Electric | C | |
Available Moves Moves
Damage vs Cramorant View Manectric builds →Discharge 4x141-166%KO Volt Switch 4x122-145%KO Thunder Fang 4x131-155%KO Shock Wave 4x10⁹-129%KO | ||
Charjabug BugElectric | C | |
Available Moves Moves
Damage vs Cramorant View Charjabug builds →Volt Switch 4x77-91% Spark 4x146-171%KO Electroweb 4x63-75% | ||
Pikachu Electric | C | |
Available Moves Moves
Damage vs Cramorant View Pikachu builds →Thunderbolt 4x91-107%KO Discharge 4x81-96% Volt Switch 4x72-86% Spark 4x10⁹-129%KO | ||
Stunfisk GroundElectric | A | |
Available Moves Moves
Damage vs Cramorant View Stunfisk builds →Electroweb 4x78-93% Thunder Shock 4x58-68% | ||
Morpeko ElectricDark | A | |
Available Moves Moves
Damage vs Cramorant View Morpeko builds →Volt Switch 4x87-102%KO Spark 4x153-180%KO Electroweb 4x70-83% Thunder Shock 4x54-63% | ||
Boltund Electric | C | |
Available Moves Moves
Damage vs Cramorant View Boltund builds →Volt Switch 4x10⁷-127%KO Spark 4x149-176%KO Nuzzle 4x50-59% | ||
Manectric Electric | C | |
Available Moves Moves
Damage vs Cramorant View Manectric builds →Discharge 4x137-161%KO Volt Switch 4x120-141%KO Thunder Fang 4x128-151%KO Shock Wave 4x10³-122%KO | ||
Galvantula BugElectric | C | |
Available Moves Moves
Damage vs Cramorant View Galvantula builds →Discharge 4x128-151%KO Volt Switch 4x111-132%KO Electroweb 4x91-107%KO | ||
Morpeko ElectricDark | A | |
Available Moves Moves
Damage vs Cramorant View Morpeko builds →Volt Switch 4x87-102%KO Spark 4x153-181%KO Electroweb 4x71-84% Thunder Shock 4x51-60% | ||
Boltund Electric | C | |
Available Moves Moves
Damage vs Cramorant View Boltund builds →Volt Switch 4x10⁶-126%KO Spark 4x146-172%KO Nuzzle 4x51-60% | ||
Manectric Electric | C | |
Available Moves Moves
Damage vs Cramorant View Manectric builds →Discharge 4x138-163%KO Volt Switch 4x119-140%KO Thunder Fang 4x126-149%KO Shock Wave 4x10²-121%KO | ||
Galvantula BugElectric | C | |
Available Moves Moves
Damage vs Cramorant View Galvantula builds →Discharge 4x126-149%KO Volt Switch 4x114-135%KO Electroweb 4x91-107%KO | ||
Pincurchin Electric | C | |
Available Moves Moves
Damage vs Cramorant View Pincurchin builds →Spark 4x162-191%KO Thunder Shock 4x63-74% | ||
Stunfisk GroundElectric | A | |
Available Moves Moves
Damage vs Cramorant View Stunfisk builds →Discharge 4x113-133%KO Rock Slide 2x46-54% Rock Tomb 2x37-44% Electroweb 4x80-94% | ||
Morpeko ElectricDark | A | |
Available Moves Moves
Damage vs Cramorant View Morpeko builds →Volt Switch 4x91-107%KO Spark 4x160-189%KO Electroweb 4x73-86% Thunder Shock 4x54-64% | ||
Boltund Electric | C | |
Available Moves Moves
Damage vs Cramorant View Boltund builds →Wild Charge 4x207-244%KO Volt Switch 4x10⁹-129%KO Spark 4x153-180%KO Nuzzle 4x51-60% | ||
Manectric Electric | C | |
Available Moves Moves
Damage vs Cramorant View Manectric builds →Wild Charge 4x178-210%KO Discharge 4x138-163%KO Volt Switch 4x120-141%KO Thunder Fang 4x131-154%KO | ||
Galvantula BugElectric | C | |
Available Moves Moves
Damage vs Cramorant View Galvantula builds →Discharge 4x131-154%KO Volt Switch 4x113-133%KO Electroweb 4x91-107%KO | ||
In Sword & Shield, Nihilego threatens a KO with Power Gem (91-107%). Raikou's Thunderbolt also KOs at 201-237%.
Zeraora Electric | A | |
Recommended Build AbilityVoltabsorb ItemAir Balloon NatureJolly Moves
Damage vs Cramorant View Zeraora builds →Drain Punch21-25% | ||
Nihilego RockPoison | A | |
Recommended Build AbilityBeastboost ItemBlack Sludge NatureTimid Moves
Damage vs Cramorant View Nihilego builds →Power Gem 2x91-107%KO | ||
Raikou Electric | B | |
Recommended Build AbilityInnerfocus ItemHeavy-Duty Boots NatureTimid Moves
Damage vs Cramorant View Raikou builds →Thunderbolt 4x201-237%KO Scald15-17% Volt Switch 4x158-186%KO | ||
Terrakion RockFighting | B | |
Recommended Build AbilityJustified ItemLum Berry NatureJolly Moves
Damage vs Cramorant View Terrakion builds →Rock Slide 2x141-167%KO | ||
Sword & Shield Evolution
Cramorant doesn't evolve, so breeding's where the action is. You'll find a decent partner pool across two egg groups, and eggs are average hatch time. It's got 5 egg moves worth looking into. View every chain in the Evolution Chart.
How to Evolve

Breeding
Breed Cramorant easily with 42 breeding partners from the Flying and Water1 egg groups. Pass egg moves like Aerial Ace, Aqua Ring, Defog and 2 more to offspring.


Sword & Shield Cramorant Best Moveset
Cramorant doesn't rely on pure speed. Heavy-Duty Boots gives it hazard immunity on every switch-in to stay healthy, and Timid nature still pushes offense. Surf and double STAB keep the pressure on while max Sp. Atk and Speed EVs balance power and survivability.
Best Build
Cramorant best EVs are Sp. Atk
Special Wallbreaker Moveset
- Hurricane
- Blizzard
- Hydro Pump
- Roost
Recommended Teammates
Special Sweeper Moveset
- Surf
- Endure
- Ice Beam
- Air Slash
Recommended Teammates
Moves
Without breeding, Cramorant misses out on Aerial Ace and Aqua Ring. That's 5 egg moves adding depth that the base kit lacks. STAB comes from Brave Bird and Hydro Pump, with Poison and Normal coverage and more rounding things out.
Level-Up Moves
TM Moves
Egg Moves
Tutor Moves
Sword & Shield Cramorant Locations
high spawn rates across 18 locations for Cramorant in mid-game routes. Scroll the sorted list below and pick whichever spot sits closest to your current route. The rate differences between locations are worth comparing.
Best Locations to Catch Cramorant in Sword & Shield
18 walking and surfing encounters at Lv. 27-52 for Cramorant across Shield and Sword. A few locations are version-exclusive, so your copy of the game affects what's available.
Cramorant Guide
In Sword & Shield, Cramorant brings 475 BST to the table. C-Tier on our list: a niche pick in Sword & Shield's meta. Surf with Heavy-Duty Boots is the standard set.
Gulp Missile if a Cramorant with Gulp Missile uses Surf or Dive, it catches prey and changes its form depending on its remaining HP. That's the one you want on Cramorant. It's the only ability Cramorant has.
Cramorant is a special attacker with base 85 Sp. Atk. Enough bulk to take a hit or two, too. Speed tells the real story. Base 85 Speed is workable. Faster than some, slower than many.
In Sword & Shield, run Surf, Roost, Hurricane, and Endure on Cramorant. Surf is the most common pick at 24% usage. Surf provides reliable STAB damage.
Game Availability
Since Sword & Shield, Cramorant has been obtainable in 2 games. A Generation 8 debut means a shorter history, but Cramorant has appeared steadily across every generation since.
Click a game to view version-specific details
- Gen 1Y
 Yellow
 - Gen 1RB

 Red & Blue
 - Gen 2GS

 Gold & Silver
 - Gen 2C
 Crystal
 - Gen 3RS

 Ruby & Sapphire
 - Gen 3FRLG

 FireRed & LeafGreen
 - Gen 3E
 Emerald
 - Gen 4Pt
 Platinum
 - Gen 4HGSS

 HeartGold & SoulSilver
 - Gen 4DP

 Diamond & Pearl
 - Gen 5BW

 Black & White
 - Gen 5B2W2

 Black 2 & White 2
 - Gen 6XY

 X & Y
X & Y - Gen 6ORAS

 Omega Ruby & Alpha Sapphire
 - Gen 7USUM

 Ultra Sun & Ultra Moon
 - Gen 7SM

 Sun & Moon
 - Gen 7LGPE

 Let's Go Pikachu & Eevee
 - Gen 8SwShDebut

 Sword & Shield
 - Gen 8PLA
 Legends: Arceus
 - Gen 8BDSP

 Brilliant Diamond & Shining Pearl
 - Gen 9SV

 Scarlet & Violet
 - Gen 9LZA
 Legends: Z-A
 - Gen 10WW

 Winds & Waves