
Is Rabsca Good in Scarlet & Violet Playthrough?
Bug/Psychic Rabsca from the Let's Go evolution method. Revival Blessing revives a fainted teammate at half HP. The same move that makes Pawmot so valuable. Two Pokemon with team-reviving capability gives you enormous sustain across long boss fights.
Rellor has the type edge here and should clean up Katy's team.
Rellor resists most of Brassius's coverage and hits back hard.
Rellor trades roughly evenly with Iono's team.
Rellor trades roughly evenly with Kofu's team.
Larry's team hits Rellor's weaknesses hard.
Ryme's team hits Rabsca's weaknesses hard.
Tulip's team hits Rabsca's weaknesses hard.
Rabsca trades roughly evenly with Grusha's team.
Rabsca trades roughly evenly with Rika's team.
Poppy's team hits Rabsca's weaknesses hard.
Larry's team hits Rabsca's weaknesses hard.
Rabsca trades roughly evenly with Hassel's team.
Rabsca trades roughly evenly with Geeta's team.
Catch Rabsca on West Province (Area Two) (overworld, Lv 35-65).
Catch Rellor on West Province (Area Two) (overworld, Lv 26-40).
How to Get Rabsca in Scarlet & Violet
Rabsca appears at moderate rates across 8 spots in late-game routes. Sort by Best below if you want the highest rate, or Earliest if you want the quickest access point in your playthrough.
Where To Catch Rabsca in SV
Rellor is your first catch on the way to Rabsca. You'll find walking encounters from Lv. 26-80 across 14 total spots in the chain.
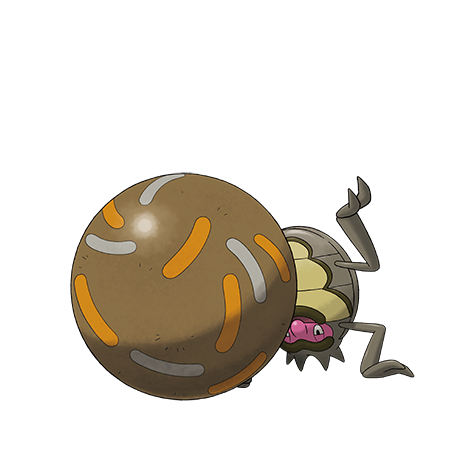 Step 1Catch RellorAsado Desert - DesertLv.26-40OverworldRate 58%West Province (Area Two) - DesertLv.26-40OverworldRate 58%Savanna BiomeLv.50-80Overworld
- Step 2Rabsca ✓Asado Desert - DesertLv.35-65OverworldRate 1%West Province (Area Two) - DesertLv.35-65OverworldRate 1%Savanna BiomeLv.50-80OverworldSavanna BiomeLv.63Overworldor evolve from Rellor (Step 1)
Rabsca Weakness
Type-wise, Rabsca takes extra damage from Fire, Flying, Bug, Rock, Ghost, and Dark. It resists 4 types, giving it decent defensive coverage.
| Damage | Types |
|---|---|
| 2x (Weak) | Fire, Flying, Bug, Rock, Ghost, Dark |
| 0.5x (Resist) | Grass, Ground, Psychic |
| 0.25x (Resist) | Fighting |
What is Rabsca Weak Against
FragileBest Pokemon Against Rabsca
Sudowoodo Rock | C | |
Oricorio Fire | C | |
Squawkabilly Normal | C | |
Flareon Fire | C | |
Vivillon Bug | C | |
Available Moves Moves
Damage vs Rabsca View Vivillon builds →Struggle Bug 2x42-52% Gust 2x33-40% | ||
Arcanine Fire | B | |
Available Moves Moves
Damage vs Rabsca View Arcanine builds →Flare Blitz 2x111-132%KO Crunch 2x49-60% | ||
Scyther Bug | B | |
Available Moves Moves
Damage vs Rabsca View Scyther builds →Wing Attack 2x58-68% Fury Cutter 2x39-47% | ||
Sudowoodo Rock | C | |
Oricorio Fire | C | |
Crocalor Fire | C | |
Obtain MethodEvolve Fuecoco (Cabo Poco Gift) Available Moves Moves
Damage vs Rabsca View Crocalor builds →Incinerate 2x44-53% Bite 2x23-28% Lick 2x14-18% | ||
Arcanine Fire | B | |
Available Moves Moves
Damage vs Rabsca View Arcanine builds →Flare Blitz 2x112-132%KO Crunch 2x51-60% | ||
Houndoom DarkFire | C | |
Available Moves Moves
Damage vs Rabsca View Houndoom builds →Incinerate 2x52-62% Bite 2x49-58% | ||
Gyarados Water | B | |
Bombirdier Dark | C | |
Available Moves Moves
Damage vs Rabsca View Bombirdier builds →Wing Attack 2x56-66% Thief 2x56-66% Rock Throw 2x30-36% | ||
Honchkrow Dark | B | |
Available Moves Moves
Damage vs Rabsca View Honchkrow builds →Night Slash 2x73-86% Wing Attack 2x62-74% Astonish 2x22-26% | ||
Arcanine Fire | B | |
Available Moves Moves
Damage vs Rabsca View Arcanine builds →Flare Blitz 2x116-137%KO Crunch 2x52-62% | ||
Houndoom DarkFire | C | |
Available Moves Moves
Damage vs Rabsca View Houndoom builds →Incinerate 2x54-64% Bite 2x51-61% | ||
Gyarados Water | B | |
Bombirdier Dark | C | |
Available Moves Moves
Damage vs Rabsca View Bombirdier builds →Wing Attack 2x56-67% Thief 2x56-67% Rock Tomb 2x37-45% | ||
Flareon Fire | C | |
Available Moves Moves
Damage vs Rabsca View Flareon builds →Fire Fang 2x72-86% Bite 2x45-53% | ||
Arcanine Fire | B | |
Available Moves Moves
Damage vs Rabsca View Arcanine builds →Flare Blitz 2x112-132%KO Crunch 2x50-59% | ||
Camerupt FireGround | C | |
Available Moves Moves
Damage vs Rabsca View Camerupt builds →Eruption 2x117-138%KO Rock Slide 2x44-52% | ||
Houndoom DarkFire | C | |
Available Moves Moves
Damage vs Rabsca View Houndoom builds →Heat Wave 2x77-92% Snarl 2x48-57% | ||
Talonflame Fire | C | |
Available Moves Moves
Damage vs Rabsca View Talonflame builds →Flare Blitz 2x86-103%KO Acrobatics 2x41-49% | ||
Pyroar FireNormal | C | |
Available Moves Moves
Damage vs Rabsca View Pyroar builds →Heat Wave 2x77-92% Snarl 2x31-36% | ||
Houndoom DarkFire | C | |
Available Moves Moves
Damage vs Rabsca View Houndoom builds →Overheat 2x10³-122%KO Dark Pulse 2x66-77% | ||
Pyroar FireNormal | C | |
Available Moves Moves
Damage vs Rabsca View Pyroar builds →Overheat 2x10³-122%KO Dark Pulse 2x42-50% | ||
Salazzle PoisonFire | B | |
Available Moves Moves
Damage vs Rabsca View Salazzle builds →Overheat 2x10³-122%KO Leech Life 2x31-38% Knock Off 2x27-31% | ||
Corviknight Steel | B | |
Available Moves Moves
Damage vs Rabsca View Corviknight builds →Drill Peck 2x62-73% U-turn 2x35-42% Thief 2x31-38% | ||
Camerupt FireGround | C | |
Available Moves Moves
Damage vs Rabsca View Camerupt builds →Eruption 2x115-136%KO Rock Slide 2x42-50% | ||
Honchkrow Dark | B | |
Available Moves Moves
Damage vs Rabsca View Honchkrow builds →Foul Play 2x101-119%KO Wing Attack 2x65-77% Astonish 2x22-26% | ||
Camerupt FireGround | C | |
Available Moves Moves
Damage vs Rabsca View Camerupt builds →Eruption 2x120-141%KO Rock Slide 2x45-53% | ||
Corviknight Steel | B | |
Available Moves Moves
Damage vs Rabsca View Corviknight builds →Drill Peck 2x63-75% Power Trip 2x13-15% | ||
Arcanine Fire | B | |
Available Moves Moves
Damage vs Rabsca View Arcanine builds →Flare Blitz 2x114-135%KO Crunch 2x51-60% | ||
Pyroar FireNormal | C | |
Available Moves Moves
Damage vs Rabsca View Pyroar builds →Flamethrower 2x76-90% Crunch 2x35-41% | ||
Houndoom DarkFire | C | |
Available Moves Moves
Damage vs Rabsca View Houndoom builds →Overheat 2x10⁸-127%KO Dark Pulse 2x67-79% | ||
Pyroar FireNormal | C | |
Available Moves Moves
Damage vs Rabsca View Pyroar builds →Overheat 2x10⁶-125%KO Dark Pulse 2x44-53% | ||
Salazzle PoisonFire | B | |
Available Moves Moves
Damage vs Rabsca View Salazzle builds →Overheat 2x10⁸-127%KO Leech Life 2x33-39% Knock Off 2x27-32% | ||
Honchkrow Dark | B | |
Available Moves Moves
Damage vs Rabsca View Honchkrow builds →Foul Play 2x99-117%KO Wing Attack 2x63-75% Heat Wave 2x51-60% U-turn 2x49-58% | ||
Corviknight Steel | B | |
Available Moves Moves
Damage vs Rabsca View Corviknight builds →Drill Peck 2x63-75% U-turn 2x36-43% Thief 2x31-38% | ||
Volcarona BugFire | B | |
Available Moves Moves
Damage vs Rabsca View Volcarona builds →Overheat 2x127-150%KO Bug Buzz 2x89-104%KO Hurricane 2x72-85% | ||
Chi-Yu DarkFire | B | |
Obtain MethodNorth Province Area Two Interact Encounter Available Moves Moves
Damage vs Rabsca View Chi-Yu builds →Overheat 2x127-150%KO Dark Pulse 2x79-93% Hex 2x43-51% Bounce 2x42-49% | ||
Braviary Normal | C | |
Available Moves Moves
Damage vs Rabsca View Braviary builds →Sky Attack 2x144-170%KO U-turn 2x48-57% Heat Wave 2x31-37% | ||
Honchkrow Dark | B | |
Available Moves Moves
Damage vs Rabsca View Honchkrow builds →Brave Bird 2x126-148%KO Foul Play 2x100-118%KO Heat Wave 2x51-60% U-turn 2x49-58% | ||
Corviknight Steel | B | |
Available Moves Moves
Damage vs Rabsca View Corviknight builds →Brave Bird 2x93-110%KO U-turn 2x37-44% Thief 2x31-37% | ||
Volcarona BugFire | B | |
Available Moves Moves
Damage vs Rabsca View Volcarona builds →Overheat 2x123-145%KO Bug Buzz 2x86-101%KO Hurricane 2x69-82% | ||
Chi-Yu DarkFire | B | |
Obtain MethodNorth Province Area Two Interact Encounter Available Moves Moves
Damage vs Rabsca View Chi-Yu builds →Overheat 2x123-145%KO Dark Pulse 2x76-90% Hex 2x42-49% Bounce 2x40-48% | ||
Braviary Normal | C | |
Available Moves Moves
Damage vs Rabsca View Braviary builds →Sky Attack 2x140-165%KO U-turn 2x47-56% Heat Wave 2x30-35% | ||
Incineroar FireDark | C | |
Available Moves Moves
Damage vs Rabsca View Incineroar builds →Flare Blitz 2x113-134%KO Darkest Lariat 2x80-95% Leech Life 2x51-60% Acrobatics 2x35-42% | ||
Honchkrow Dark | B | |
Available Moves Moves
Damage vs Rabsca View Honchkrow builds →Brave Bird 2x122-144%KO Foul Play 2x97-114%KO Heat Wave 2x49-58% U-turn 2x48-57% | ||
Volcarona BugFire | B | |
Available Moves Moves
Damage vs Rabsca View Volcarona builds →Overheat 2x125-147%KO Bug Buzz 2x88-103%KO Hurricane 2x70-83% | ||
Chi-Yu DarkFire | B | |
Obtain MethodNorth Province Area Two Interact Encounter Available Moves Moves
Damage vs Rabsca View Chi-Yu builds →Overheat 2x125-147%KO Dark Pulse 2x78-92% Hex 2x42-49% Bounce 2x40-47% | ||
Braviary Normal | C | |
Available Moves Moves
Damage vs Rabsca View Braviary builds →Sky Attack 2x142-167%KO U-turn 2x48-56% Heat Wave 2x30-36% | ||
Incineroar FireDark | C | |
Available Moves Moves
Damage vs Rabsca View Incineroar builds →Flare Blitz 2x115-136%KO Darkest Lariat 2x82-97% Leech Life 2x51-60% Acrobatics 2x35-42% | ||
Honchkrow Dark | B | |
Available Moves Moves
Damage vs Rabsca View Honchkrow builds →Brave Bird 2x123-145%KO Foul Play 2x98-115%KO Heat Wave 2x49-58% U-turn 2x48-57% | ||
In Scarlet & Violet, Dragapult's Shadow Ball hits Rabsca for 62-73%.
S | ||
Recommended Build AbilityProtosynthesis ItemHeavy-Duty Boots NatureJolly Moves
Damage vs Rabsca View Great Tusk builds →Rapid Spin13-15% | ||
S | ||
Recommended Build AbilityInfiltrator ItemChoice Specs NatureTimid Moves
Damage vs Rabsca View Dragapult builds →U Turn 2x24-29% Draco Meteor50-59% Shadow Ball 2x62-73% | ||
A | ||
Recommended Build AbilityRegenerator ItemHeavy-Duty Boots NatureRelaxed Moves
Damage vs Rabsca View Alomomola builds →Flip Turn8-9% Scald8-10% | ||
A | ||
Recommended Build AbilityDauntlessshield ItemLeftovers NatureJolly Moves
Damage vs Rabsca View Zamazenta builds →Crunch 2x38-45% Close Combat7-8% | ||
B | ||
Recommended Build AbilityPressure ItemRocky Helmet NatureImpish Moves
Damage vs Rabsca View Corviknight builds →U Turn 2x21-24% | ||
Rabsca Evolutions
Rabsca doesn't evolve through normal leveling. You'll need a unique condition to get here from Rellor's line. Breed this form to get Rellor eggs (average hatch time). Evolving from Rellor gave Rabsca the biggest boost in Sp.Atk (+84), bringing the total to 470 stats. View every chain in the Evolution Chart.
How to Evolve


SV Rabsca Best Moveset
Bug/Psychic at 115 Sp. Atk with MoveRevival Blessing that uniquely revives a fainted teammate mid-battle. AbilitySynchronize passes status back. 85/100 bulk on the defensive side absorbs hits. 45 Speed means going last. The moveset fires special Bug and Psychic TermStab and has the only in-battle revive move in the game. The Revival Blessing utility is the entire competitive identity.
Best Build
Rabsca best EVs are HP and Defense
Bulky Support Moveset
- Revival Blessing
- Trick Room
- Psychic Noise
- Bug Buzz
Recommended Teammates
Moves List
The egg pool carries weight here. Cosmic Power and Memento aren't available any other way for Rabsca, and they meaningfully change what it threatens. Stack those on top of Future Sight and Bug Buzz for solid options.
How to Read the Moves Table
Tabs
- Level-Up
- Learned by leveling up.
- TM
- Taught by a Technical Machine.
- Egg
- Inherited via breeding.
- Tutor
- NPC tutor (cost: items, BP, money).
- Reminder
- An NPC reteaches any move this Pokemon could have learned by leveling up.
- Transfer
- Carried over from an older game using Pokemon HOME.
- Event
- Given out through Mystery Gift events.
Visual Signals
CAT (Category)
How the move deals damage and which stats it uses.
A small dot on the icon's corner marks the move as contact. That triggers abilities like Static, Flame Body, Rough Skin, or Iron Barbs, plus items like Rocky Helmet and Sticky Barb.
Tier (S to D)
Each move's competitive rank in RankedBoost's system. TM, Egg, and Tutor sort by tier by default (best first). On Level-Up, click the Tier header to do the same.
PWR (Power)
Base damage. Numbers shown in a type color include STAB (base × 1.5). Hover any colored number to see the math.
— means no power (status moves) or variable power.
Sorting & Filter
Click any column header to sort. Level-Up opens with Lv 1 at the top. TM, Egg, and Tutor open with the highest-tier moves at the top.
Search filters by move name or type. The Filter button limits the list to STAB, Physical, Special, or Status moves.
Level-Up Moves
TM Moves
Egg Moves
Tutor Moves
Base Stats
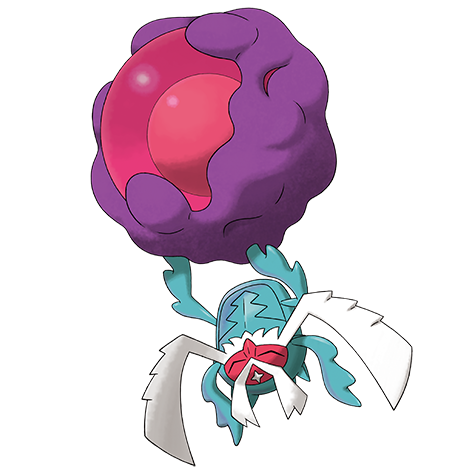
The body that supports the ball barely moves. Therefore, it is thought that the true body of this Pokémon is actually inside the ball.
An infant sleeps inside the ball. Rabsca rolls the ball soothingly with its legs to ensure the infant sleeps comfortably.
Rabsca Scarlet & Violet Guide
In Scarlet & Violet, Rabsca has a 470 base stat total and ranks as C-Tier: a niche pick in Scarlet & Violet's meta. It works best as a wallbreaker. Revivalblessing with Leppaberry is the standard set.
In Scarlet & Violet, Rabsca's biggest threats include Charizard (Fire), Aerodactyl (Flying), and Heracross (Bug), all carrying super-effective STAB moves. Rock, Ghost, and Dark-type attackers are also a problem. With 6 weakness types, most competitive teams carry at least one counter.
Synchronize is the go-to ability for Rabsca. It copies burns, paralysis, and poison received onto the Pokémon that inflicted them. Its hidden ability Telepathy can work in specific setups.
In Scarlet & Violet, Rabsca fills the wallbreaker role. It's a special attacker with base 115 Sp. Atk. Base 45 Speed is low. Priority moves or Trick Room are the way to go. And it's enough bulk to take a hit or two.
For Scarlet & Violet, the core moveset is Revivalblessing, Trickroom, Psychicnoise, and Bugbuzz. Revivalblessing leads at 0% usage. This set covers the wallbreaker role with a mix of damage and utility.
Game Availability
Introduced in Scarlet & Violet, Rabsca has appeared in 1 games across 2 generations. Later debuts mean fewer total appearances, but it's been a consistent presence since its introduction.
Click a game to view version-specific details
- Gen 1RB

 Red & Blue
 - Gen 1Y
 Yellow
 - Gen 2GS

 Gold & Silver
 - Gen 2C
 Crystal
 - Gen 3RS

 Ruby & Sapphire
 - Gen 3E
 Emerald
 - Gen 3FRLG

 FireRed & LeafGreen
 - Gen 4DP

 Diamond & Pearl
 - Gen 4Pt
 Platinum
 - Gen 4HGSS

 HeartGold & SoulSilver
 - Gen 5BW

 Black & White
 - Gen 5B2W2

 Black 2 & White 2
 - Gen 6XY

 X & Y
X & Y - Gen 6ORAS

 Omega Ruby & Alpha Sapphire
 - Gen 7SM

 Sun & Moon
 - Gen 7USUM

 Ultra Sun & Ultra Moon
 - Gen 7LGPE

 Let's Go Pikachu & Eevee
 - Gen 8SwSh

 Sword & Shield
 - Gen 8BDSP

 Brilliant Diamond & Shining Pearl
 - Gen 8PLA
 Legends: Arceus
 - Gen 9SVDebut

 Scarlet & Violet
 - Gen 9LZA
 Legends: Z-A
 - Gen 10WW

 Winds & Waves