Stats & Training
The stat line revolves around HP. Percentage recovery gets extra mileage here. Attack backs it up, though Speed doesn't pull its weight. Worth 2 HP EVs on a slow 1.25M XP grind to max out.
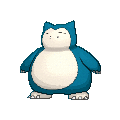
It is not satisfied unless it eats over 880 pounds of food every day. When it is done eating, it goes promptly to sleep.
Its stomach can digest any kind of food, even if it happens to be moldy or rotten.
Snorlax Weakness
Snorlax's Normal typing leaves it vulnerable to Fighting. It shrugs off Ghost-type attacks completely. Thick Fat reduces Fire/Ice damage, further improving the defensive spread. Snorlax's special bulk (base 110 Sp.Def) helps absorb special-type weaknesses, though physical moves exploit the lower Defense.
| Damage | Types |
|---|---|
| 2x (Weak) | Fighting |
| 0x (Immune) | Ghost |
Lucario FightingSteel | C | |
Obtain MethodTower Of Mastery Gift Available Moves Moves
Damage vs Snorlax View Lucario builds →Close Combat 2x89-105%KO Focus Blast 2x60-71% Aura Sphere 2x41-49% Low Sweep 2x49-57% | ||
Chesnaught GrassFighting | C | |
Available Moves Moves
Damage vs Snorlax View Chesnaught builds →Focus Blast 2x43-51% Hammer Arm 2x72-86% Low Sweep 2x48-56% Power-Up Punch 2x30-36% | ||
Gallade PsychicFighting | C | |
Available Moves Moves
Damage vs Snorlax View Gallade builds →Close Combat 2x100-117%KO Focus Blast 2x39-46% Low Sweep 2x54-64% Power-Up Punch 2x34-41% | ||
Poliwrath WaterFighting | C | |
Obtain MethodEvolve Poliwhirl (Laverre City Super Rod) Available Moves Moves
Damage vs Snorlax View Poliwrath builds →Focus Blast 2x41-49% Dynamic Punch 2x66-78% Submission 2x53-63% Low Sweep 2x43-51% | ||
Mienshao Fighting | C | |
Available Moves Moves
Damage vs Snorlax View Mienshao builds →High Jump Kick 2x10⁷-126%KO Focus Blast 2x52-61% Jump Kick 2x83-98% Aura Sphere 2x36-42% | ||
Mienfoo Fighting | D | |
Scraggy DarkFighting | D | |
Available Moves Moves
Damage vs Snorlax View Scraggy builds →Brick Break 2x45-54% Rock Smash 2x25-30% | ||
Pancham Fighting | D | |
Available Moves Moves
Damage vs Snorlax View Pancham builds →Karate Chop 2x33-39% Rock Smash 2x28-33% Arm Thrust 2x12-15% | ||
Machop Fighting | D | |
Available Moves Moves
Damage vs Snorlax View Machop builds →Low Sweep 2x43-51% Karate Chop 2x33-39% Rock Smash 2x28-33% | ||
Croagunk PoisonFighting | D | |
Lucario FightingSteel | C | |
Obtain MethodTower Of Mastery Gift Available Moves Moves
Damage vs Snorlax View Lucario builds →Low Sweep 2x47-56% Power-Up Punch 2x31-37% Rock Smash 2x31-37% | ||
Hawlucha Fighting | C | |
Available Moves Moves
Damage vs Snorlax View Hawlucha builds →Flying Press 2x62-74% Low Sweep 2x41-49% Karate Chop 2x33-39% Power-Up Punch 2x26-31% | ||
Hariyama Fighting | C | |
Available Moves Moves
Damage vs Snorlax View Hariyama builds →Vital Throw 2x55-64% Low Sweep 2x51-60% Force Palm 2x47-56% Power-Up Punch 2x33-39% | ||
Throh Fighting | C | |
Available Moves Moves
Damage vs Snorlax View Throh builds →Vital Throw 2x47-56% Low Sweep 2x44-53% Revenge 2x41-49% Storm Throw 2x41-49% | ||
Sawk Fighting | C | |
Available Moves Moves
Damage vs Snorlax View Sawk builds →Brick Break 2x61-72% Low Sweep 2x53-62% Karate Chop 2x41-49% Rock Smash 2x33-39% | ||
Lucario FightingSteel | C | |
Obtain MethodTower Of Mastery Gift Available Moves Moves
Damage vs Snorlax View Lucario builds →Low Sweep 2x47-56% Power-Up Punch 2x31-37% Rock Smash 2x31-37% | ||
Heracross BugFighting | C | |
Available Moves Moves
Damage vs Snorlax View Heracross builds →Brick Break 2x61-72% Rock Smash 2x33-39% Arm Thrust 2x14-18% | ||
Hawlucha Fighting | C | |
Available Moves Moves
Damage vs Snorlax View Hawlucha builds →Flying Press 2x62-74% Low Sweep 2x41-49% Karate Chop 2x33-39% Power-Up Punch 2x26-31% | ||
Hariyama Fighting | C | |
Available Moves Moves
Damage vs Snorlax View Hariyama builds →Vital Throw 2x55-64% Low Sweep 2x51-60% Force Palm 2x47-56% Power-Up Punch 2x33-39% | ||
Throh Fighting | C | |
Available Moves Moves
Damage vs Snorlax View Throh builds →Vital Throw 2x47-56% Low Sweep 2x44-53% Revenge 2x41-49% Storm Throw 2x41-49% | ||
Lucario FightingSteel | C | |
Obtain MethodTower Of Mastery Gift Available Moves Moves
Damage vs Snorlax View Lucario builds →Low Sweep 2x49-58% Power-Up Punch 2x31-36% Rock Smash 2x31-36% | ||
Heracross BugFighting | C | |
Available Moves Moves
Damage vs Snorlax View Heracross builds →Close Combat 2x98-116%KO Brick Break 2x62-73% Rock Smash 2x34-40% Arm Thrust 2x14-17% | ||
Hawlucha Fighting | C | |
Available Moves Moves
Damage vs Snorlax View Hawlucha builds →Flying Press 2x65-76% Low Sweep 2x42-50% Karate Chop 2x34-40% Power-Up Punch 2x27-31% | ||
Hariyama Fighting | C | |
Available Moves Moves
Damage vs Snorlax View Hariyama builds →Vital Throw 2x56-66% Low Sweep 2x52-61% Force Palm 2x49-58% Power-Up Punch 2x34-40% | ||
Throh Fighting | C | |
Available Moves Moves
Damage vs Snorlax View Throh builds →Vital Throw 2x49-58% Low Sweep 2x45-53% Revenge 2x42-50% Storm Throw 2x42-50% | ||
Lucario FightingSteel | C | |
Obtain MethodTower Of Mastery Gift Available Moves Moves
Damage vs Snorlax View Lucario builds →Low Sweep 2x49-58% Power-Up Punch 2x31-36% Rock Smash 2x31-36% | ||
Heracross BugFighting | C | |
Available Moves Moves
Damage vs Snorlax View Heracross builds →Close Combat 2x101-118%KO Brick Break 2x63-74% Rock Smash 2x35-41% Arm Thrust 2x15-17% | ||
Hawlucha Fighting | C | |
Available Moves Moves
Damage vs Snorlax View Hawlucha builds →Flying Press 2x65-77% Low Sweep 2x43-51% Karate Chop 2x33-39% Power-Up Punch 2x27-32% | ||
Hariyama Fighting | C | |
Available Moves Moves
Damage vs Snorlax View Hariyama builds →Vital Throw 2x57-68% Low Sweep 2x54-63% Force Palm 2x49-58% Power-Up Punch 2x33-39% | ||
Throh Fighting | C | |
Available Moves Moves
Damage vs Snorlax View Throh builds →Vital Throw 2x49-58% Low Sweep 2x45-54% Revenge 2x43-51% Storm Throw 2x43-51% | ||
Lucario FightingSteel | C | |
Obtain MethodTower Of Mastery Gift Available Moves Moves
Damage vs Snorlax View Lucario builds →Focus Blast 2x60-71% Aura Sphere 2x41-49% Low Sweep 2x49-57% Power-Up Punch 2x30-36% | ||
Heracross BugFighting | C | |
Available Moves Moves
Damage vs Snorlax View Heracross builds →Close Combat 2x100-117%KO Focus Blast 2x28-33% Brick Break 2x63-74% Rock Smash 2x34-41% | ||
Hawlucha Fighting | C | |
Available Moves Moves
Damage vs Snorlax View Hawlucha builds →High Jump Kick 2x83-98% Focus Blast 2x43-51% Flying Press 2x64-75% Low Sweep 2x42-50% | ||
Hariyama Fighting | C | |
Available Moves Moves
Damage vs Snorlax View Hariyama builds →Focus Blast 2x28-33% Vital Throw 2x56-66% Wake-Up Slap 2x56-66% Low Sweep 2x53-63% | ||
Throh Fighting | C | |
Available Moves Moves
Damage vs Snorlax View Throh builds →Superpower 2x82-97% Focus Blast 2x24-28% Vital Throw 2x49-57% Low Sweep 2x46-54% | ||
In X & Y, Breloom's Mach Punch hits Snorlax for 36-42%.
A | ||
Recommended Build AbilityFlashfire ItemLeftovers NatureCalm Moves View Heatran builds →
| ||
Breloom GrassFighting | B | |
Recommended Build AbilityTechnician ItemMiracleseed NatureJolly Moves
Damage vs Snorlax View Breloom builds →Bullet Seed11-13% Mach Punch 2x36-42% | ||
X & Y Evolution
Snorlax is what Munchlax becomes. Breed it for Munchlax eggs (takes forever to hatch). Plenty of partners for breeding via one egg group. Eggs are takes forever to hatch. The evolution from Munchlax pushed Snorlax to 540 total stats. HP saw the largest single gain at +25. View every chain in the Evolution Chart.
How to Evolve
Breeding
Breed with Snorlax to get Munchlax eggs (with patience) using 75 partners from the Monster egg group. Notable egg moves include After You, Belch, Charm and 10 more.


X & Y Snorlax Best Moveset
Most things take neutral or super-effective damage from this set. Snorlax runs Dark and Ground coverage backed by Custapberry for extra utility. Max HP and Attack EVs and Gluttony make the coverage actually threatening.
Best Build
Snorlax best EVs are HP and Attack
Doubles Physical Tank Moveset
- Crunch
- Belly Drum
- Earthquake
- Self Destruct
Recommended Teammates
Physical Tank Moveset
- Body Slam
- Curse
- Rest
- Earthquake
Recommended Teammates
Moves
Breadth over depth defines this movepool. Snorlax won't stack one type's damage ceiling, but coverage across 13 types means it always has an effective option. Self-Destruct and Giga Impact anchor the STAB core.
Level-Up Moves
TM Moves
Egg Moves
Tutor Moves
Reminder Moves
Transfer Moves
How to Get Snorlax in X & Y
Snorlax is a fixed encounter, not a random spawn. Walk up to it, interact, and the battle starts immediately. Head to Route 7 when your team is ready for the fight.
How to Obtain Snorlax in X & Y
 Step 1Breed Munchlax from Snorlax
Breed from Snorlax at the Day Care.
 Step 2Snorlax ✓Route 7YInteract with Pokemon Lv.15 RouteLimitedEarlyRoute 7XInteract with Pokemon Lv.15 RouteLimitedEarlyor evolve from Munchlax (Step 1)
Snorlax Guide
In X & Y, Snorlax looks average on paper at 540 BST. But Thick Fat is why it sees play. Build around that and it pulls its weight. B-Tier tank on our tier list. Crunch with Custapberry is the standard set.
In X & Y, watch for Hitmonlee (Fighting) when using Snorlax. They all hit it super-effectively with STAB. Only 1 weakness means fewer dedicated counters to worry about. At base 30 Speed, Snorlax won't outrun any of these threats so switching to a resist is usually the safer play.
Snorlax gets Thick Fat, Immunity, and Gluttony. But Thick Fat is the one that matters. It's the centerpiece of every viable set. Build around that.
Snorlax is a physical attacker with base 110 Attack. Tanky enough to absorb a few hits, too. Speed tells the real story. Base 30 Speed is low. Priority moves or Trick Room are the way to go. Fits the tank role.
In X & Y, run Crunch, Bellydrum, Earthquake, and Self Destruct on Snorlax. Crunch is the most common pick at 18% usage. This set covers the tank role with a mix of damage and utility.
Game Availability
Available since Red & Blue, Snorlax appears in 21 games spanning 10 generations. Beyond its original form, it gained a Gigantamax form in Generation 8.
Click a game to view version-specific details
- Gen 1Y
 Yellow
 - Gen 1RBDebut

 Red & Blue
 - Gen 2GS

 Gold & Silver
 - Gen 2C
 Crystal
 - Gen 3RS

 Ruby & Sapphire
 - Gen 3FRLG

 FireRed & LeafGreen
 - Gen 3E
 Emerald
 - Gen 4Pt
 Platinum
 - Gen 4HGSS

 HeartGold & SoulSilver
 - Gen 4DP

 Diamond & Pearl
 - Gen 5BW

 Black & White
 - Gen 5B2W2

 Black 2 & White 2
 - Gen 6XY

 X & Y
X & Y - Gen 6ORAS

 Omega Ruby & Alpha Sapphire
 - Gen 7USUM

 Ultra Sun & Ultra Moon
 - Gen 7SM

 Sun & Moon
 - Gen 7LGPE

 Let's Go Pikachu & Eevee
 - Gen 8SwShGigantamax

 Sword & Shield
 - Gen 8PLA
 Legends: Arceus
 - Gen 8BDSP

 Brilliant Diamond & Shining Pearl
 - Gen 9SV

 Scarlet & Violet
 - Gen 9LZA
 Legends: Z-A
 - Gen 10WW

 Winds & Waves