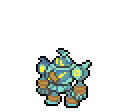
Stats & Training
Nothing fancy in Golurk's spread. It leans physical with Attack out front. And you'll get 2 Attack EVs per KO for it. Follows a medium-fast 1M XP curve.
Artillery platforms built into the walls of ancient castles served as perches from which Golurk could fire energy beams.
There’s a theory that inside Golurk is a perpetual motion machine that produces limitless energy, but this belief hasn’t been proven.
Golurk Weakness
Golurk's Ground/Ghost typing leaves it vulnerable to Water, Grass, Ice, Ghost, and Dark. It shrugs off Normal, Electric, and Fighting-type attacks completely.
| Damage | Types |
|---|---|
| 2x (Weak) | Water, Grass, Ice, Ghost, Dark |
| 0.5x (Resist) | Bug, Rock |
| 0.25x (Resist) | Poison |
| 0x (Immune) | Normal, Electric, Fighting |
Drifloon Ghost | D | |
Available Moves Moves
Damage vs Golurk View Drifloon builds →Shadow Ball 2x54-63% Hex 2x42-51% Brutal Swing 2x24-28% Payback 2x21-25% | ||
Nuzleaf GrassDark | D | |
Available Moves Moves
Damage vs Golurk View Nuzleaf builds →Solar Beam 2x75-89% Razor Leaf 2x39-46% Payback 2x39-46% Mega Drain 2x28-34% | ||
Wingull Water | D | |
Available Moves Moves
Damage vs Golurk View Wingull builds →Water Pulse 2x39-46% Water Gun 2x28-34% | ||
Lombre WaterGrass | D | |
Available Moves Moves
Damage vs Golurk View Lombre builds →Solar Beam 2x75-89% Knock Off 2x25-31% Water Gun 2x28-34% Mega Drain 2x28-34% | ||
Pumpkaboo GhostGrass | D | |
Available Moves Moves
Damage vs Golurk View Pumpkaboo builds →Solar Beam 2x61-72% Razor Leaf 2x39-46% Shadow Sneak 2x28-34% Astonish 2x24-30% | ||
Drifloon Ghost | D | |
Available Moves Moves
Damage vs Golurk View Drifloon builds →Shadow Ball 2x48-57% Hex 2x39-46% Brutal Swing 2x21-26% Payback 2x18-21% | ||
Nuzleaf GrassDark | D | |
Available Moves Moves
Damage vs Golurk View Nuzleaf builds →Solar Beam 2x69-82% Razor Leaf 2x39-46% Payback 2x36-43% Mega Drain 2x26-32% | ||
Wingull Water | D | |
Available Moves Moves
Damage vs Golurk View Wingull builds →Water Pulse 2x36-43% Water Gun 2x24-29% | ||
Scraggy DarkFighting | D | |
Lombre WaterGrass | D | |
Available Moves Moves
Damage vs Golurk View Lombre builds →Solar Beam 2x69-82% Knock Off 2x24-29% Bubble Beam 2x39-46% Water Gun 2x26-32% | ||
Drifloon Ghost | D | |
Available Moves Moves
Damage vs Golurk View Drifloon builds →Shadow Ball 2x46-55% Hex 2x38-45% Brutal Swing 2x22-26% Payback 2x18-22% | ||
Nuzleaf GrassDark | D | |
Available Moves Moves
Damage vs Golurk View Nuzleaf builds →Solar Beam 2x68-81% Razor Leaf 2x38-45% Payback 2x32-39% Mega Drain 2x24-29% | ||
Wingull Water | D | |
Available Moves Moves
Damage vs Golurk View Wingull builds →Water Pulse 2x35-42% Water Gun 2x24-29% | ||
Scraggy DarkFighting | D | |
Lombre WaterGrass | D | |
Available Moves Moves
Damage vs Golurk View Lombre builds →Solar Beam 2x68-81% Knock Off 2x24-28% Bubble Beam 2x38-45% Water Gun 2x24-29% | ||
Pelipper Water | B | |
Available Moves Moves
Damage vs Golurk View Pelipper builds →Water Pulse 2x50-60% Payback 2x18-21% Water Gun 2x33-40% Whirlpool 2x29-35% | ||
Cramorant Water | C | |
Available Moves Moves
Damage vs Golurk View Cramorant builds →Dive 2x60-72% Water Gun 2x31-37% Whirlpool 2x27-32% | ||
Vullaby Dark | D | |
Available Moves Moves
Damage vs Golurk View Vullaby builds →Knock Off 2x36-42% Payback 2x29-35% | ||
Drifloon Ghost | D | |
Available Moves Moves
Damage vs Golurk View Drifloon builds →Shadow Ball 2x46-55% Hex 2x37-45% Brutal Swing 2x21-25% Payback 2x18-21% | ||
Nuzleaf GrassDark | D | |
Available Moves Moves
Damage vs Golurk View Nuzleaf builds →Solar Beam 2x69-82% Razor Leaf 2x36-42% Payback 2x33-40% Mega Drain 2x25-30% | ||
Pelipper Water | B | |
Available Moves Moves
Damage vs Golurk View Pelipper builds →Water Pulse 2x50-59% Payback 2x17-20% Water Gun 2x34-40% Whirlpool 2x30-35% | ||
Cramorant Water | C | |
Available Moves Moves
Damage vs Golurk View Cramorant builds →Dive 2x60-71% Water Gun 2x31-38% Whirlpool 2x28-33% | ||
Vullaby Dark | D | |
Available Moves Moves
Damage vs Golurk View Vullaby builds →Knock Off 2x35-43% Payback 2x28-33% | ||
Drifloon Ghost | D | |
Available Moves Moves
Damage vs Golurk View Drifloon builds →Shadow Ball 2x46-54% Hex 2x38-45% Brutal Swing 2x21-25% Payback 2x17-20% | ||
Nuzleaf GrassDark | D | |
Available Moves Moves
Damage vs Golurk View Nuzleaf builds →Solar Beam 2x68-80% Razor Leaf 2x35-43% Payback 2x34-40% Mega Drain 2x24-28% | ||
Pelipper Water | B | |
Available Moves Moves
Damage vs Golurk View Pelipper builds →Water Pulse 2x47-56% Payback 2x17-20% Water Gun 2x32-39% Whirlpool 2x29-35% | ||
Drifblim Ghost | C | |
Available Moves Moves
Damage vs Golurk View Drifblim builds →Phantom Force 2x62-73% Shadow Ball 2x60-71% Hex 2x49-58% Brutal Swing 2x28-33% | ||
Cramorant Water | C | |
Available Moves Moves
Damage vs Golurk View Cramorant builds →Dive 2x58-69% Assurance 2x29-35% Water Gun 2x31-37% Whirlpool 2x27-32% | ||
Vullaby Dark | D | |
Available Moves Moves
Damage vs Golurk View Vullaby builds →Knock Off 2x35-41% Assurance 2x32-39% Payback 2x27-32% | ||
Nuzleaf GrassDark | D | |
Available Moves Moves
Damage vs Golurk View Nuzleaf builds →Solar Beam 2x65-78% Assurance 2x38-45% Razor Leaf 2x35-41% Payback 2x32-39% | ||
Pelipper Water | B | |
Available Moves Moves
Damage vs Golurk View Pelipper builds →Water Pulse 2x49-58% Icy Wind 2x29-34% Payback 2x17-21% Water Gun 2x33-39% | ||
Drifblim Ghost | C | |
Available Moves Moves
Damage vs Golurk View Drifblim builds →Phantom Force 2x63-74% Shadow Ball 2x61-72% Hex 2x49-58% Brutal Swing 2x28-33% | ||
Mantine Water | C | |
Available Moves Moves
Damage vs Golurk View Mantine builds →Dive 2x35-41% Bubble Beam 2x46-54% Water Pulse 2x42-50% Assurance 2x17-21% | ||
Cramorant Water | C | |
Available Moves Moves
Damage vs Golurk View Cramorant builds →Dive 2x58-68% Assurance 2x29-34% Icy Wind 2x27-32% Water Gun 2x30-35% | ||
Vullaby Dark | D | |
Available Moves Moves
Damage vs Golurk View Vullaby builds →Knock Off 2x35-41% Assurance 2x33-39% Payback 2x28-33% | ||
Obstagoon DarkNormal | C | |
Available Moves Moves
Damage vs Golurk View Obstagoon builds →Night Slash 2x54-65% Shadow Claw 2x36-43% Assurance 2x46-55% Snarl 2x32-38% | ||
Drifblim Ghost | C | |
Available Moves Moves
Damage vs Golurk View Drifblim builds →Phantom Force 2x63-74% Shadow Ball 2x63-74% Hex 2x51-61% Brutal Swing 2x28-34% | ||
Mantine Water | C | |
Available Moves Moves
Damage vs Golurk View Mantine builds →Hydro Pump 2x77-91% Dive 2x35-42% Bubble Beam 2x46-55% Water Pulse 2x43-51% | ||
Cramorant Water | C | |
Available Moves Moves
Damage vs Golurk View Cramorant builds →Dive 2x59-70% Assurance 2x30-35% Icy Wind 2x28-33% Water Gun 2x30-36% | ||
Vullaby Dark | D | |
Available Moves Moves
Damage vs Golurk View Vullaby builds →Dark Pulse 2x39-46% Knock Off 2x35-42% Assurance 2x32-38% Snarl 2x27-32% | ||
In Sword & Shield, Rillaboom threatens a KO with Wood Hammer (133-157%). Weavile deals 64-76% with Knock Off.
S | ||
Recommended Build AbilityFlashfire ItemLeftovers NatureTimid Moves View Heatran builds →
| ||
Rillaboom Grass | A | |
Recommended Build AbilityGrassy Surge ItemAssault Vest NatureAdamant Moves
Damage vs Golurk View Rillaboom builds →U Turn13-15% Wood Hammer 2x133-157%KO | ||
Weavile DarkIce | A | |
Recommended Build AbilityPressure ItemHeavy-Duty Boots NatureJolly Moves
Damage vs Golurk View Weavile builds →Knock Off 2x64-76% Ice Shard 2x40-47% | ||
Slowking WaterPsychic | A | |
Recommended Build AbilityRegenerator ItemColbur Berry NatureRelaxed Moves
Damage vs Golurk View Slowking builds →Scald 2x60-71% | ||
Blacephalon FireGhost | A | |
Recommended Build AbilityBeastboost ItemChoice Scarf NatureTimid Moves
Damage vs Golurk View Blacephalon builds →Shadow Ball 2x10²-120%KO Flamethrower57-67% Overheat82-97% | ||
Sword & Shield Evolution
Golurk is what Golett becomes. Breed it for Golett eggs (average hatch time). No compatible partners for breeding via one egg group. Eggs are average hatch time. The evolution from Golett pushed Golurk to 483 total stats. Attack saw the largest single gain at +50. View every chain in the Evolution Chart.
How to Evolve
Breeding
Golurk is genderless — breed with Ditto to produce Golett eggs. Part of the Mineral egg group.
 Ditto only
Sword & Shield Golurk Best Moveset
Noguard isn't flashy, but it matters. Combined with Life Orb for extra damage on every hit for a health trade and max Attack without Speed EVs, Golurk fills the hazard lead slot reliably. Adamant nature finishes the spread.
Best Build
Golurk best EVs are Attack and Defense
Hazard Setter Moveset
- Earthquake
- Poltergeist
- Dynamic Punch
- Stealth Rock
Recommended Teammates
Doubles Hazard Setter Moveset
- Earthquake
- Stealth Rock
- Brick Break
- Poltergeist
Recommended Teammates
Physical Sweeper Moveset
- Earthquake
- Poltergeist
- Ice Punch
- Close Combat
Recommended Teammates
Moves
Breadth over depth defines this movepool. Golurk won't stack one type's damage ceiling, but coverage across 11 types means it always has an effective option. Poltergeist and Earthquake anchor the STAB core.
Level-Up Moves
TM Moves
Egg Moves
Tutor Moves
How to Get Golurk in Sword & Shield
decent spawn rates across 22 locations for Golurk in endgame routes. Scroll the sorted list below and pick whichever spot sits closest to your current route. The rate differences between locations are worth comparing.
Where To Catch Golurk in Sword & Shield
The path to Golurk starts with Golett at Lv. 7-65 via walking encounters. 2 catchable stages total, with locations listed for each one below.
 Step 1Catch GolettWatchtower RuinsShieldGrass Lv.11-14 Building40%EarlyIntense SunWatchtower RuinsShieldGrass Lv.11-14 Building40%EarlySandstormWatchtower RuinsSwordGrass Lv.11-14 Building40%EarlyIntense SunWatchtower RuinsShieldGrass Lv.11-14 Building40%EarlyNormal WeatherWatchtower RuinsSwordGrass Lv.11-14 Building40%EarlySandstormWatchtower RuinsSwordGrass Lv.11-14 Building40%EarlyNormal WeatherDappled GroveShieldGrass Lv.11-15 Forest35%EarlySandstormDappled GroveSwordGrass Lv.11-15 Forest35%EarlySandstormRolling FieldsShieldGrass Lv.7-1020%EarlySandstormRolling FieldsSwordGrass Lv.7-920%EarlySandstormNorth Lake MilochShieldOverworld Lv.26-28 Water60%MidSandstormNorth Lake MilochSwordOverworld Lv.26-28 Water60%MidSandstormWatchtower RuinsShieldOverworld Lv.26-29 Building60%MidNormal WeatherWatchtower RuinsSwordOverworld Lv.26-29 Building60%MidNormal WeatherGiant's CapShieldGrass Lv.26-2840%MidSandstormGiant's CapSwordGrass Lv.26-2840%MidIntense SunGiant's CapSwordGrass Lv.26-2840%MidSandstormGiant's CapShieldGrass Lv.26-2840%MidIntense SunStony WildernessSwordOverworld Lv.28-3010%MidSnowingStony WildernessShieldOverworld Lv.28-3010%MidRainingStony WildernessSwordOverworld Lv.28-3010%MidSandstormStony WildernessShieldOverworld Lv.28-3010%MidHeavy FogStony WildernessSwordOverworld Lv.28-3010%MidRainingStony WildernessShieldOverworld Lv.28-3010%MidOvercastStony WildernessSwordOverworld Lv.28-3010%MidHeavy FogStony WildernessShieldOverworld Lv.28-3010%MidNormal WeatherStony WildernessSwordOverworld Lv.28-3010%MidOvercastStony WildernessShieldOverworld Lv.28-3010%MidSnowstormStony WildernessSwordOverworld Lv.28-3010%MidNormal WeatherStony WildernessSwordOverworld Lv.28-3010%MidSnowstormStony WildernessShieldOverworld Lv.28-3010%MidThunderstormStony WildernessShieldOverworld Lv.28-3010%MidIntense SunStony WildernessSwordOverworld Lv.28-3010%MidThunderstormStony WildernessShieldOverworld Lv.28-3010%MidSnowingStony WildernessSwordOverworld Lv.28-3010%MidIntense SunStony WildernessShieldOverworld Lv.28-3010%MidSandstormGiant's SeatShieldOverworld Lv.33-38 Water60%LateSandstormGiant's SeatSwordOverworld Lv.33-38 Water60%LateSandstormRoute 8ShieldOverworld Lv.39-41 Route25%LateAll WeatherRoute 8SwordOverworld Lv.39-41 Route25%LateAll Weather
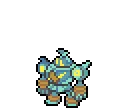 Step 2Golurk ✓Lake of OutrageShieldOverworld Lv.55-58 Water23%PostSandstormLake of OutrageSwordOverworld Lv.55-58 Water23%PostSandstormLake of OutrageShieldOverworld Lv.55-58 Water20%PostRainingLake of OutrageSwordOverworld Lv.55-58 Water20%PostRainingLake of OutrageShieldOverworld Lv.55-58 Water20%PostHeavy FogLake of OutrageShieldOverworld Lv.55-58 Water20%PostThunderstormLake of OutrageSwordOverworld Lv.55-58 Water20%PostHeavy FogLake of OutrageSwordOverworld Lv.55-58 Water20%PostThunderstormLake of OutrageShieldOverworld Lv.55-58 Water20%PostOvercastLake of OutrageShieldOverworld Lv.55-58 Water20%PostIntense SunLake of OutrageSwordOverworld Lv.55-58 Water20%PostOvercastLake of OutrageSwordOverworld Lv.55-58 Water20%PostIntense SunLake of OutrageShieldOverworld Lv.55-58 Water20%PostNormal WeatherLake of OutrageShieldOverworld Lv.55-58 Water20%PostSnowingLake of OutrageSwordOverworld Lv.55-58 Water20%PostNormal WeatherLake of OutrageSwordOverworld Lv.55-58 Water20%PostSnowingLake of OutrageShieldOverworld Lv.55-58 Water13%PostSnowstormLake of OutrageSwordOverworld Lv.55-58 Water13%PostSnowstormThree-Point PassShieldOverworld Lv.60-6510%PostHeavy FogThree-Point PassSwordOverworld Lv.60-6510%PostHeavy FogThree-Point PassShieldOverworld Lv.60-6510%PostNormal WeatherThree-Point PassSwordOverworld Lv.60-6510%PostNormal Weatheror evolve from Golett (Step 1)
Golurk Guide
In Sword & Shield, Golurk works as a wallbreaker with 483 BST behind it. C-Tier on our list: a niche pick in Sword & Shield's meta. Earthquake with Life Orb is the standard set.
Iron Fist strengthens punch-based moves to 1.2× their power. That's the one you want on Golurk. No Guard is the hidden ability. Niche, but it has its uses. Klutz works too if your team needs something different.
Golurk is a physical attacker with base 124 Attack. Enough bulk to take a hit or two, too. Speed tells the real story. At base 55 Speed, it won't be moving first often. Fits the wallbreaker role.
In Sword & Shield, run Earthquake, Poltergeist, Dynamicpunch, and Stealth Rock on Golurk. Earthquake is the most common pick at 24% usage. Earthquake provides reliable STAB damage.
Game Availability
Since Black & White, Golurk has been obtainable in 9 games. A Generation 5 debut means a shorter history, but Golurk has appeared steadily across every generation since.
Click a game to view version-specific details
- Gen 1Y
 Yellow
 - Gen 1RB

 Red & Blue
 - Gen 2GS

 Gold & Silver
 - Gen 2C
 Crystal
 - Gen 3RS

 Ruby & Sapphire
 - Gen 3FRLG

 FireRed & LeafGreen
 - Gen 3E
 Emerald
 - Gen 4Pt
 Platinum
 - Gen 4HGSS

 HeartGold & SoulSilver
 - Gen 4DP

 Diamond & Pearl
 - Gen 5BWDebut

 Black & White
 - Gen 5B2W2

 Black 2 & White 2
 - Gen 6XY

 X & Y
X & Y - Gen 6ORAS

 Omega Ruby & Alpha Sapphire
 - Gen 7USUM

 Ultra Sun & Ultra Moon
 - Gen 7SM

 Sun & Moon
 - Gen 7LGPE

 Let's Go Pikachu & Eevee
 - Gen 8SwSh

 Sword & Shield
 - Gen 8PLA
 Legends: Arceus
 - Gen 8BDSP

 Brilliant Diamond & Shining Pearl
 - Gen 9SV

 Scarlet & Violet
 - Gen 9LZA
 Legends: Z-A
 - Gen 10WW

 Winds & Waves