Stats & Training
The stat bars tell the story: Defense carries everything and Speed's dead weight. But this Coal Pokemon still yields 3 Defense EVs per fight on a 1.06M XP medium-slow curve.
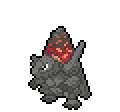
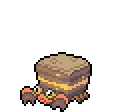
Its body is a colossal stove. With Gigantamax energy stoking the fire, this Pokémon’s flame burns hotter than 3,600 degrees Fahrenheit.
When Galar was hit by a harsh cold wave, this Pokémon served as a giant heating stove and saved many lives.
Coalossal Weakness
Coalossal's Rock/Fire typing leaves it vulnerable to Water, Ground, Fighting, and Rock. Water and Ground hits land at 4x, so they're the biggest threat. It resists 7 types, so it can switch into a lot of moves safely. Flash Fire grants an additional Fire immunity, reshaping the matchup chart. Coalossal's physical bulk (base 120 Def) helps cushion physical weakness hits, but special attackers are the bigger threat.
| Damage | Types |
|---|---|
| 4x (Critical) | Water, Ground |
| 2x (Weak) | Fighting, Rock |
| 0.5x (Resist) | Normal, Ice, Poison, Flying, Bug, Fairy |
| 0.25x (Resist) | Fire |
Diggersby NormalGround | B | |
Available Moves Moves
Damage vs Coalossal View Diggersby builds →Mud Shot 4x56-68% Double Kick 2x10-13% Mud-Slap 4x25-30% | ||
Onix RockGround | C | |
Available Moves Moves
Damage vs Coalossal View Onix builds →Rock Slide 2x28-34% Rock Throw 2x19-23% Smack Down 2x19-23% Rock Blast 2x13-15% | ||
Wooper WaterGround | C | |
Available Moves Moves
Damage vs Coalossal View Wooper builds →Mud Shot 4x38-45% Water Gun 4x31-38% | ||
Mudbray Ground | C | |
Available Moves Moves
Damage vs Coalossal View Mudbray builds →Bulldoze 4x76-90% Rock Smash 2x16-20% Double Kick 2x14-18% Mud-Slap 4x25-30% | ||
Palpitoad WaterGround | D | |
Available Moves Moves
Damage vs Coalossal View Palpitoad builds →Bubble Beam 4x76-90% Mud Shot 4x64-75% | ||
Diggersby NormalGround | B | |
Available Moves Moves
Damage vs Coalossal View Diggersby builds →Bulldoze 4x48-57% Mud Shot 4x48-57% Sand Tomb 4x32-38% Double Kick 2x9-11% | ||
Onix RockGround | C | |
Available Moves Moves
Damage vs Coalossal View Onix builds →Rock Slide 2x27-32% Rock Throw 2x18-22% Smack Down 2x18-22% Sand Tomb 4x27-32% | ||
Wooper WaterGround | C | |
Available Moves Moves
Damage vs Coalossal View Wooper builds →Aqua Tail 4x60-70% Mud Shot 4x37-45% Water Gun 4x27-32% Whirlpool 4x27-32% | ||
Mudbray Ground | C | |
Available Moves Moves
Damage vs Coalossal View Mudbray builds →Bulldoze 4x70-83% Rock Smash 2x16-19% Sand Tomb 4x43-51% Double Kick 2x12-15% | ||
Palpitoad WaterGround | D | |
Available Moves Moves
Damage vs Coalossal View Palpitoad builds →Bubble Beam 4x70-83% Mud Shot 4x60-70% | ||
Diggersby NormalGround | B | |
Available Moves Moves
Damage vs Coalossal View Diggersby builds →Bulldoze 4x43-52% Mud Shot 4x49-58% Sand Tomb 4x29-35% Double Kick 2x8-10% | ||
Onix RockGround | C | |
Available Moves Moves
Damage vs Coalossal View Onix builds →Rock Slide 2x24-29% Rock Throw 2x16-20% Smack Down 2x16-20% Sand Tomb 4x24-29% | ||
Wooper WaterGround | C | |
Available Moves Moves
Damage vs Coalossal View Wooper builds →Aqua Tail 4x59-69% Mud Shot 4x34-40% Water Gun 4x29-35% Whirlpool 4x24-29% | ||
Mudbray Ground | C | |
Available Moves Moves
Damage vs Coalossal View Mudbray builds →Bulldoze 4x68-81% Rock Smash 2x16-19% Sand Tomb 4x43-52% Double Kick 2x13-15% | ||
Palpitoad WaterGround | D | |
Available Moves Moves
Damage vs Coalossal View Palpitoad builds →Bubble Beam 4x68-81% Mud Shot 4x59-69% | ||
Quagsire WaterGround | C | |
Available Moves Moves
Damage vs Coalossal View Quagsire builds →Aqua Tail 4x86-101%KO Muddy Water 4x90-106%KO Dig 4x79-93% Mud Shot 4x56-66% | ||
Onix RockGround | C | |
Available Moves Moves
Damage vs Coalossal View Onix builds →Dig 4x52-62% Rock Slide 2x24-29% Rock Throw 2x16-20% Smack Down 2x16-20% | ||
Rhyhorn GroundRock | C | |
Available Moves Moves
Damage vs Coalossal View Rhyhorn builds →Drill Run 4x79-93% Dig 4x79-93% Bulldoze 4x60-71% Mud Shot 4x38-44% | ||
Palpitoad WaterGround | D | |
Available Moves Moves
Damage vs Coalossal View Palpitoad builds →Bubble Beam 4x67-79% Mud Shot 4x56-66% | ||
Barboach WaterGround | D | |
Obtain MethodNorth Lake Miloch Surfing Available Moves Moves
Damage vs Coalossal View Barboach builds →Earthquake 4x63-75% Aqua Tail 4x60-71% Muddy Water 4x71-84% Water Pulse 4x49-57% | ||
Quagsire WaterGround | C | |
Available Moves Moves
Damage vs Coalossal View Quagsire builds →Aqua Tail 4x89-105%KO Muddy Water 4x89-105%KO Dig 4x78-92% Mud Shot 4x57-67% | ||
Onix RockGround | C | |
Available Moves Moves
Damage vs Coalossal View Onix builds →Dig 4x50-59% Rock Slide 2x23-27% Rock Throw 2x15-19% Smack Down 2x15-19% | ||
Rhyhorn GroundRock | C | |
Available Moves Moves
Damage vs Coalossal View Rhyhorn builds →Drill Run 4x78-92% Dig 4x78-92% Bulldoze 4x60-71% Mud Shot 4x36-42% | ||
Palpitoad WaterGround | D | |
Available Moves Moves
Damage vs Coalossal View Palpitoad builds →Bubble Beam 4x67-80% Mud Shot 4x57-67% | ||
Barboach WaterGround | D | |
Obtain MethodNorth Lake Miloch Surfing Available Moves Moves
Damage vs Coalossal View Barboach builds →Earthquake 4x64-76% Aqua Tail 4x60-71% Muddy Water 4x71-84% Water Pulse 4x50-59% | ||
Seismitoad WaterGround | C | |
Available Moves Moves
Damage vs Coalossal View Seismitoad builds →Dig 4x81-96% Drain Punch 2x25-31% Brick Break 2x25-31% Bubble Beam 4x78-92% | ||
Quagsire WaterGround | C | |
Available Moves Moves
Damage vs Coalossal View Quagsire builds →Aqua Tail 4x84-99% Muddy Water 4x87-103%KO Dig 4x75-88% Brick Break 2x24-28% | ||
Onix RockGround | C | |
Available Moves Moves
Damage vs Coalossal View Onix builds →Dig 4x48-57% Rock Slide 2x22-27% Bulldoze 4x39-46% Rock Throw 2x16-19% | ||
Rhyhorn GroundRock | C | |
Available Moves Moves
Damage vs Coalossal View Rhyhorn builds →Drill Run 4x75-88% Dig 4x75-88% Bulldoze 4x58-69% Mud Shot 4x36-42% | ||
Barboach WaterGround | D | |
Obtain MethodNorth Lake Miloch Surfing Available Moves Moves
Damage vs Coalossal View Barboach builds →Earthquake 4x61-73% Aqua Tail 4x55-65% Muddy Water 4x68-80% Water Pulse 4x48-57% | ||
Gastrodon WaterGround | B | |
Available Moves Moves
Damage vs Coalossal View Gastrodon builds →Muddy Water 4x112-132%KO Earth Power 4x112-132%KO Dig 4x74-88% Dive 4x74-88% | ||
Seismitoad WaterGround | C | |
Available Moves Moves
Damage vs Coalossal View Seismitoad builds →Dig 4x84-99% Dive 4x84-99% Drain Punch 2x26-30% Rock Slide 2x26-30% | ||
Quagsire WaterGround | C | |
Available Moves Moves
Damage vs Coalossal View Quagsire builds →Aqua Tail 4x84-99% Muddy Water 4x87-102%KO Dig 4x74-88% Dive 4x74-88% | ||
Onix RockGround | C | |
Available Moves Moves
Damage vs Coalossal View Onix builds →Dig 4x49-59% Rock Slide 2x23-27% Rock Tomb 2x18-22% Bulldoze 4x37-44% | ||
Rhyhorn GroundRock | C | |
Available Moves Moves
Damage vs Coalossal View Rhyhorn builds →Drill Run 4x74-88% Dig 4x74-88% Rock Slide 2x35-42% Bulldoze 4x59-70% | ||
Gastrodon WaterGround | B | |
Available Moves Moves
Damage vs Coalossal View Gastrodon builds →Muddy Water 4x115-135%KO Earth Power 4x115-135%KO Dig 4x74-88% Dive 4x74-88% | ||
Seismitoad WaterGround | C | |
Available Moves Moves
Damage vs Coalossal View Seismitoad builds →Dig 4x83-98% Dive 4x83-98% Drain Punch 2x25-30% Stomping Tantrum 4x77-91% | ||
Quagsire WaterGround | C | |
Available Moves Moves
Damage vs Coalossal View Quagsire builds →Aqua Tail 4x86-101%KO Muddy Water 4x89-104%KO Dig 4x77-91% Dive 4x77-91% | ||
Onix RockGround | C | |
Available Moves Moves
Damage vs Coalossal View Onix builds →Dig 4x48-57% Rock Slide 2x22-27% Stomping Tantrum 4x46-54% Rock Tomb 2x19-22% | ||
Rhyhorn GroundRock | C | |
Available Moves Moves
Damage vs Coalossal View Rhyhorn builds →Earthquake 4x94-111%KO Drill Run 4x77-91% Dig 4x77-91% Rock Slide 2x35-42% | ||
In Sword & Shield, Excadrill can KO Coalossal with Earthquake (137-162%). Cobalion's Close Combat hits Coalossal for 62-73%. Slowking's Scald also KOs at 89-105%.
Excadrill GroundSteel | A | |
Recommended Build AbilityMold Breaker ItemLeftovers NatureJolly Moves
Damage vs Coalossal View Excadrill builds →Earthquake 4x137-162%KO Rapid Spin6-7% | ||
Cobalion SteelFighting | A | |
Recommended Build AbilityJustified ItemRocky Helmet NatureJolly Moves
Damage vs Coalossal View Cobalion builds →Close Combat 2x62-73% | ||
Slowking WaterPsychic | A | |
Recommended Build AbilityRegenerator ItemColbur Berry NatureRelaxed Moves
Damage vs Coalossal View Slowking builds →Scald 4x89-105%KO | ||
Nihilego RockPoison | A | |
Recommended Build AbilityBeastboost ItemBlack Sludge NatureTimid Moves
Damage vs Coalossal View Nihilego builds →Power Gem 2x63-74% | ||
Urshifu FightingDark | C | |
Water deals 4x damage to CoalossalView Urshifu → | ||
Sword & Shield Evolution
The three-stage chain from Rolycoly through Carkol ends here at Coalossal. Want more? Breed for Rolycoly eggs. Plenty of partners available via one egg group. The evolution from Rolycoly pushed Coalossal to 510 total stats. HP saw the largest single gain at +80. View every chain in the Evolution Chart.
How to Evolve
Breeding
Breed with Coalossal to get Rolycoly eggs easily using 61 partners from the Mineral egg group. Notable egg moves include Block, Explosion, Mud-Slap.


Sword & Shield Coalossal Best Moveset
Steamengine isn't flashy, but it matters. Combined with Weakness Policy for a massive attack boost after eating a super-effective hit and max HP and Attack EVs, Coalossal fills the physical attacker slot reliably. Adamant nature finishes the spread.
Best Build
Coalossal best EVs are Attack and HP
Doubles Physical Tank Moveset
- Body Press
- Heat Crash
- Rock Slide
- Meteor Beam
Recommended Teammates
Physical Tank Moveset
- Earthquake
- Flare Blitz
- Body Press
- Fire Blast
Recommended Teammates
Physical Sweeper Moveset
- Stealth Rock
- Rapid Spin
- Earthquake
- Flamethrower
Recommended Teammates
Moves
The natural movepool does the job, but Block and Explosion from the egg pool give Coalossal something extra. Pair those with Burn Up and Overheat for STAB and Normal and Fighting coverage and more for reach, and the kit fills out nicely.
Level-Up Moves
TM Moves
Egg Moves
Tutor Moves
How to Get Coalossal in Sword & Shield
4 encounter spots for Coalossal at decent spawn rates starting from late-game routes. Best and Earliest sort options below help narrow down your approach based on odds vs. Accessibility.
Where To Catch Coalossal in Sword & Shield
To get Coalossal, start by catching Rolycoly through walking encounters at Lv. 10-65. The chain covers 3 catchable stages before reaching the final form.
 Step 1Catch RolycolyRoute 3 - GarbageShieldOverworld Lv.10-13 Route99%EarlyAll WeatherRoute 3 - GarbageSwordOverworld Lv.10-13 Route99%EarlyAll WeatherGalar MineShieldOverworld Lv.11-14 Cave35%EarlyAll WeatherGalar MineSwordOverworld Lv.11-14 Cave35%EarlyAll WeatherGalar MineShieldGrass Lv.11-15 Cave30%EarlyAll WeatherGalar MineSwordGrass Lv.11-15 Cave30%EarlyAll WeatherGiant's Cap - 2ShieldOverworld Lv.28-3050%MidIntense SunGiant's Cap - 2SwordOverworld Lv.28-3050%MidIntense SunGiant's Cap - 3ShieldOverworld Lv.29-3250%MidIntense SunGiant's Cap - 3SwordOverworld Lv.29-3250%MidIntense SunMotostoke RiverbankSwordOverworld Lv.26-2810%MidSandstormMotostoke RiverbankShieldOverworld Lv.28-3010%MidIntense SunMotostoke RiverbankShieldOverworld Lv.28-3010%MidSandstormMotostoke RiverbankSwordOverworld Lv.26-285%MidIntense SunGiant's Cap - GroundSwordOverworld Lv.31-3460%LateIntense SunGiant's Cap - GroundShieldOverworld Lv.31-3460%LateNormal WeatherGiant's Cap - GroundSwordOverworld Lv.31-3460%LateNormal WeatherGiant's Cap - GroundShieldOverworld Lv.31-3460%LateSandstormGiant's Cap - GroundSwordOverworld Lv.31-3460%LateSandstormGiant's Cap - GroundShieldOverworld Lv.31-3460%LateHeavy FogGiant's Cap - GroundSwordOverworld Lv.31-3460%LateHeavy FogGiant's Cap - GroundShieldOverworld Lv.31-3460%LateOvercastGiant's Cap - GroundShieldOverworld Lv.31-3460%LateIntense SunGiant's Cap - GroundSwordOverworld Lv.31-3460%LateOvercastGiant's Cap - GroundSwordOverworld Lv.31-3430%LateSnowingGiant's Cap - GroundSwordOverworld Lv.31-3430%LateSnowstormGiant's Cap - GroundSwordOverworld Lv.31-3430%LateRainingGiant's Cap - GroundSwordOverworld Lv.31-3430%LateThunderstormGiant's Cap - GroundShieldOverworld Lv.31-3410%LateSnowingGiant's Cap - GroundShieldOverworld Lv.31-3410%LateSnowstormGiant's Cap - GroundShieldOverworld Lv.31-3410%LateRainingGiant's Cap - GroundShieldOverworld Lv.31-3410%LateThunderstorm
 Step 2Catch or Evolve CarkolStony WildernessShieldGrass Lv.26-2840%MidIntense SunStony WildernessSwordGrass Lv.26-2840%MidIntense SunGiant's CapShieldOverworld Lv.28-3040%MidIntense SunGiant's CapSwordOverworld Lv.28-3040%MidIntense SunGiant's CapShieldOverworld Lv.28-3040%MidSandstormGiant's CapSwordOverworld Lv.28-3040%MidSandstormBridge FieldShieldGrass Lv.26-2810%MidIntense SunBridge FieldSwordGrass Lv.26-2810%MidIntense SunBallimere LakeShieldOverworld Lv.60-65 Water20%PostIntense SunBallimere LakeSwordOverworld Lv.60-65 Water20%PostIntense SunLakeside CaveShieldOverworld Lv.60-65 Cave15%PostAll WeatherLakeside CaveSwordOverworld Lv.60-65 Cave15%PostAll Weatheror evolve from Rolycoly (Step 1)
 Step 3Coalossal ✓Dusty BowlShieldGrass Lv.40-452%LateIntense SunDusty BowlSwordGrass Lv.40-452%LateIntense SunLake of OutrageShieldGrass Lv.50-52 Water25%PostIntense SunLake of OutrageSwordGrass Lv.50-52 Water25%PostIntense Sunor evolve from Carkol (Step 2)
Coalossal Guide
In Sword & Shield, Coalossal looks average on paper at 510 BST. But Flash Fire is why it sees play. Build around that and it pulls its weight. C-Tier wall on our tier list. Bodypress with Weakness Policy is the standard set.
In Sword & Shield, watch for Urshifu (Water), Landorus (Ground), and Golem (Rock) when using Coalossal. They all hit it super-effectively with STAB. Urshifu is the most dangerous since Water moves deal 4x damage. Fighting-type attackers are also a problem. At base 30 Speed, Coalossal won't outrun any of these threats so switching to a resist is usually the safer play.
Coalossal gets Flash Fire, Steam Engine, and Flame Body. But Flash Fire is the one that matters. It's the centerpiece of every viable set. Build around that. On wall sets, Flash Fire pairs with Coalossal's base 120 Defense to absorb physical hits on the switch.
Coalossal is a physical attacker with base 80 Attack. Tanky enough to absorb a few hits, too. Speed tells the real story. Base 30 Speed is low. Priority moves or Trick Room are the way to go. Fits the wall role.
In Sword & Shield, Coalossal's hidden ability is Flash Fire. Protects against fire moves. Better than the standard options for competitive play.
Game Availability
Available since Sword & Shield, Coalossal appears in 2 games spanning 3 generations. Beyond its original form, it gained a Gigantamax form in Generation 8.
Click a game to view version-specific details
- Gen 1Y
 Yellow
 - Gen 1RB

 Red & Blue
 - Gen 2GS

 Gold & Silver
 - Gen 2C
 Crystal
 - Gen 3RS

 Ruby & Sapphire
 - Gen 3FRLG

 FireRed & LeafGreen
 - Gen 3E
 Emerald
 - Gen 4Pt
 Platinum
 - Gen 4HGSS

 HeartGold & SoulSilver
 - Gen 4DP

 Diamond & Pearl
 - Gen 5BW

 Black & White
 - Gen 5B2W2

 Black 2 & White 2
 - Gen 6XY

 X & Y
X & Y - Gen 6ORAS

 Omega Ruby & Alpha Sapphire
 - Gen 7USUM

 Ultra Sun & Ultra Moon
 - Gen 7SM

 Sun & Moon
 - Gen 7LGPE

 Let's Go Pikachu & Eevee
 - Gen 8SwShDebutGigantamax

 Sword & Shield
 - Gen 8PLA
 Legends: Arceus
 - Gen 8BDSP

 Brilliant Diamond & Shining Pearl
 - Gen 9SV

 Scarlet & Violet
 - Gen 9LZA
 Legends: Z-A
 - Gen 10WW

 Winds & Waves