Stats & Training
Wooloo's stats barely vary. None sit in respectable range with no real gaps. It's a blank slate for EV investment. Worth 1 Defense EV, medium-fast 1M XP curve to max.
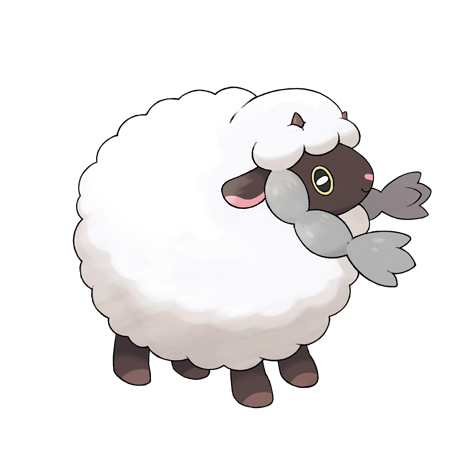
Its curly fleece is such an effective cushion that this Pokémon could fall off a cliff and stand right back up at the bottom, unharmed.
If its fleece grows too long, Wooloo won’t be able to move. Cloth made with the wool of this Pokémon is surprisingly strong.
Wooloo Weakness
Wooloo's Normal typing leaves it vulnerable to Fighting. It shrugs off Ghost-type attacks completely. Only 1 weakness makes it relatively easy to build around defensively.
| Damage | Types |
|---|---|
| 2x (Weak) | Fighting |
| 0x (Immune) | Ghost |
Pancham Fighting | D | |
Available Moves Moves
Damage vs Wooloo View Pancham builds →Low Sweep 2x91-108%KO Circle Throw 2x85-102%KO Arm Thrust 2x28-34% | ||
Machop Fighting | D | |
Available Moves Moves
Damage vs Wooloo View Machop builds →Low Sweep 2x85-102%KO Revenge 2x81-96% | ||
Stufful NormalFighting | D | |
Timburr Fighting | D | |
Tyrogue Fighting | D | |
Pancham Fighting | D | |
Available Moves Moves
Damage vs Wooloo View Pancham builds →Low Sweep 2x87-103%KO Circle Throw 2x79-93% Arm Thrust 2x25-30% | ||
Machop Fighting | D | |
Available Moves Moves
Damage vs Wooloo View Machop builds →Vital Throw 2x92-108%KO Low Sweep 2x84-98% Revenge 2x79-93% | ||
Croagunk PoisonFighting | D | |
Scraggy DarkFighting | D | |
Stufful NormalFighting | D | |
Throh Fighting | C | |
Available Moves Moves
Damage vs Wooloo View Throh builds →Circle Throw 2x90-106%KO Revenge 2x90-106%KO | ||
Sawk Fighting | C | |
Available Moves Moves
Damage vs Wooloo View Sawk builds →Low Sweep 2x116-137%KO Rock Smash 2x71-84% Double Kick 2x56-66% | ||
Pancham Fighting | D | |
Available Moves Moves
Damage vs Wooloo View Pancham builds →Low Sweep 2x82-97% Circle Throw 2x78-93% Arm Thrust 2x22-26% | ||
Machop Fighting | D | |
Available Moves Moves
Damage vs Wooloo View Machop builds →Vital Throw 2x85-101%KO Low Sweep 2x82-97% Revenge 2x75-88% | ||
Croagunk PoisonFighting | D | |
Hawlucha Fighting | B | |
Available Moves Moves
Damage vs Wooloo View Hawlucha builds →Submission 2x117-138%KO Low Sweep 2x97-114%KO Revenge 2x87-103%KO | ||
Toxicroak PoisonFighting | C | |
Available Moves Moves
Damage vs Wooloo View Toxicroak builds →Low Sweep 2x10⁵-124%KO Revenge 2x99-117%KO | ||
Throh Fighting | C | |
Available Moves Moves
Damage vs Wooloo View Throh builds →Vital Throw 2x10⁸-128%KO Low Sweep 2x10²-121%KO Circle Throw 2x93-110%KO Revenge 2x93-110%KO | ||
Sawk Fighting | C | |
Available Moves Moves
Damage vs Wooloo View Sawk builds →Brick Break 2x140-166%KO Low Sweep 2x123-145%KO Revenge 2x114-134%KO Rock Smash 2x76-90% | ||
Machoke Fighting | D | |
Available Moves Moves
Damage vs Wooloo View Machoke builds →Vital Throw 2x10⁸-128%KO Low Sweep 2x10²-121%KO Revenge 2x93-110%KO | ||
Hawlucha Fighting | B | |
Available Moves Moves
Damage vs Wooloo View Hawlucha builds →Submission 2x118-138%KO Low Sweep 2x95-112%KO Revenge 2x89-105%KO | ||
Toxicroak PoisonFighting | C | |
Available Moves Moves
Damage vs Wooloo View Toxicroak builds →Low Sweep 2x10⁵-125%KO Revenge 2x100-119%KO | ||
Passimian Fighting | C | |
Available Moves Moves
Damage vs Wooloo View Passimian builds →Low Sweep 2x118-138%KO Revenge 2x10⁹-129%KO Rock Smash 2x75-89% | ||
Throh Fighting | C | |
Available Moves Moves
Damage vs Wooloo View Throh builds →Vital Throw 2x10⁹-129%KO Low Sweep 2x10³-122%KO Circle Throw 2x95-112%KO Revenge 2x95-112%KO | ||
Sawk Fighting | C | |
Available Moves Moves
Damage vs Wooloo View Sawk builds →Brick Break 2x140-165%KO Low Sweep 2x123-145%KO Revenge 2x114-135%KO Rock Smash 2x78-92% | ||
Hawlucha Fighting | B | |
Available Moves Moves
Damage vs Wooloo View Hawlucha builds →Submission 2x112-132%KO Brick Break 2x10⁷-126%KO Low Sweep 2x91-108%KO Revenge 2x86-102%KO | ||
Bewear NormalFighting | C | |
Available Moves Moves
Damage vs Wooloo View Bewear builds →Hammer Arm 2x181-213%KO Brick Break 2x135-159%KO Low Sweep 2x117-138%KO Revenge 2x10⁹-129%KO | ||
Toxicroak PoisonFighting | C | |
Available Moves Moves
Damage vs Wooloo View Toxicroak builds →Brick Break 2x119-141%KO Low Sweep 2x10⁴-123%KO Revenge 2x96-114%KO | ||
Passimian Fighting | C | |
Available Moves Moves
Damage vs Wooloo View Passimian builds →Brick Break 2x130-153%KO Low Sweep 2x114-135%KO Revenge 2x10⁴-123%KO Rock Smash 2x71-84% | ||
Falinks Fighting | C | |
Available Moves Moves
Damage vs Wooloo View Falinks builds →Brick Break 2x114-135%KO Revenge 2x91-108%KO Rock Smash 2x61-72% | ||
Hawlucha Fighting | B | |
Available Moves Moves
Damage vs Wooloo View Hawlucha builds →Flying Press 2x141-167%KO Submission 2x113-133%KO Brick Break 2x10⁸-127%KO Low Sweep 2x92-110%KO | ||
Bewear NormalFighting | C | |
Available Moves Moves
Damage vs Wooloo View Bewear builds →Hammer Arm 2x181-213%KO Brick Break 2x137-162%KO Low Sweep 2x119-141%KO Revenge 2x110-130%KO | ||
Toxicroak PoisonFighting | C | |
Available Moves Moves
Damage vs Wooloo View Toxicroak builds →Brick Break 2x119-141%KO Low Sweep 2x10³-121%KO Revenge 2x95-113%KO | ||
Passimian Fighting | C | |
Available Moves Moves
Damage vs Wooloo View Passimian builds →Brick Break 2x132-156%KO Low Sweep 2x114-136%KO Revenge 2x10⁸-127%KO Rock Smash 2x73-87% | ||
Falinks Fighting | C | |
Available Moves Moves
Damage vs Wooloo View Falinks builds →Brick Break 2x114-136%KO Revenge 2x92-110%KO Rock Smash 2x63-75% | ||
Hawlucha Fighting | B | |
Available Moves Moves
Damage vs Wooloo View Hawlucha builds →High Jump Kick 2x187-220%KO Flying Press 2x146-173%KO Submission 2x117-138%KO Brick Break 2x110-130%KO | ||
Bewear NormalFighting | C | |
Available Moves Moves
Damage vs Wooloo View Bewear builds →Hammer Arm 2x187-220%KO Brick Break 2x140-165%KO Low Sweep 2x121-143%KO Revenge 2x112-133%KO | ||
Pangoro FightingDark | C | |
Available Moves Moves
Damage vs Wooloo View Pangoro builds →Brick Break 2x140-165%KO Vital Throw 2x130-154%KO Low Sweep 2x121-143%KO Circle Throw 2x112-133%KO | ||
Toxicroak PoisonFighting | C | |
Available Moves Moves
Damage vs Wooloo View Toxicroak builds →Brick Break 2x121-143%KO Low Sweep 2x10⁵-125%KO Revenge 2x99-117%KO | ||
Passimian Fighting | C | |
Available Moves Moves
Damage vs Wooloo View Passimian builds →Brick Break 2x137-162%KO Low Sweep 2x119-141%KO Revenge 2x110-130%KO Rock Smash 2x74-88% | ||
In Sword & Shield, Buzzwole can KO Wooloo with Close Combat (295-347%).
Buzzwole BugFighting | B | |
Recommended Build AbilityBeastboost ItemRocky Helmet NatureAdamant Moves
Damage vs Wooloo View Buzzwole builds →Close Combat 2x295-347%KO Earthquake82-96% | ||
Urshifu FightingDark | C | |
Fighting is super effective against WoolooView Urshifu → | ||
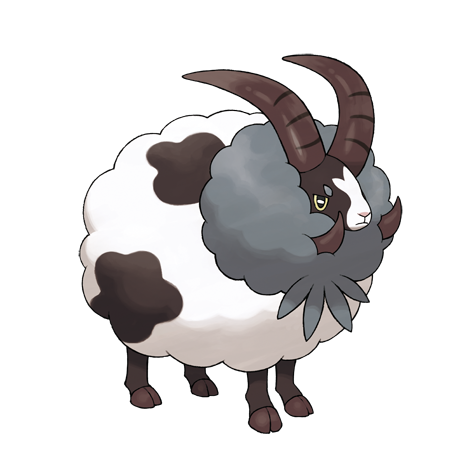
Sword & Shield Evolution
Wooloo evolves into Dubwool. It's a two-stage chain with the method shown below. A massive partner pool for breeding via one egg group. Eggs are quick to hatch. The evolved forms gain up to 220 total stats over Wooloo. View every chain in the Evolution Chart.
How to Evolve
Breeding
Breed Wooloo easily with 152 breeding partners from the Ground egg group. Pass egg moves like Counter, Stomp, Swagger to offspring.


Sword & Shield Wooloo Best Moveset
Best Build
No build content available for this Pokemon in Gen 8.
Try selecting a different game/generation filter, or check back later.
Moves
The natural movepool does the job, but Counter and Stomp from the egg pool give Wooloo something extra. Pair those with Double-Edge and Take Down for STAB and Fighting and Electric coverage and more for reach, and the kit fills out nicely.
Level-Up Moves
TM Moves
Egg Moves
Tutor Moves
Sword & Shield Wooloo Locations
Wooloo's scattered across 28 spots in early-game routes with decent spawn rates. Check the list below for the closest location to wherever you are in the game. This one's quick.
Best Locations to Catch Wooloo in Sword & Shield
walking encounters for Wooloo across 28 spots at Lv. 3-65. The catch is that Shield and Sword don't share every location, so compare what's available in your version.
Wooloo Guide
Get Wooloo to Dubwool at level 24. At 270 BST, Wooloo is just the starting point.
Level 24 gets you Dubwool. Not the fastest evolution, so consider Exp. Share or route grinding to speed it up.
In Sword & Shield, Wooloo does the job early-game if you need a Normal type on your team. Evolve it into Dubwool before the later gyms and it holds up fine through the story.
You can find Wooloo in Sword & Shield. The Locations section has the full breakdown of routes and encounter details.
Game Availability
Introduced in Sword & Shield, Wooloo has appeared in 1 games across 3 generations. Later debuts mean fewer total appearances, but it's been a consistent presence since its introduction.
Click a game to view version-specific details
- Gen 1Y
 Yellow
 - Gen 1RB

 Red & Blue
 - Gen 2GS

 Gold & Silver
 - Gen 2C
 Crystal
 - Gen 3RS

 Ruby & Sapphire
 - Gen 3FRLG

 FireRed & LeafGreen
 - Gen 3E
 Emerald
 - Gen 4Pt
 Platinum
 - Gen 4HGSS

 HeartGold & SoulSilver
 - Gen 4DP

 Diamond & Pearl
 - Gen 5BW

 Black & White
 - Gen 5B2W2

 Black 2 & White 2
 - Gen 6XY

 X & Y
X & Y - Gen 6ORAS

 Omega Ruby & Alpha Sapphire
 - Gen 7USUM

 Ultra Sun & Ultra Moon
 - Gen 7SM

 Sun & Moon
 - Gen 7LGPE

 Let's Go Pikachu & Eevee
 - Gen 8SwShDebut

 Sword & Shield
 - Gen 8PLA
 Legends: Arceus
 - Gen 8BDSP

 Brilliant Diamond & Shining Pearl
 - Gen 9SV

 Scarlet & Violet
 - Gen 9LZA
 Legends: Z-A
 - Gen 10WW

 Winds & Waves