
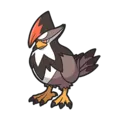
Stats & Training
Starly's spread isn't flashy. Speed leads, Defense trails, 0 stats clear the bar. Easy to catch and worth 1 Speed EV, on a 1.06M XP medium-slow curve.
They flock in great numbers. Though small, they flap their wings with great power.
Usually with a large flock, it is barely noticeable when alone. Its cries are very strident.
Starly Weakness
Starly is weak to Electric, Ice, and Rock. On the flip side, it's immune to Ground and Ghost-type moves entirely.
| Damage | Types |
|---|---|
| 2x (Weak) | Electric, Ice, Rock |
| 0.5x (Resist) | Grass, Bug |
| 0x (Immune) | Ground, Ghost |
Onix RockGround | C | |
Available Moves Moves
Damage vs Starly View Onix builds →Stone Edge 2x129-155%KO Rock Slide 2x97-116%KO Rock Tomb 2x81-97% Rock Throw 2x71-87% | ||
Geodude RockGround | C | |
Available Moves Moves
Damage vs Starly View Geodude builds →Stone Edge 2x181-213%KO Rock Slide 2x139-165%KO Rock Tomb 2x113-135%KO Rollout 2x65-77% | ||
Shinx Electric | D | |
Available Moves Moves
Damage vs Starly View Shinx builds →Volt Switch 2x90-106%KO Shock Wave 2x81-97% Charge Beam 2x65-77% Thunder Shock 2x55-68% | ||
Onix RockGround | C | |
Available Moves Moves
Damage vs Starly View Onix builds →Stone Edge 2x123-146%KO Rock Slide 2x94-111%KO Rock Tomb 2x80-94% Rock Throw 2x63-77% | ||
Geodude RockGround | C | |
Available Moves Moves
Damage vs Starly View Geodude builds →Stone Edge 2x166-197%KO Rock Slide 2x129-154%KO Rock Tomb 2x100-120%KO Rollout 2x57-69% | ||
Pachirisu Electric | C | |
Available Moves Moves
Damage vs Starly View Pachirisu builds →Thunderbolt 2x10⁹-129%KO Volt Switch 2x86-103%KO Shock Wave 2x80-94% Charge Beam 2x63-77% | ||
Electrike Electric | D | |
Available Moves Moves
Damage vs Starly View Electrike builds →Thunderbolt 2x137-163%KO Volt Switch 2x10⁹-129%KO Shock Wave 2x94-111%KO Charge Beam 2x80-94% | ||
Shinx Electric | D | |
Available Moves Moves
Damage vs Starly View Shinx builds →Thunderbolt 2x100-120%KO Volt Switch 2x86-103%KO Shock Wave 2x71-86% Charge Beam 2x63-77% | ||
Graveler RockGround | C | |
Available Moves Moves
Damage vs Starly View Graveler builds →Stone Edge 2x223-263%KO Rock Slide 2x167-197%KO Rock Tomb 2x136-160%KO Rock Throw 2x115-136%KO | ||
Onix RockGround | C | |
Available Moves Moves
Damage vs Starly View Onix builds →Stone Edge 2x129-152%KO Rock Slide 2x97-115%KO Rock Tomb 2x79-95% Rock Throw 2x66-78% | ||
Pachirisu Electric | C | |
Available Moves Moves
Damage vs Starly View Pachirisu builds →Thunder 2x142-168%KO Thunderbolt 2x118-140%KO Volt Switch 2x93-111%KO Spark 2x86-103%KO | ||
Nosepass Rock | C | |
Available Moves Moves
Damage vs Starly View Nosepass builds →Thunder 2x95-112%KO Stone Edge 2x129-152%KO Thunderbolt 2x78-93% Power Gem 2x10⁴-123%KO | ||
Electrike Electric | D | |
Available Moves Moves
Damage vs Starly View Electrike builds →Thunder 2x185-218%KO Thunderbolt 2x149-177%KO Volt Switch 2x118-140%KO Thunder Fang 2x86-103%KO | ||
Sudowoodo Rock | C | |
Available Moves Moves
Damage vs Starly View Sudowoodo builds →Stone Edge 2x230-271%KO Rock Slide 2x174-205%KO Rock Tomb 2x140-164%KO Rock Throw 2x118-140%KO | ||
Graveler RockGround | C | |
Available Moves Moves
Damage vs Starly View Graveler builds →Stone Edge 2x223-263%KO Rock Slide 2x167-197%KO Rock Tomb 2x136-160%KO Rock Throw 2x115-136%KO | ||
Onix RockGround | C | |
Available Moves Moves
Damage vs Starly View Onix builds →Stone Edge 2x129-152%KO Rock Slide 2x97-115%KO Rock Tomb 2x79-95% Rock Throw 2x66-78% | ||
Pachirisu Electric | C | |
Available Moves Moves
Damage vs Starly View Pachirisu builds →Thunder 2x142-168%KO Thunderbolt 2x118-140%KO Volt Switch 2x93-111%KO Spark 2x86-103%KO | ||
Nosepass Rock | C | |
Available Moves Moves
Damage vs Starly View Nosepass builds →Thunder 2x95-112%KO Stone Edge 2x129-152%KO Thunderbolt 2x78-93% Power Gem 2x10⁴-123%KO | ||
Sudowoodo Rock | C | |
Available Moves Moves
Damage vs Starly View Sudowoodo builds →Stone Edge 2x233-275%KO Rock Slide 2x176-208%KO Rock Tomb 2x140-166%KO Rock Throw 2x120-141%KO | ||
Graveler RockGround | C | |
Available Moves Moves
Damage vs Starly View Graveler builds →Stone Edge 2x221-261%KO Rock Slide 2x167-198%KO Rock Tomb 2x134-159%KO Rock Throw 2x113-134%KO | ||
Onix RockGround | C | |
Available Moves Moves
Damage vs Starly View Onix builds →Stone Edge 2x128-152%KO Rock Slide 2x99-116%KO Rock Tomb 2x78-92% Rock Throw 2x66-78% | ||
Pachirisu Electric | C | |
Available Moves Moves
Damage vs Starly View Pachirisu builds →Thunder 2x140-166%KO Thunderbolt 2x116-138%KO Volt Switch 2x93-109%KO Spark 2x84-99% | ||
Nosepass Rock | C | |
Available Moves Moves
Damage vs Starly View Nosepass builds →Thunder 2x93-111%KO Stone Edge 2x128-152%KO Thunderbolt 2x78-92% Power Gem 2x10⁵-124%KO | ||
Sudowoodo Rock | C | |
Available Moves Moves
Damage vs Starly View Sudowoodo builds →Stone Edge 2x227-267%KO Rock Slide 2x172-202%KO Rock Tomb 2x138-163%KO Rock Throw 2x116-137%KO | ||
Graveler RockGround | C | |
Available Moves Moves
Damage vs Starly View Graveler builds →Stone Edge 2x218-258%KO Rock Slide 2x166-196%KO Rock Tomb 2x133-157%KO Rock Throw 2x111-130%KO | ||
Onix RockGround | C | |
Available Moves Moves
Damage vs Starly View Onix builds →Stone Edge 2x127-150%KO Rock Slide 2x97-114%KO Rock Tomb 2x77-91% Rock Throw 2x66-78% | ||
Magnemite ElectricSteel | C | |
Available Moves Moves
Damage vs Starly View Magnemite builds →Thunder 2x240-284%KO Thunderbolt 2x197-232%KO Discharge 2x174-205%KO Volt Switch 2x154-183%KO | ||
Pachirisu Electric | C | |
Available Moves Moves
Damage vs Starly View Pachirisu builds →Thunder 2x138-163%KO Thunderbolt 2x113-134%KO Volt Switch 2x88-104%KO Spark 2x83-98% | ||
Sudowoodo Rock | C | |
Available Moves Moves
Damage vs Starly View Sudowoodo builds →Stone Edge 2x226-266%KO Rock Slide 2x171-202%KO Rock Tomb 2x138-162%KO Rock Throw 2x114-135%KO | ||
Graveler RockGround | C | |
Available Moves Moves
Damage vs Starly View Graveler builds →Stone Edge 2x215-254%KO Rock Slide 2x161-190%KO Rock Tomb 2x130-153%KO Rock Throw 2x10⁹-129%KO | ||
Onix RockGround | C | |
Available Moves Moves
Damage vs Starly View Onix builds →Stone Edge 2x124-147%KO Rock Slide 2x93-110%KO Rock Tomb 2x74-89% Rock Throw 2x64-77% | ||
Magnemite ElectricSteel | C | |
Available Moves Moves
Damage vs Starly View Magnemite builds →Thunder 2x237-279%KO Thunderbolt 2x195-230%KO Discharge 2x171-202%KO Volt Switch 2x150-178%KO | ||
Pachirisu Electric | C | |
Available Moves Moves
Damage vs Starly View Pachirisu builds →Thunder 2x135-159%KO Thunderbolt 2x111-132%KO Discharge 2x98-116%KO Volt Switch 2x88-104%KO | ||
In Brilliant Diamond & Shining Pearl, Tyranitar can KO Starly with Stone Edge (611-719%). Mamoswine threatens a KO with Ice Shard (190-224%). Jolteon's Thunder also KOs at 533-627%.
Tyranitar RockDark | A | |
Recommended Build AbilitySand Stream ItemChoice Band NatureAdamant Moves
Damage vs Starly View Tyranitar builds →Crunch244-288%KO Stone Edge 2x611-719%KO | ||
Mamoswine IceGround | B | |
Recommended Build AbilityThickfat ItemLife Orb NatureJolly Moves
Damage vs Starly View Mamoswine builds →Ice Shard 2x190-224%KO Knock Off103-121%KO | ||
Jolteon Electric | B | |
Recommended Build AbilityVoltabsorb ItemChoice Specs NatureTimid Moves
Damage vs Starly View Jolteon builds →Thunder 2x533-627%KO | ||
Lapras WaterIce | C | |
Recommended Build AbilityHydration ItemLeftovers NatureModest Moves
Damage vs Starly View Lapras builds →Surf135-159%KO | ||
Brilliant Diamond & Shining Pearl Evolution
Starly is the start of a three-stage chain. It evolves into Staravia first, then eventually reaches Staraptor. For breeding, quick to hatch with a decent partner pool via one egg group. Evolving adds up to 240 stat points total. View every chain in the Evolution Chart.
How to Evolve


Breeding
Breed Starly easily with 31 breeding partners from the Flying egg group. Pass egg moves like Astonish, Detect, Double-Edge and 5 more to offspring.


Brilliant Diamond & Shining Pearl Starly Best Moveset
Focus Sash guarantees Starly survives one hit from full HP. That's enough to deal early damage and fire off Endeavor before going down. Keeneye and flexible EVs maximize first-turn impact.
Best Build
Utility Moveset
- Unknown
- Endeavor
- Brave Bird
- Agility
Moves
Egg moves make a real difference. Starly gets Astonish and Detect exclusively through breeding, filling gaps that TMs and level-up can't touch. Fighting and Steel coverage and more rounds out the picture alongside Brave Bird and Double-Edge.
Level-Up Moves
TM Moves
Egg Moves
Tutor Moves
Brilliant Diamond & Shining Pearl Starly Locations
Easy grab on Starly with high spawn rates across 44 locations in early-game routes. The sorted list below shows the full spread so you can pick the most convenient spot.
Best Locations to Catch Starly in Brilliant Diamond & Shining Pearl
Which version you're playing matters for Starly. 44 walking spots at Lv. 2-26 spread across Shining Pearl and Brilliant Diamond, and some routes only appear in one cartridge. Check the version badges below.
Starly Guide
Starly evolves into Staravia at level 14. Early evolution, you'll hit it before the third gym in most games.
In Brilliant Diamond & Shining Pearl, Starly does the job early-game if you need a Normal/Flying type on your team. Evolve it into Staravia before the later gyms and it holds up fine through the story.
Starly is catchable in Brilliant Diamond & Shining Pearl. Check the Locations section above for specific routes, encounter rates, and methods. It also appears in 12 other games across the series.
Game Availability
Starly first appeared in Diamond & Pearl and has been available in 13 games across 7 generations. Obtainable through catching or hatching as a base form in most titles where it appears.
Click a game to view version-specific details
- Gen 1Y
 Yellow
 - Gen 1RB

 Red & Blue
 - Gen 2GS

 Gold & Silver
 - Gen 2C
 Crystal
 - Gen 3RS

 Ruby & Sapphire
 - Gen 3FRLG

 FireRed & LeafGreen
 - Gen 3E
 Emerald
 - Gen 4Pt
 Platinum
 - Gen 4HGSS

 HeartGold & SoulSilver
 - Gen 4DPDebut

 Diamond & Pearl
 - Gen 5BW

 Black & White
 - Gen 5B2W2

 Black 2 & White 2
 - Gen 6XY

 X & Y
X & Y - Gen 6ORAS

 Omega Ruby & Alpha Sapphire
 - Gen 7USUM

 Ultra Sun & Ultra Moon
 - Gen 7SM

 Sun & Moon
 - Gen 7LGPE

 Let's Go Pikachu & Eevee
 - Gen 8SwSh

 Sword & Shield
 - Gen 8PLA
 Legends: Arceus
 - Gen 8BDSP

 Brilliant Diamond & Shining Pearl
 - Gen 9SV

 Scarlet & Violet
 - Gen 9LZA
 Legends: Z-A
 - Gen 10WW

 Winds & Waves