
Stats & Training
Speed and Sp. Atk carry most of Salandit's stat budget. Defense's the obvious dump stat. Common in the wild and yields 1 Speed EV. Follows a medium-fast 1M XP curve.
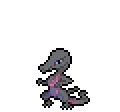
Its venom sacs produce a fluid that this Pokémon then heats up with the flame in its tail. This process creates Salandit’s poisonous gas.
This sneaky Pokémon will slink behind its prey and immobilize it with poisonous gas before the prey even realizes Salandit is there.
Salandit Weakness
Ground, Water, Psychic, and Rock moves hit Salandit for super-effective damage. Ground hits land at 4x, so they're the biggest threat. With 8 resistances, the defensive profile is strong.
| Damage | Types |
|---|---|
| 4x (Critical) | Ground |
| 2x (Weak) | Water, Psychic, Rock |
| 0.5x (Resist) | Fire, Ice, Fighting, Poison, Steel |
| 0.25x (Resist) | Grass, Bug, Fairy |
Stunfisk GroundElectric | A | |
Available Moves Moves
Damage vs Salandit View Stunfisk builds →Mud Shot 4x175-207%KO Water Gun 2x42-51% Mud-Slap 4x73-87% | ||
Diggersby NormalGround | B | |
Available Moves Moves
Damage vs Salandit View Diggersby builds →Mud Shot 4x129-153%KO Mud-Slap 4x55-65% | ||
Onix RockGround | C | |
Available Moves Moves
Damage vs Salandit View Onix builds →Rock Slide 2x82-98% Rock Throw 2x55-65% Smack Down 2x55-65% Rock Blast 2x31-38% | ||
Wooper WaterGround | C | |
Available Moves Moves
Damage vs Salandit View Wooper builds →Mud Shot 4x93-109%KO Water Gun 2x36-44% | ||
Palpitoad WaterGround | D | |
Available Moves Moves
Damage vs Salandit View Palpitoad builds →Bubble Beam 2x87-104%KO Mud Shot 4x156-185%KO | ||
Stunfisk GroundElectric | A | |
Available Moves Moves
Damage vs Salandit View Stunfisk builds →Mud Shot 4x167-197%KO Water Gun 2x42-50% Mud-Slap 4x70-84% | ||
Diggersby NormalGround | B | |
Available Moves Moves
Damage vs Salandit View Diggersby builds →Bulldoze 4x142-169%KO Mud Shot 4x127-150%KO Sand Tomb 4x88-103%KO Mud-Slap 4x55-66% | ||
Onix RockGround | C | |
Available Moves Moves
Damage vs Salandit View Onix builds →Rock Slide 2x80-94% Rock Throw 2x55-66% Smack Down 2x55-66% Sand Tomb 4x80-94% | ||
Wooper WaterGround | C | |
Available Moves Moves
Damage vs Salandit View Wooper builds →Aqua Tail 2x91-108%KO Mud Shot 4x88-103%KO Water Gun 2x31-38% Whirlpool 2x27-33% | ||
Palpitoad WaterGround | D | |
Available Moves Moves
Damage vs Salandit View Palpitoad builds →Bubble Beam 2x83-98% Mud Shot 4x142-169%KO | ||
Stunfisk GroundElectric | A | |
Available Moves Moves
Damage vs Salandit View Stunfisk builds →Mud Shot 4x172-203%KO Water Gun 2x42-51% Mud-Slap 4x72-85% | ||
Diggersby NormalGround | B | |
Available Moves Moves
Damage vs Salandit View Diggersby builds →Bulldoze 4x144-169%KO Mud Shot 4x121-144%KO Sand Tomb 4x86-101%KO Mud-Slap 4x49-59% | ||
Onix RockGround | C | |
Available Moves Moves
Damage vs Salandit View Onix builds →Rock Slide 2x75-89% Rock Throw 2x54-63% Smack Down 2x54-63% Sand Tomb 4x79-93% | ||
Wooper WaterGround | C | |
Available Moves Moves
Damage vs Salandit View Wooper builds →Aqua Tail 2x89-106%KO Mud Shot 4x86-101%KO Water Gun 2x31-38% Whirlpool 2x28-34% | ||
Palpitoad WaterGround | D | |
Available Moves Moves
Damage vs Salandit View Palpitoad builds →Bubble Beam 2x86-101%KO Mud Shot 4x144-169%KO | ||
Quagsire WaterGround | C | |
Available Moves Moves
Damage vs Salandit View Quagsire builds →Aqua Tail 2x145-171%KO Muddy Water 2x118-138%KO Dig 4x257-303%KO Mud Shot 4x145-171%KO | ||
Onix RockGround | C | |
Available Moves Moves
Damage vs Salandit View Onix builds →Dig 4x162-191%KO Rock Slide 2x78-92% Rock Throw 2x53-63% Smack Down 2x53-63% | ||
Rhyhorn GroundRock | C | |
Available Moves Moves
Damage vs Salandit View Rhyhorn builds →Drill Run 4x257-303%KO Dig 4x257-303%KO Bulldoze 4x196-231%KO Mud Shot 4x89-105%KO | ||
Palpitoad WaterGround | D | |
Available Moves Moves
Damage vs Salandit View Palpitoad builds →Bubble Beam 2x87-102%KO Mud Shot 4x145-171%KO | ||
Barboach WaterGround | D | |
Obtain MethodNorth Lake Miloch Surfing Available Moves Moves
Damage vs Salandit View Barboach builds →Earthquake 4x212-251%KO Aqua Tail 2x95-112%KO Muddy Water 2x95-112%KO Water Pulse 2x64-76% | ||
Quagsire WaterGround | C | |
Available Moves Moves
Damage vs Salandit View Quagsire builds →Aqua Tail 2x143-169%KO Muddy Water 2x117-138%KO Dig 4x254-300%KO Mud Shot 4x148-175%KO | ||
Onix RockGround | C | |
Available Moves Moves
Damage vs Salandit View Onix builds →Dig 4x159-188%KO Rock Slide 2x76-91% Rock Throw 2x53-63% Smack Down 2x53-63% | ||
Rhyhorn GroundRock | C | |
Available Moves Moves
Damage vs Salandit View Rhyhorn builds →Drill Run 4x254-300%KO Dig 4x254-300%KO Bulldoze 4x196-231%KO Mud Shot 4x90-106%KO | ||
Palpitoad WaterGround | D | |
Available Moves Moves
Damage vs Salandit View Palpitoad builds →Bubble Beam 2x88-103%KO Mud Shot 4x148-175%KO | ||
Barboach WaterGround | D | |
Obtain MethodNorth Lake Miloch Surfing Available Moves Moves
Damage vs Salandit View Barboach builds →Earthquake 4x213-250%KO Aqua Tail 2x95-113%KO Muddy Water 2x93-109%KO Water Pulse 2x64-75% | ||
Hippowdon Ground | A | |
Available Moves Moves
Damage vs Salandit View Hippowdon builds →Dig 4x315-371%KO Bulldoze 4x237-280%KO Mud Shot 4x150-177%KO Sand Tomb 4x140-166%KO | ||
Seismitoad WaterGround | C | |
Available Moves Moves
Damage vs Salandit View Seismitoad builds →Dig 4x271-320%KO Bubble Beam 2x10²-120%KO Bulldoze 4x209-246%KO Mud Shot 4x174-206%KO | ||
Quagsire WaterGround | C | |
Available Moves Moves
Damage vs Salandit View Quagsire builds →Aqua Tail 2x140-166%KO Muddy Water 2x113-134%KO Dig 4x252-297%KO Bulldoze 4x189-223%KO | ||
Onix RockGround | C | |
Available Moves Moves
Damage vs Salandit View Onix builds →Dig 4x160-189%KO Rock Slide 2x75-89% Bulldoze 4x121-143%KO Rock Throw 2x50-60% | ||
Rhyhorn GroundRock | C | |
Available Moves Moves
Damage vs Salandit View Rhyhorn builds →Drill Run 4x252-297%KO Dig 4x252-297%KO Bulldoze 4x189-223%KO Mud Shot 4x87-103%KO | ||
Gastrodon WaterGround | B | |
Available Moves Moves
Damage vs Salandit View Gastrodon builds →Muddy Water 2x151-179%KO Earth Power 4x304-358%KO Dive 2x126-149%KO Dig 4x252-297%KO | ||
Seismitoad WaterGround | C | |
Available Moves Moves
Damage vs Salandit View Seismitoad builds →Dive 2x140-165%KO Dig 4x281-330%KO Rock Slide 2x87-103%KO Bubble Beam 2x10⁵-124%KO | ||
Quagsire WaterGround | C | |
Available Moves Moves
Damage vs Salandit View Quagsire builds →Aqua Tail 2x145-171%KO Muddy Water 2x117-138%KO Dig 4x257-303%KO Dive 2x128-151%KO | ||
Onix RockGround | C | |
Available Moves Moves
Damage vs Salandit View Onix builds →Dig 4x163-193%KO Rock Slide 2x77-91% Bulldoze 4x121-143%KO Rock Tomb 2x61-72% | ||
Rhyhorn GroundRock | C | |
Available Moves Moves
Damage vs Salandit View Rhyhorn builds →Drill Run 4x257-303%KO Dig 4x257-303%KO Rock Slide 2x121-143%KO Bulldoze 4x196-231%KO | ||
Rhydon GroundRock | S | |
Available Moves Moves
Damage vs Salandit View Rhydon builds →Earthquake 4x458-539%KO Drill Run 4x367-432%KO Dig 4x367-432%KO Rock Slide 2x173-203%KO | ||
Gastrodon WaterGround | B | |
Available Moves Moves
Damage vs Salandit View Gastrodon builds →Muddy Water 2x155-183%KO Earth Power 4x311-366%KO Dive 2x127-150%KO Dig 4x254-300%KO | ||
Flygon GroundDragon | C | |
Available Moves Moves
Damage vs Salandit View Flygon builds →Earthquake 4x367-432%KO Earth Power 4x276-325%KO Dig 4x293-346%KO Rock Slide 2x92-108%KO | ||
Seismitoad WaterGround | C | |
Available Moves Moves
Damage vs Salandit View Seismitoad builds →Dive 2x142-168%KO Dig 4x285-336%KO Rock Slide 2x89-105%KO Stomping Tantrum 4x268-315%KO | ||
Quagsire WaterGround | C | |
Available Moves Moves
Damage vs Salandit View Quagsire builds →Aqua Tail 2x144-170%KO Muddy Water 2x119-140%KO Dig 4x259-305%KO Dive 2x130-153%KO | ||
In Sword & Shield, Hatterene can KO Salandit with Psychic (287-338%). Tyranitar threatens a KO with Earthquake (630-741%). Excadrill's Earthquake also KOs at 578-681%.
Hatterene PsychicFairy | A | |
Recommended Build AbilityMagic Bounce ItemLeftovers NatureQuiet Moves
Damage vs Salandit View Hatterene builds →Dazzling Gleam32-38% Psychic 2x287-338%KO | ||
Tyranitar RockDark | A | |
Recommended Build AbilitySand Stream ItemChoice Band NatureAdamant Moves
Damage vs Salandit View Tyranitar builds →Crunch189-222%KO Stone Edge 2x472-556%KO Earthquake 4x630-741%KO | ||
Excadrill GroundSteel | A | |
Recommended Build AbilityMold Breaker ItemLeftovers NatureJolly Moves
Damage vs Salandit View Excadrill builds →Earthquake 4x578-681%KO Rapid Spin48-57% | ||
Krookodile GroundDark | B | |
Recommended Build AbilityIntimidate ItemChoice Scarf NatureJolly Moves
Damage vs Salandit View Krookodile builds →Earthquake 4x492-580%KO Knock Off80-94% | ||
Slowbro WaterPsychic | B | |
Recommended Build AbilityRegenerator ItemHeavy-Duty Boots NatureRelaxed Moves
Damage vs Salandit View Slowbro builds →Scald 2x148-175%KO | ||
Sword & Shield Evolution
One evolution ahead. Salandit grows into Salazzle through a straightforward two-stage chain. Plenty of partners for breeding via two egg groups. Eggs are average hatch time. The evolved forms gain up to 160 total stats over Salandit. View every chain in the Evolution Chart.
How to Evolve
Breeding
Breed Salandit easily with 63 breeding partners from the Dragon and Monster egg groups. Pass egg moves like Belch, Fake Out, Mud-Slap and 1 more to offspring.


Sword & Shield Salandit Best Moveset
Best Build
No build content available for this Pokemon in Gen 8.
Try selecting a different game/generation filter, or check back later.
Moves
Without breeding, Salandit misses out on Belch and Fake Out. That's 4 egg moves adding depth that the base kit lacks. STAB comes from Overheat and Gunk Shot, with coverage across 7 types rounding things out.
Level-Up Moves
TM Moves
Egg Moves
Tutor Moves
Sword & Shield Salandit Locations
Easy grab on Salandit with decent spawn rates across 25 locations in early-game routes. The sorted list below shows the full spread so you can pick the most convenient spot.
Best Locations to Catch Salandit in Sword & Shield
Before you go hunting for Salandit, check which of the 25 spots belong to your version. Shield and Sword each have different walking encounters at Lv. 10-30.
Salandit Guide
Get Salandit to Salazzle at level 33. At 320 BST, Salandit is just the starting point.
Level 33 gets you Salazzle. Not the fastest evolution, so consider Exp. Share or route grinding to speed it up.
For Sword & Shield, you can run Salandit through the first few routes without issues. 320 BST won't carry you far though. Get it to Salazzle as fast as you can.
You can find Salandit in Sword & Shield. The Locations section has the full breakdown of routes and encounter details. It also appears in 3 other games across the series.
Game Availability
Salandit joined the series in Sun & Moon and has been available in 4 titles so far. With 4 generations of appearances, it's established itself despite the later start.
Click a game to view version-specific details
- Gen 1Y
 Yellow
 - Gen 1RB

 Red & Blue
 - Gen 2GS

 Gold & Silver
 - Gen 2C
 Crystal
 - Gen 3RS

 Ruby & Sapphire
 - Gen 3FRLG

 FireRed & LeafGreen
 - Gen 3E
 Emerald
 - Gen 4Pt
 Platinum
 - Gen 4HGSS

 HeartGold & SoulSilver
 - Gen 4DP

 Diamond & Pearl
 - Gen 5BW

 Black & White
 - Gen 5B2W2

 Black 2 & White 2
 - Gen 6XY

 X & Y
X & Y - Gen 6ORAS

 Omega Ruby & Alpha Sapphire
 - Gen 7USUM

 Ultra Sun & Ultra Moon
 - Gen 7SMDebut

 Sun & Moon
 - Gen 7LGPE

 Let's Go Pikachu & Eevee
 - Gen 8SwSh

 Sword & Shield
 - Gen 8PLA
 Legends: Arceus
 - Gen 8BDSP

 Brilliant Diamond & Shining Pearl
 - Gen 9SV

 Scarlet & Violet
 - Gen 9LZA
 Legends: Z-A
 - Gen 10WW

 Winds & Waves