Stats & Training
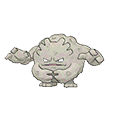
Graveler's all-in on Defense at the expense of Speed. The physical lean is obvious from the bars. Yields 0 HP EVs and follows a 1.06M XP medium-slow curve.
Graveler grows by feeding on rocks. Apparently, it prefers to eat rocks that are covered in moss. This Pokemon eats its way through a ton of rocks on a daily basis.
Graveler Weakness
Graveler's Rock/Ground typing leaves it vulnerable to Water, Grass, Ice, Fighting, Ground, and Steel. Water and Grass hits land at 4x, so they're the biggest threat. It shrugs off Electric-type attacks completely. It resists 5 types, giving it decent defensive coverage. Graveler's physical bulk (base 115 Def) helps cushion physical weakness hits, but special attackers are the bigger threat.
| Damage | Types |
|---|---|
| 4x (Critical) | Water, Grass |
| 2x (Weak) | Ice, Fighting, Ground, Steel |
| 0.5x (Resist) | Normal, Fire, Flying, Rock |
| 0.25x (Resist) | Poison |
| 0x (Immune) | Electric |
Chikorita Grass | D | |
Obtain MethodRoute 101 Gift | ||
Turtwig Grass | D | |
Obtain MethodRoute 101 Gift Available Moves Moves
Damage vs Graveler View Turtwig builds →Razor Leaf 4x81-98% Absorb 4x47-56% | ||
Treecko Grass | D | |
Obtain MethodRoute 101 Gift Available Moves Moves
Damage vs Graveler View Treecko builds →Mega Drain 4x10⁵-126%KO Absorb 4x58-70% | ||
Snivy Grass | D | |
Obtain MethodRoute 101 Gift | ||
Shroomish Grass | D | |
Available Moves Moves
Damage vs Graveler View Shroomish builds →Mega Drain 4x81-98% Absorb 4x47-56% | ||
Chikorita Grass | D | |
Obtain MethodRoute 101 Gift | ||
Turtwig Grass | D | |
Obtain MethodRoute 101 Gift Available Moves Moves
Damage vs Graveler View Turtwig builds →Razor Leaf 4x73-88% Absorb 4x52-63% | ||
Treecko Grass | D | |
Obtain MethodRoute 101 Gift Available Moves Moves
Damage vs Graveler View Treecko builds →Mega Drain 4x10⁶-125%KO Absorb 4x63-75% | ||
Sewaddle BugGrass | D | |
Snivy Grass | D | |
Obtain MethodRoute 101 Gift Available Moves Moves
Damage vs Graveler View Snivy builds →Leaf Tornado 4x127-150%KO Vine Whip 4x52-63% | ||
Chikorita Grass | D | |
Obtain MethodRoute 101 Gift Available Moves Moves
Damage vs Graveler View Chikorita builds →Magical Leaf 4x113-134%KO Razor Leaf 4x60-72% | ||
Turtwig Grass | D | |
Obtain MethodRoute 101 Gift Available Moves Moves
Damage vs Graveler View Turtwig builds →Razor Leaf 4x76-90% Absorb 4x45-54% | ||
Treecko Grass | D | |
Obtain MethodRoute 101 Gift Available Moves Moves
Damage vs Graveler View Treecko builds →Giga Drain 4x167-197%KO Mega Drain 4x99-116%KO Absorb 4x52-63% | ||
Sewaddle BugGrass | D | |
Snivy Grass | D | |
Obtain MethodRoute 101 Gift Available Moves Moves
Damage vs Graveler View Snivy builds →Leaf Tornado 4x121-143%KO Vine Whip 4x52-63% Mega Drain 4x76-90% | ||
Lileep RockGrass | D | |
Obtain MethodRustboro City Gift Available Moves Moves
Damage vs Graveler View Lileep builds →Giga Drain 4x161-190%KO Brine 4x94-111%KO | ||
Lombre WaterGrass | D | |
Available Moves Moves
Damage vs Graveler View Lombre builds →Surf 4x194-228%KO Bubble Beam 4x142-167%KO Bubble 4x90-106%KO Rock Smash 2x14-18% | ||
Nuzleaf GrassDark | D | |
Available Moves Moves
Damage vs Graveler View Nuzleaf builds →Leaf Blade 4x10⁹-129%KO Dig 2x34-41% Low Sweep 2x28-33% Razor Leaf 4x71-84% | ||
Cacnea Grass | D | |
Available Moves Moves
Damage vs Graveler View Cacnea builds →Needle Arm 4x90-106%KO Power-Up Punch 2x22-25% Absorb 4x65-76% | ||
Chikorita Grass | D | |
Obtain MethodRoute 101 Gift Available Moves Moves
Damage vs Graveler View Chikorita builds →Magical Leaf 4x115-137%KO Razor Leaf 4x57-68% | ||
Lileep RockGrass | D | |
Obtain MethodRustboro City Gift Available Moves Moves
Damage vs Graveler View Lileep builds →Giga Drain 4x169-200%KO Brine 4x96-114%KO | ||
Lombre WaterGrass | D | |
Available Moves Moves
Damage vs Graveler View Lombre builds →Surf 4x194-229%KO Bubble Beam 4x145-171%KO Bubble 4x90-107%KO Rock Smash 2x13-17% | ||
Nuzleaf GrassDark | D | |
Available Moves Moves
Damage vs Graveler View Nuzleaf builds →Leaf Blade 4x114-136%KO Dig 2x33-40% Low Sweep 2x27-33% Razor Leaf 4x73-86% | ||
Cacnea Grass | D | |
Available Moves Moves
Damage vs Graveler View Cacnea builds →Needle Arm 4x90-107%KO Power-Up Punch 2x20-24% Absorb 4x61-71% | ||
Chikorita Grass | D | |
Obtain MethodRoute 101 Gift Available Moves Moves
Damage vs Graveler View Chikorita builds →Magical Leaf 4x114-136%KO Razor Leaf 4x54-64% | ||
Pelipper Water | C | |
Obtain MethodDewford Town Surfing Available Moves Moves
Damage vs Graveler View Pelipper builds →Surf 4x280-330%KO Steel Wing 2x25-29% Brine 4x206-243%KO Water Pulse 4x189-222%KO | ||
Lileep RockGrass | D | |
Obtain MethodRustboro City Gift Available Moves Moves
Damage vs Graveler View Lileep builds →Giga Drain 4x172-202%KO Brine 4x99-117%KO | ||
Lombre WaterGrass | D | |
Available Moves Moves
Damage vs Graveler View Lombre builds →Surf 4x200-236%KO Bubble Beam 4x143-169%KO Bubble 4x91-108%KO Rock Smash 2x15-18% | ||
Nuzleaf GrassDark | D | |
Available Moves Moves
Damage vs Graveler View Nuzleaf builds →Leaf Blade 4x115-135%KO Dig 2x34-40% Low Sweep 2x28-34% Razor Leaf 4x74-88% | ||
Cacnea Grass | D | |
Available Moves Moves
Damage vs Graveler View Cacnea builds →Needle Arm 4x91-108%KO Power-Up Punch 2x20-25% Absorb 4x63-74% | ||
Tropius Grass | C | |
Available Moves Moves
Damage vs Graveler View Tropius builds →Solar Beam 4x297-351%KO Energy Ball 4x225-264%KO Steel Wing 2x29-34% Leaf Tornado 4x164-193%KO | ||
Lileep RockGrass | D | |
Obtain MethodRustboro City Gift Available Moves Moves
Damage vs Graveler View Lileep builds →Solar Beam 4x264-310%KO Energy Ball 4x198-234%KO Giga Drain 4x168-198%KO Brine 4x97-115%KO | ||
Lombre WaterGrass | D | |
Available Moves Moves
Damage vs Graveler View Lombre builds →Solar Beam 4x259-305%KO Hydro Pump 4x237-280%KO Blizzard 2x79-93% Energy Ball 4x194-229%KO | ||
Nuzleaf GrassDark | D | |
Available Moves Moves
Damage vs Graveler View Nuzleaf builds →Solar Beam 4x259-305%KO Leaf Blade 4x10⁸-127%KO Energy Ball 4x194-229%KO Dig 2x33-39% | ||
Cacnea Grass | D | |
Available Moves Moves
Damage vs Graveler View Cacnea builds →Solar Beam 4x341-402%KO Energy Ball 4x254-300%KO Needle Arm 4x86-102%KO Power-Up Punch 2x19-24% | ||
Tropius Grass | C | |
Available Moves Moves
Damage vs Graveler View Tropius builds →Solar Beam 4x298-350%KO Earthquake 2x38-45% Energy Ball 4x225-265%KO Steel Wing 2x28-33% | ||
Lileep RockGrass | D | |
Obtain MethodRustboro City Gift Available Moves Moves
Damage vs Graveler View Lileep builds →Solar Beam 4x263-310%KO Energy Ball 4x199-235%KO Giga Drain 4x165-195%KO Brine 4x96-113%KO | ||
Lombre WaterGrass | D | |
Available Moves Moves
Damage vs Graveler View Lombre builds →Solar Beam 4x259-305%KO Hydro Pump 4x238-280%KO Blizzard 2x79-93% Energy Ball 4x195-230%KO | ||
Nuzleaf GrassDark | D | |
Available Moves Moves
Damage vs Graveler View Nuzleaf builds →Solar Beam 4x259-305%KO Leaf Blade 4x10⁶-125%KO Energy Ball 4x195-230%KO Dig 2x33-38% | ||
Cacnea Grass | D | |
Available Moves Moves
Damage vs Graveler View Cacnea builds →Solar Beam 4x335-395%KO Energy Ball 4x255-300%KO Brick Break 2x35-42% Needle Arm 4x85-100%KO | ||
In Omega Ruby & Alpha Sapphire, Serperior can KO Graveler with Leaf Storm (418-492%). Garchomp threatens a KO with Earthquake (117-137%). Weavile deals 67-79% with Ice Shard.
Serperior Grass | A | |
Recommended Build AbilityContrary ItemLeftovers NatureTimid Moves
Damage vs Graveler View Serperior builds →Leaf Storm 4x418-492%KO | ||
Garchomp DragonGround | A | |
Recommended Build AbilityRough Skin ItemRocky Helmet NatureJolly Moves
Damage vs Graveler View Garchomp builds →Earthquake 2x117-137%KO | ||
Weavile DarkIce | A | |
Recommended Build AbilityPressure ItemChoice Band NatureJolly Moves
Damage vs Graveler View Weavile builds →Knock Off54-63% Ice Shard 2x67-79% Pursuit33-39% | ||
Heatran FireSteel | A | |
Recommended Build AbilityFlashfire ItemLeftovers NatureCalm Moves View Heatran builds →
| ||
Hitmontop Fighting | B | |
Recommended Build AbilityIntimidate ItemEjectbutton NatureAdamant Moves
Damage vs Graveler View Hitmontop builds →Close Combat 2x124-146%KO Feint5-6% | ||
Omega Ruby & Alpha Sapphire Evolution
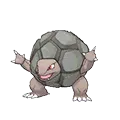
Graveler is partway through a three-stage line between Geodude and Golem. The chain involves a trade, so it's not a straightforward grind. So far, HP got the biggest boost (+15 from Geodude). The final form adds another 105 stats on top. View every chain in the Evolution Chart.
How to Evolve
Breeding
Breed with Graveler to get Geodude eggs easily using 56 partners from the Mineral egg group. Notable egg moves include Autotomize, Block, Curse and 7 more.


Omega Ruby & Alpha Sapphire Graveler Best Moveset
Best Build
No build content available for this Pokemon in Gen 6.
Try selecting a different game/generation filter, or check back later.
Moves
You'll want to breed for Autotomize and Block on Graveler. These egg moves aren't just nice to have. Combined with STAB from Earthquake and Stone Edge, they expand what Graveler can actually threaten in practice.
Level-Up Moves
TM Moves
Egg Moves
Tutor Moves
Transfer Moves
How to Get Graveler in Omega Ruby & Alpha Sapphire
28 encounter spots for Graveler at high spawn rates starting from mid-game areas. Best and Earliest sort options below help narrow down your approach based on odds vs. Accessibility.
Where To Catch Graveler in Omega Ruby & Alpha Sapphire
To get Graveler, start by catching Geodude through rock smash and walking encounters at Lv. 5-38. The chain covers 2 catchable stages before reaching the final form.
 Step 1Catch GeodudeRoute 114Omega RubySmashing rocks Lv.5-20 Route100%EarlyRoute 114Alpha SapphireSmashing rocks Lv.5-20 Route100%EarlyRoute 111 - SouthOmega RubySmashing rocks Lv.13-16 Route100%EarlyRoute 111 - SouthAlpha SapphireSmashing rocks Lv.13-16 Route100%EarlyRusturf TunnelOmega RubySmashing rocks Lv.14-17 Cave100%EarlyRusturf TunnelAlpha SapphireSmashing rocks Lv.14-17 Cave100%EarlyGranite Cave - Area 3Omega RubySmashing rocks Lv.10-12 Cave94%EarlyGranite Cave - Area 3Alpha SapphireSmashing rocks Lv.10-12 Cave94%EarlyGranite Cave - Area 1Alpha SapphireGrass Lv.6 Cave35%EarlyHorde battleGranite Cave - Area 1Omega RubyGrass Lv.6 Cave35%EarlyHorde battleGranite Cave - Area 1Alpha SapphireGrass Lv.10-12 Cave2%EarlyGranite Cave - Area 1Omega RubyGrass Lv.10-12 Cave2%Early
 Step 2Graveler ✓Lilycove CityAlpha SapphireSmashing rocks Lv.28-31 City100%MidLilycove CityOmega RubySmashing rocks Lv.28-31 City100%MidShoal Cave - Area 3Omega RubySmashing rocks Lv.31-34 Cave100%LateShoal Cave - Area 3Alpha SapphireSmashing rocks Lv.31-34 Cave100%LateMirage Spots - Area 6Alpha SapphireSmashing rocks Lv.33-36100%LateMirage Spots - Area 6Omega RubySmashing rocks Lv.33-36100%LateSeafloor Cavern - Area 2Alpha SapphireSmashing rocks Lv.33-36 Cave100%LateSeafloor Cavern - Area 2Omega RubySmashing rocks Lv.33-36 Cave100%LateSeafloor Cavern - Area 3Alpha SapphireSmashing rocks Lv.33-36 Cave100%LateSeafloor Cavern - Area 3Omega RubySmashing rocks Lv.33-36 Cave100%LateSeafloor Cavern - Area 8Omega RubySmashing rocks Lv.33-36 Cave100%LateSeafloor Cavern - Area 8Alpha SapphireSmashing rocks Lv.33-36 Cave100%LateMirage Spots - Area 10Alpha SapphireSmashing rocks Lv.35-3895%LateMirage Spots - Area 10Omega RubySmashing rocks Lv.35-3895%LateMirage Spots - Area 13Omega RubySmashing rocks Lv.35-3895%LateMirage Spots - Area 13Alpha SapphireSmashing rocks Lv.35-3895%LateMirage Spots - Area 23Omega RubySmashing rocks Lv.35-3895%LateMirage Spots - Area 23Alpha SapphireSmashing rocks Lv.35-3895%LateMirage Spots - Area 24Omega RubySmashing rocks Lv.35-3895%LateMirage Spots - Area 24Alpha SapphireSmashing rocks Lv.35-3895%LateMirage Spots - Area 25Omega RubySmashing rocks Lv.35-3895%LateMirage Spots - Area 25Alpha SapphireSmashing rocks Lv.35-3895%LateMirage Spots - Area 26Omega RubySmashing rocks Lv.35-3895%LateMirage Spots - Area 26Alpha SapphireSmashing rocks Lv.35-3895%LateMirage Spots - Area 29Omega RubySmashing rocks Lv.35-3895%LateMirage Spots - Area 29Alpha SapphireSmashing rocks Lv.35-3895%LateMirage Spots - Area 31Omega RubySmashing rocks Lv.35-3895%LateMirage Spots - Area 31Alpha SapphireSmashing rocks Lv.35-3895%Lateor evolve from Geodude (Step 1)
Graveler Guide
In Omega Ruby & Alpha Sapphire, Graveler isn't fully evolved, so it's not built for competitive play. You'll want to evolve it into Golem to unlock its full potential. At 390 BST, it's a stepping stone rather than a team anchor.
In Omega Ruby & Alpha Sapphire, watch for Starmie (Water), Exeggutor (Grass), and Cloyster (Ice) when using Graveler. They all hit it super-effectively with STAB. Starmie is the most dangerous since Water moves deal 4x damage. Fighting, Ground, and Steel-type attackers are also a problem. With 6 weakness types, most competitive teams carry at least one counter. At base 35 Speed, Graveler won't outrun any of these threats so switching to a resist is usually the safer play.
Rock Head protects against recoil damage. That's the one you want on Graveler. Sand Veil is the hidden ability. Niche, but it has its uses. Sturdy works too if your team needs something different.
In Omega Ruby & Alpha Sapphire, Graveler fills the trick room role. It's a physical attacker with base 95 Attack. Base 35 Speed is low. Priority moves or Trick Room are the way to go. And it's enough bulk to take a hit or two.
Game Availability
Graveler first appeared in Red & Blue and spans 20 games across 10 generations. It later gained an Alolan form in Generation 7, adding new dimensions to its competitive identity.
Click a game to view version-specific details
- Gen 1Y
 Yellow
 - Gen 1RBDebut

 Red & Blue
 - Gen 2GS

 Gold & Silver
 - Gen 2C
 Crystal
 - Gen 3RS

 Ruby & Sapphire
 - Gen 3FRLG

 FireRed & LeafGreen
 - Gen 3E
 Emerald
 - Gen 4Pt
 Platinum
 - Gen 4HGSS

 HeartGold & SoulSilver
 - Gen 4DP

 Diamond & Pearl
 - Gen 5BW

 Black & White
 - Gen 5B2W2

 Black 2 & White 2
 - Gen 6XY

 X & Y
X & Y - Gen 6ORAS

 Omega Ruby & Alpha Sapphire
 - Gen 7USUM

 Ultra Sun & Ultra Moon
 - Gen 7SMAlolan

 Sun & Moon
 - Gen 7LGPE

 Let's Go Pikachu & Eevee
 - Gen 8SwSh

 Sword & Shield
 - Gen 8PLA
 Legends: Arceus
 - Gen 8BDSP

 Brilliant Diamond & Shining Pearl
 - Gen 9SV

 Scarlet & Violet
 - Gen 9LZA
 Legends: Z-A
 - Gen 10WW

 Winds & Waves