
Is Larvesta Good in Sword & Shield Playthrough?
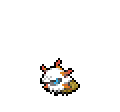
Larvesta appears on Route 6 and the Wild Area. Bug/Fire with AbilityFlame Body hatching eggs faster. Evolves into Volcarona at level 59, one of the latest non-legendary evolutions. The payoff is a 550 BST Quiver Dance user. Start very early if you want Volcarona for the Champion Cup.
Larvesta has the type edge here and should clean up Milo's team.
Larvesta trades roughly evenly with Nessa's team.
Kabu's typing presses Larvesta's defenses.
Bea's typing presses Larvesta's defenses.
Larvesta trades roughly evenly with Opal's team.
Gordie's team hits Larvesta's weaknesses hard.
Larvesta trades roughly evenly with Piers's team.
Raihan's team hits Larvesta's weaknesses hard.
Bede's typing presses Larvesta's defenses.
Leon's team hits Larvesta's weaknesses hard.
Larvesta cannot be caught in this game. It must be traded in from a compatible game where it appears in the wild. Cross-region trading typically becomes available after defeating the Elite Four.
How to Get Larvesta in Sword & Shield
Larvesta isn't available in the wild in Sword & Shield. Start by transferring Larvesta from Black & White, Omega Ruby & Alpha Sapphire, or Scarlet & Violet. The evolution path from Larvesta to Larvesta is covered in the steps below.
How to Obtain Larvesta in SwSh
 Step 1Larvesta ✓BREEDINGAvailableLeave Volcarona with a compatible partner at the Pokemon Day Care to receive a Larvesta egg.LATER APPEARANCEfrom Black & WhiteNot TradeableAppears in Black & White via Gift · Route 18 · Gift. Forward-only transfer — no path back to this game from a later one.LATER APPEARANCENot TradeableAppears in Omega Ruby & Alpha Sapphire via Walking · Mirage Spots. Forward-only transfer — no path back to this game from a later one.LATER APPEARANCENot TradeableAppears in Ultra Sun & Ultra Moon via Walking · Lush Jungle. Forward-only transfer — no path back to this game from a later one.LATER APPEARANCEfrom Scarlet & VioletNot TradeableAppears in Scarlet & Violet via Overworld · Asado Desert. Forward-only transfer — no path back to this game from a later one.
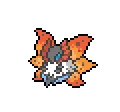 Step 2Evolve into Volcarona
Larvesta Weakness
Larvesta is weak to Rock, Water, and Flying. Watch out for Rock attacks, those deal 4x damage. 6 resistances give it solid defensive coverage on top of that.
| Damage | Types |
|---|---|
| 4x (Critical) | Rock |
| 2x (Weak) | Water, Flying |
| 0.5x (Resist) | Ice, Fighting, Bug, Steel, Fairy |
| 0.25x (Resist) | Grass |
What is Larvesta Weak Against
AvgBest Pokemon Against Larvesta
Roggenrola Rock | C | |
Available Move Moves
Damage vs Larvesta View Roggenrola builds →Smack Down 4x122-145%KO | ||
Onix RockGround | C | |
Dwebble BugRock | C | |
Rolycoly Rock | D | |
Available Move Moves
Damage vs Larvesta View Rolycoly builds →Ancient Power 4x97-114%KO | ||
Woobat Psychic | C | |
Gyarados Water | B | |
Obtain MethodHoneycalm Island Surfing | ||
Drednaw WaterRock | C | |
Available Moves Moves
Damage vs Larvesta View Drednaw builds →Rock Tomb 4x190-224%KO Razor Shell 2x118-139%KO | ||
Carkol RockFire | C | |
Available Move Moves
Damage vs Larvesta View Carkol builds →Ancient Power 4x121-143%KO | ||
Dwebble BugRock | C | |
Roggenrola Rock | C | |
Available Move Moves
Damage vs Larvesta View Roggenrola builds →Smack Down 4x113-134%KO | ||
Sudowoodo Rock | C | |
Gyarados Water | B | |
Obtain MethodHoneycalm Island Surfing | ||
Drednaw WaterRock | C | |
Available Moves Moves
Damage vs Larvesta View Drednaw builds →Rock Tomb 4x183-216%KO Razor Shell 2x112-132%KO | ||
Carkol RockFire | C | |
Available Move Moves
Damage vs Larvesta View Carkol builds →Ancient Power 4x115-136%KO | ||
Boldore Rock | C | |
Gyarados Water | B | |
Obtain MethodHoneycalm Island Surfing | ||
Sudowoodo Rock | C | |
Coalossal RockFire | C | |
Available Move Moves
Damage vs Larvesta View Coalossal builds →Ancient Power 4x143-169%KO | ||
Crustle BugRock | C | |
Drednaw WaterRock | C | |
Available Moves Moves
Damage vs Larvesta View Drednaw builds →Rock Tomb 4x191-225%KO Razor Shell 2x117-138%KO | ||
Gyarados Water | B | |
Obtain MethodHoneycalm Island Surfing | ||
Sudowoodo Rock | C | |
Coalossal RockFire | C | |
Available Move Moves
Damage vs Larvesta View Coalossal builds →Ancient Power 4x146-172%KO | ||
Crustle BugRock | C | |
Drednaw WaterRock | C | |
Available Moves Moves
Damage vs Larvesta View Drednaw builds →Rock Tomb 4x191-226%KO Razor Shell 2x118-140%KO | ||
Gyarados Water | B | |
Obtain MethodHoneycalm Island Surfing | ||
Sudowoodo Rock | C | |
Coalossal RockFire | C | |
Available Move Moves
Damage vs Larvesta View Coalossal builds →Ancient Power 4x138-162%KO | ||
Solrock RockPsychic | C | |
Available Moves Moves
Damage vs Larvesta View Solrock builds →Stone Edge 4x257-303%KO Acrobatics 2x49-58% | ||
Crustle BugRock | C | |
Barbaracle RockWater | C | |
Available Moves Moves
Damage vs Larvesta View Barbaracle builds →Rock Slide 4x215-253%KO Dive 2x114-134%KO | ||
Rhydon GroundRock | C | |
Available Moves Moves
Damage vs Larvesta View Rhydon builds →Rock Slide 4x254-300%KO Whirlpool 2x19-22% | ||
Gyarados Water | B | |
Obtain MethodHoneycalm Island Surfing Available Moves Moves
Damage vs Larvesta View Gyarados builds →Aqua Tail 2x147-173%KO Hurricane 2x101-119%KO | ||
Coalossal RockFire | C | |
Golisopod BugWater | B | |
Available Moves Moves
Damage vs Larvesta View Golisopod builds →Rock Slide 4x164-193%KO Liquidation 2x138-163%KO | ||
Sudowoodo Rock | C | |
Dwebble BugRock | C | |
Available Move Moves
Damage vs Larvesta View Dwebble builds →Rock Wrecker 4x298-350%KO | ||
Barbaracle RockWater | C | |
Available Moves Moves
Damage vs Larvesta View Barbaracle builds →Rock Slide 4x220-259%KO Dive 2x118-139%KO | ||
Coalossal RockFire | C | |
Gyarados Water | B | |
Obtain MethodHoneycalm Island Surfing Available Moves Moves
Damage vs Larvesta View Gyarados builds →Aqua Tail 2x150-178%KO Hurricane 2x10⁴-122%KO | ||
Crustle BugRock | C | |
Available Move Moves
Damage vs Larvesta View Crustle builds →Rock Wrecker 4x438-516%KO | ||
Sudowoodo Rock | C | |
Drednaw WaterRock | C | |
Available Moves Moves
Damage vs Larvesta View Drednaw builds →Head Smash 4x472-556%KO Liquidation 2x134-158%KO | ||
Coalossal RockFire | C | |
Barbaracle RockWater | C | |
Available Moves Moves
Damage vs Larvesta View Barbaracle builds →Stone Edge 4x292-344%KO Dive 2x117-138%KO | ||
Crustle BugRock | C | |
Available Move Moves
Damage vs Larvesta View Crustle builds →Rock Wrecker 4x438-516%KO | ||
Sudowoodo Rock | C | |
Tyrantrum RockDragon | B | |
Drednaw WaterRock | C | |
Available Moves Moves
Damage vs Larvesta View Drednaw builds →Head Smash 4x472-556%KO Liquidation 2x134-158%KO | ||
Coalossal RockFire | C | |
In Sword & Shield, Tyranitar can KO Larvesta with Stone Edge (287-338%). Starmie's Scald hits Larvesta for 70-82%. Salamence deals 41-49% with Earthquake.
Tyranitar RockDark | A | |
Recommended Build AbilitySand Stream ItemChoice Band NatureAdamant Moves
Damage vs Larvesta View Tyranitar builds →Crunch57-68% Stone Edge 4x287-338%KO Earthquake48-56% | ||
Starmie WaterPsychic | B | |
Recommended Build AbilityAnalytic ItemPower Herb NatureTimid Moves
Damage vs Larvesta View Starmie builds →Scald 2x70-82% Ice Beam13-15% Psyshock35-41% | ||
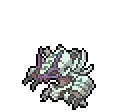
Salamence Dragon | B | |
Recommended Build AbilityIntimidate ItemLife Orb NatureAdamant Moves
Damage vs Larvesta View Salamence builds →Earthquake41-49% | ||
Larvesta Evolutions
Larvesta evolves into Volcarona. It's a two-stage chain with the method shown below. A decent partner pool for breeding via one egg group. Eggs are takes forever to hatch. Evolving adds up to 190 stat points total. View every chain in the Evolution Chart.
How to Evolve


SwSh Larvesta Best Moveset
Pre-evo of Volcarona with 85 Attack on what becomes an entirely special evolution. AbilityFlame Body burns on contact, and Bug/Fire typing gives the moveset some identity. Nothing competitive at this level though. Evolve for 135 Sp. Atk and MoveQuiver Dance access.
Best Build
Larvesta best EVs are Defense and Sp. Def
Wall Moveset
- U Turn
- Flare Blitz
- Will O Wisp
- Morning Sun
Recommended Teammates
Moves List
Egg moves make a real difference. Larvesta gets Absorb and Harden exclusively through breeding, filling gaps that TMs and level-up can't touch. Normal and Flying coverage and more rounds out the picture alongside Overheat and Flare Blitz.
How to Read the Moves Table
Tabs
- Level-Up
- Learned by leveling up.
- TM
- Taught by a Technical Machine.
- Egg
- Inherited via breeding.
- Tutor
- NPC tutor (cost: items, BP, money).
- Reminder
- An NPC reteaches any move this Pokemon could have learned by leveling up.
- Transfer
- Carried over from an older game using Pokemon HOME.
- Event
- Given out through Mystery Gift events.
Visual Signals
CAT (Category)
How the move deals damage and which stats it uses.
A small dot on the icon's corner marks the move as contact. That triggers abilities like Static, Flame Body, Rough Skin, or Iron Barbs, plus items like Rocky Helmet and Sticky Barb.
Tier (S to D)
Each move's competitive rank in RankedBoost's system. TM, Egg, and Tutor sort by tier by default (best first). On Level-Up, click the Tier header to do the same.
PWR (Power)
Base damage. Numbers shown in a type color include STAB (base × 1.5). Hover any colored number to see the math.
— means no power (status moves) or variable power.
Sorting & Filter
Click any column header to sort. Level-Up opens with Lv 1 at the top. TM, Egg, and Tutor open with the highest-tier moves at the top.
Search filters by move name or type. The Filter button limits the list to STAB, Physical, Special, or Status moves.
Level-Up Moves
TM Moves
Egg Moves
Tutor Moves
Base Stats
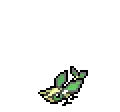
The people of ancient times believed that Larvesta fell from the sun.
Larvesta’s body is warm all over. It spouts fire from the tips of its horns to intimidate predators and scare prey.
Larvesta Sword & Shield Guide
In Sword & Shield, Larvesta isn't fully evolved, so it's not built for competitive play. You'll want to evolve it into Volcarona to unlock its full potential. At 360 BST, it's a stepping stone rather than a team anchor.
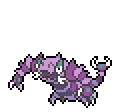
In Sword & Shield, Larvesta's biggest threats include Aerodactyl (Rock), Gyarados (Water), and Salamence (Flying), all carrying super-effective STAB moves. Aerodactyl is the most dangerous since Rock moves deal 4x damage.
Flame Body is the go-to ability for Larvesta. It has a 30% chance of burning attacking Pokémon on contact. Its hidden ability Swarm can work in specific setups.
In Sword & Shield, Larvesta fills the balanced role. It's a physical attacker with base 85 Attack. At base 60 Speed, it won't be moving first often. And it's fragile, can't afford to take many hits.
In Sword & Shield, Larvesta does the job early-game if you need a Bug/Fire type on your team. Evolve it into Volcarona before the later gyms and it holds up fine through the story.
Game Availability
Introduced in Black & White, Larvesta has appeared in 8 games across 6 generations. Later debuts mean fewer total appearances, but it's been a consistent presence since its introduction.
Click a game to view version-specific details
- Gen 1RB

 Red & Blue
 - Gen 1Y
 Yellow
 - Gen 2GS

 Gold & Silver
 - Gen 2C
 Crystal
 - Gen 3RS

 Ruby & Sapphire
 - Gen 3E
 Emerald
 - Gen 3FRLG

 FireRed & LeafGreen
 - Gen 4DP

 Diamond & Pearl
 - Gen 4Pt
 Platinum
 - Gen 4HGSS

 HeartGold & SoulSilver
 - Gen 5BWDebut

 Black & White
 - Gen 5B2W2

 Black 2 & White 2
 - Gen 6XY

 X & Y
X & Y - Gen 6ORAS

 Omega Ruby & Alpha Sapphire
 - Gen 7SM

 Sun & Moon
 - Gen 7USUM

 Ultra Sun & Ultra Moon
 - Gen 7LGPE

 Let's Go Pikachu & Eevee
 - Gen 8SwSh

 Sword & Shield
 - Gen 8BDSP

 Brilliant Diamond & Shining Pearl
 - Gen 8PLA
 Legends: Arceus
 - Gen 9SV

 Scarlet & Violet
 - Gen 9LZA
 Legends: Z-A
 - Gen 10WW

 Winds & Waves