Stats & Training
Bouffalant's built to absorb hits, not race for knockouts. Balanced defenses with Attack doing the heavy lifting. And the medium-fast 1M XP curve means it won't take forever to bring up, worth 2 Attack EVs.
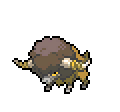
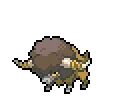
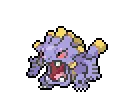
These Pokémon can crush a car with no more than a headbutt. Bouffalant with more hair on their heads hold higher positions within the herd.
These Pokémon live in herds of about 20 individuals. Bouffalant that betray the herd will lose the hair on their heads for some reason.
Bouffalant Weakness
Type-wise, Bouffalant takes extra damage from Fighting. Ghost moves do nothing thanks to a full immunity. Sap Sipper grants an additional Grass immunity, reshaping the matchup chart. Bouffalant's overall bulk (95/95/95) lets it take a hit or two from most weaknesses before going down.
| Damage | Types |
|---|---|
| 2x (Weak) | Fighting |
| 0x (Immune) | Ghost |
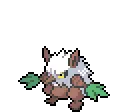
Pancham Fighting | D | |
Available Moves Moves
Damage vs Bouffalant View Pancham builds →Low Sweep 2x45-53% Circle Throw 2x41-49% Arm Thrust 2x14-16% | ||
Machop Fighting | D | |
Available Moves Moves
Damage vs Bouffalant View Machop builds →Low Sweep 2x45-53% Revenge 2x41-49% | ||
Stufful NormalFighting | D | |
Timburr Fighting | D | |
Tyrogue Fighting | D | |
Pancham Fighting | D | |
Available Moves Moves
Damage vs Bouffalant View Pancham builds →Low Sweep 2x40-48% Circle Throw 2x38-45% Arm Thrust 2x11-14% | ||
Machop Fighting | D | |
Available Moves Moves
Damage vs Bouffalant View Machop builds →Vital Throw 2x44-52% Low Sweep 2x40-48% Revenge 2x38-45% | ||
Croagunk PoisonFighting | D | |
Scraggy DarkFighting | D | |
Stufful NormalFighting | D | |
Throh Fighting | C | |
Available Moves Moves
Damage vs Bouffalant View Throh builds →Circle Throw 2x45-53% Revenge 2x45-53% | ||
Sawk Fighting | C | |
Available Moves Moves
Damage vs Bouffalant View Sawk builds →Low Sweep 2x55-66% Rock Smash 2x36-44% Double Kick 2x29-34% | ||
Pancham Fighting | D | |
Available Moves Moves
Damage vs Bouffalant View Pancham builds →Low Sweep 2x40-47% Circle Throw 2x36-44% Arm Thrust 2x13-16% | ||
Machop Fighting | D | |
Available Moves Moves
Damage vs Bouffalant View Machop builds →Vital Throw 2x42-50% Low Sweep 2x40-47% Revenge 2x36-44% | ||
Croagunk PoisonFighting | D | |
Hawlucha Fighting | B | |
Available Moves Moves
Damage vs Bouffalant View Hawlucha builds →Submission 2x53-62% Low Sweep 2x45-53% Revenge 2x41-48% | ||
Toxicroak PoisonFighting | C | |
Available Moves Moves
Damage vs Bouffalant View Toxicroak builds →Low Sweep 2x49-58% Revenge 2x46-55% | ||
Throh Fighting | C | |
Available Moves Moves
Damage vs Bouffalant View Throh builds →Vital Throw 2x50-60% Low Sweep 2x46-55% Circle Throw 2x45-53% Revenge 2x45-53% | ||
Sawk Fighting | C | |
Available Moves Moves
Damage vs Bouffalant View Sawk builds →Brick Break 2x65-77% Low Sweep 2x57-67% Revenge 2x53-62% Rock Smash 2x36-43% | ||
Machoke Fighting | D | |
Available Moves Moves
Damage vs Bouffalant View Machoke builds →Vital Throw 2x50-60% Low Sweep 2x46-55% Revenge 2x45-53% | ||
Hawlucha Fighting | B | |
Available Moves Moves
Damage vs Bouffalant View Hawlucha builds →Submission 2x54-64% Low Sweep 2x44-53% Revenge 2x40-48% | ||
Toxicroak PoisonFighting | C | |
Available Moves Moves
Damage vs Bouffalant View Toxicroak builds →Low Sweep 2x50-60% Revenge 2x47-55% | ||
Passimian Fighting | C | |
Available Moves Moves
Damage vs Bouffalant View Passimian builds →Low Sweep 2x54-64% Revenge 2x50-60% Rock Smash 2x34-41% | ||
Throh Fighting | C | |
Available Moves Moves
Damage vs Bouffalant View Throh builds →Vital Throw 2x50-60% Low Sweep 2x48-57% Circle Throw 2x44-53% Revenge 2x44-53% | ||
Sawk Fighting | C | |
Available Moves Moves
Damage vs Bouffalant View Sawk builds →Brick Break 2x66-78% Low Sweep 2x56-66% Revenge 2x52-62% Rock Smash 2x37-44% | ||
Hawlucha Fighting | B | |
Available Moves Moves
Damage vs Bouffalant View Hawlucha builds →Submission 2x53-63% Brick Break 2x49-58% Low Sweep 2x42-50% Revenge 2x40-48% | ||
Bewear NormalFighting | C | |
Available Moves Moves
Damage vs Bouffalant View Bewear builds →Hammer Arm 2x83-98% Brick Break 2x63-75% Low Sweep 2x55-65% Revenge 2x51-60% | ||
Toxicroak PoisonFighting | C | |
Available Moves Moves
Damage vs Bouffalant View Toxicroak builds →Brick Break 2x55-65% Low Sweep 2x47-56% Revenge 2x44-52% | ||
Passimian Fighting | C | |
Available Moves Moves
Damage vs Bouffalant View Passimian builds →Brick Break 2x60-71% Low Sweep 2x53-63% Revenge 2x49-58% Rock Smash 2x33-40% | ||
Falinks Fighting | C | |
Available Moves Moves
Damage vs Bouffalant View Falinks builds →Brick Break 2x53-63% Revenge 2x42-50% Rock Smash 2x30-35% | ||
Hawlucha Fighting | B | |
Available Moves Moves
Damage vs Bouffalant View Hawlucha builds →Flying Press 2x64-75% Submission 2x52-62% Brick Break 2x48-58% Low Sweep 2x42-50% | ||
Bewear NormalFighting | C | |
Available Moves Moves
Damage vs Bouffalant View Bewear builds →Hammer Arm 2x82-97% Brick Break 2x62-74% Low Sweep 2x54-64% Revenge 2x50-60% | ||
Toxicroak PoisonFighting | C | |
Available Moves Moves
Damage vs Bouffalant View Toxicroak builds →Brick Break 2x56-66% Low Sweep 2x47-56% Revenge 2x44-52% | ||
Passimian Fighting | C | |
Available Moves Moves
Damage vs Bouffalant View Passimian builds →Brick Break 2x60-72% Low Sweep 2x54-64% Revenge 2x48-58% Rock Smash 2x34-40% | ||
Falinks Fighting | C | |
Available Moves Moves
Damage vs Bouffalant View Falinks builds →Brick Break 2x52-62% Revenge 2x42-50% Rock Smash 2x28-34% | ||
Hawlucha Fighting | B | |
Available Moves Moves
Damage vs Bouffalant View Hawlucha builds →High Jump Kick 2x85-101%KO Flying Press 2x65-77% Submission 2x52-62% Brick Break 2x49-59% | ||
Bewear NormalFighting | C | |
Available Moves Moves
Damage vs Bouffalant View Bewear builds →Hammer Arm 2x84-99% Brick Break 2x63-75% Low Sweep 2x55-66% Revenge 2x51-60% | ||
Pangoro FightingDark | C | |
Available Moves Moves
Damage vs Bouffalant View Pangoro builds →Brick Break 2x63-75% Vital Throw 2x59-70% Low Sweep 2x54-64% Circle Throw 2x51-60% | ||
Toxicroak PoisonFighting | C | |
Available Moves Moves
Damage vs Bouffalant View Toxicroak builds →Brick Break 2x55-66% Low Sweep 2x48-57% Revenge 2x45-53% | ||
Passimian Fighting | C | |
Available Moves Moves
Damage vs Bouffalant View Passimian builds →Brick Break 2x62-73% Low Sweep 2x54-64% Revenge 2x49-59% Rock Smash 2x34-40% | ||
In Sword & Shield, Gurdurr's Drain Punch hits Bouffalant for 56-66%. Conkeldurr's Drain Punch hits Bouffalant for 76-89%.
Gurdurr Fighting | A | |
Recommended Build AbilityGuts ItemEviolite NatureAdamant Moves
Damage vs Bouffalant View Gurdurr builds →Drain Punch 2x56-66% Knock Off16-19% Mach Punch 2x30-36% | ||
Conkeldurr Fighting | A | |
Recommended Build AbilityGuts ItemFlame Orb NatureAdamant Moves
Damage vs Bouffalant View Conkeldurr builds →Mach Punch 2x41-48% Drain Punch 2x76-89% Knock Off22-26% Facade24-28% | ||
Sword & Shield Evolution
No evolution chain to worry about here. Bouffalant is a standalone Pokemon with a massive partner pool for breeding through one egg group. Eggs come out average hatch time. View every chain in the Evolution Chart.
How to Evolve
Breeding
Breed Bouffalant easily with 152 breeding partners from the Ground egg group. Pass egg moves like Belch, Cotton Guard, Endeavor and 4 more to offspring.


Sword & Shield Bouffalant Best Moveset
You commit to a move every time Bouffalant comes in. Choice Band gives raw power at the cost of move flexibility, and Reckless adds to that. Max HP and Attack EVs make sure the locked move actually hurts. The remaining moves covers the rest.
Best Build
Bouffalant best EVs are HP and Attack
Physical Wallbreaker Moveset
- Head Charge
- High Horsepower
- Zen Headbutt
- Wild Charge
Recommended Teammates
Moves
Hard to wall, honestly. Bouffalant threatens 11 types beyond its own STAB, with Fighting and Dark standing out. Pair that with Giga Impact and Skull Bash and switchins need to think twice.
Level-Up Moves
TM Moves
Egg Moves
Tutor Moves
Sword & Shield Bouffalant Locations
moderate rates across 18 encounter spots for Bouffalant. That's the kind of hunt where you pick one location and settle in. Sort by Best below to see where the odds are highest.
Best Locations to Catch Bouffalant in Sword & Shield
You can catch Bouffalant through 18 walking encounters from Lv. 10-15, but availability differs between Shield and Sword. Some spots are exclusive to one version.
Bouffalant Guide
In Sword & Shield, Bouffalant looks average on paper at 490 BST. But Sap Sipper is why it sees play. Build around that and it pulls its weight. A-Tier tank on our tier list. Headcharge with Choice Band is the standard set.
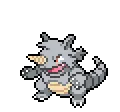
In Sword & Shield, Bouffalant's biggest threats include Hitmonlee (Fighting), all carrying super-effective STAB moves. Only 1 weakness means fewer dedicated counters to worry about.
Bouffalant gets Sap Sipper, Reckless, and Soundproof. But Sap Sipper is the one that matters. It's the centerpiece of every viable set. Build around that.
Bouffalant is a physical attacker with base 110 Attack. Tanky enough to absorb a few hits, too. Speed tells the real story. At base 55 Speed, it won't be moving first often. Fits the tank role.
In Sword & Shield, the best way to handle Bouffalant: Status moves (Toxic, Will-O-Wisp) wear it down. Setup sweepers can use it as a boost opportunity. Special attackers bypass its physical bulk.
Game Availability
Since Black & White, Bouffalant has been obtainable in 7 games. A Generation 5 debut means a shorter history, but Bouffalant has appeared steadily across every generation since.
Click a game to view version-specific details
- Gen 1Y
 Yellow
 - Gen 1RB

 Red & Blue
 - Gen 2GS

 Gold & Silver
 - Gen 2C
 Crystal
 - Gen 3RS

 Ruby & Sapphire
 - Gen 3FRLG

 FireRed & LeafGreen
 - Gen 3E
 Emerald
 - Gen 4Pt
 Platinum
 - Gen 4HGSS

 HeartGold & SoulSilver
 - Gen 4DP

 Diamond & Pearl
 - Gen 5BWDebut

 Black & White
 - Gen 5B2W2

 Black 2 & White 2
 - Gen 6XY

 X & Y
X & Y - Gen 6ORAS

 Omega Ruby & Alpha Sapphire
 - Gen 7USUM

 Ultra Sun & Ultra Moon
 - Gen 7SM

 Sun & Moon
 - Gen 7LGPE

 Let's Go Pikachu & Eevee
 - Gen 8SwSh

 Sword & Shield
 - Gen 8PLA
 Legends: Arceus
 - Gen 8BDSP

 Brilliant Diamond & Shining Pearl
 - Gen 9SV

 Scarlet & Violet
 - Gen 9LZA
 Legends: Z-A
 - Gen 10WW

 Winds & Waves