
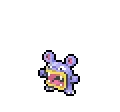
Is Bewear Good in Sword & Shield Playthrough?
Bewear's 125 Attack with AbilityFluffy halving contact damage makes it surprisingly bulky physically. Normal/Fighting handles Gordie and Piers. The Fire weakness from Fluffy means Kabu's gym is off-limits. Everything non-Fire bounces off it. Strong midgame pick with one clear avoid.
Stufful trades roughly evenly with Milo's team.
Stufful trades roughly evenly with Nessa's team.
Stufful trades roughly evenly with Kabu's team.
Bewear trades roughly evenly with Bea's team.
Bewear trades roughly evenly with Opal's team.
Bewear has the type edge here and should clean up Gordie's team.
Bewear has the type edge here and should clean up Piers's team.
Bewear trades roughly evenly with Raihan's team.
Bewear trades roughly evenly with Bede's team.
Bewear trades roughly evenly with Leon's team.
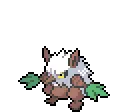
Catch Stufful on Dappled Grove (walking, Lv 11-15). Overcast.
Your Stufful should hit Level 27 before you reach Bea, at typical leveling pace.
How to Get Bewear in Sword & Shield
Bewear starts showing up in mid-game routes at high spawn rates across 40 encounter spots. The list below is sorted so you can pick what fits your current progress without scrolling through everything.
Where To Catch Bewear in SwSh
Stufful is your first catch on the way to Bewear. You'll find walking encounters from Lv. 8-52 across 112 total spots in the chain.
 Step 1Catch StuffulEast Lake AxewellLv.10-15OverworldRate 50%Normal WeatherEast Lake AxewellLv.10-15OverworldRate 50%OvercastDappled GroveLv.11-15GrassRate 40%OvercastEast Lake AxewellLv.10-15OverworldRate 35%RainingNorth Lake MilochLv.14-16GrassRate 30%Normal WeatherNorth Lake MilochLv.14-16GrassRate 30%Heavy FogEast Lake AxewellLv.10-15OverworldRate 25%SnowstormEast Lake AxewellLv.10-15OverworldRate 25%Heavy FogEast Lake AxewellLv.10-15OverworldRate 25%SnowingEast Lake AxewellLv.10-15OverworldRate 25%ThunderstormNorth Lake MilochLv.14-16GrassRate 20%OvercastEast Lake AxewellLv.10-15OverworldRate 10%Intense SunEast Lake AxewellLv.10-15OverworldRate 10%SandstormNorth Lake MilochLv.14-16GrassRate 10%SnowingNorth Lake MilochLv.14-16GrassRate 10%RainingNorth Lake MilochLv.14-16GrassRate 10%ThunderstormNorth Lake MilochLv.14-16GrassRate 10%Intense SunEast Lake AxewellLv.8-12CaveRate 5%Heavy FogEast Lake AxewellLv.8-12CaveRate 5%Intense SunEast Lake AxewellLv.8-12CaveRate 5%SnowingEast Lake AxewellLv.8-12CaveRate 5%SnowstormEast Lake AxewellLv.8-12CaveRate 5%OvercastEast Lake AxewellLv.8-12CaveRate 5%SandstormEast Lake AxewellLv.8-12CaveRate 5%ThunderstormEast Lake AxewellLv.8-12CaveRate 5%Normal WeatherEast Lake AxewellLv.8-12CaveRate 5%RainingHammerlocke HillsLv.29-31OverworldRate 45%OvercastRoute 5Lv.19-21OverworldRate 35%All WeatherBridge FieldLv.27-29OverworldRate 35%ThunderstormBridge FieldLv.27-29OverworldRate 30%RainingHammerlocke HillsLv.29-31OverworldRate 29%Normal WeatherBridge FieldLv.27-29OverworldRate 10%SandstormBridge FieldLv.27-29OverworldRate 5%Heavy FogBridge FieldLv.27-29OverworldRate 5%SnowingGiant's SeatLv.33-38OverworldRate 5%SandstormGiant's SeatLv.33-38OverworldRate 5%Normal Weather
 Step 2Bewear ✓Giant's SeatLv.30-35GrassRate 40%Normal WeatherGiant's SeatLv.30-35GrassRate 30%RainingGiant's SeatLv.30-35GrassRate 30%SnowingGiant's SeatLv.30-35GrassRate 30%ThunderstormGiant's SeatLv.30-35GrassSwordRate 30%Heavy FogGiant's SeatLv.30-35GrassRate 20%Intense SunGiant's SeatLv.30-35GrassRate 20%OvercastGiant's SeatLv.30-35GrassRate 20%SandstormGiant's SeatLv.30-35GrassRate 5%SnowstormGiant's SeatLv.30-35GrassShieldRate 5%Heavy FogAxew's EyeLv.36-40OverworldRate 60%OvercastAxew's EyeLv.36-40OverworldRate 60%Normal WeatherAxew's EyeLv.36-40OverworldRate 25%SandstormAxew's EyeLv.36-40OverworldRate 25%Intense SunAxew's EyeLv.36-40OverworldRate 25%RainingAxew's EyeLv.35-40GrassRate 20%Normal WeatherAxew's EyeLv.36-40OverworldRate 10%SnowstormAxew's EyeLv.36-40OverworldRate 10%SnowingAxew's EyeLv.36-40OverworldRate 5%ThunderstormAxew's EyeLv.36-40OverworldRate 5%Heavy FogLake of OutrageLv.50-52GrassRate 20%Normal Weatheror evolve from Stufful (Step 1)
Bewear Weakness
Bewear is weak to Fighting, Flying, Psychic, and Fairy. On the flip side, it's immune to Ghost-type moves entirely. Standard number of weaknesses for the Normal/Fighting typing.
| Damage | Types |
|---|---|
| 2x (Weak) | Fighting, Flying, Psychic, Fairy |
| 0.5x (Resist) | Bug, Rock, Dark |
| 0x (Immune) | Ghost |
What is Bewear Weak Against
AvgBest Pokemon Against Bewear
Pancham Fighting | D | |
Drifloon Ghost | C | |
Machop Fighting | C | |
Butterfree Bug | C | |
Available Moves Moves
Damage vs Bewear View Butterfree builds →Psybeam 2x38-45% Gust 2x36-43% | ||
Munna Psychic | C | |
Hitmonlee Fighting | C | |
Pancham Fighting | D | |
Drifloon Ghost | C | |
Butterfree Bug | C | |
Available Moves Moves
Damage vs Bewear View Butterfree builds →Air Slash 2x62-73% Psybeam 2x35-42% | ||
Farfetch'd Normal | C | |
Gardevoir PsychicFairy | B | |
Available Moves Moves
Damage vs Bewear View Gardevoir builds →Moonblast 2x99-117%KO Psybeam 2x69-82% | ||
Drifblim Ghost | C | |
Hitmonlee Fighting | C | |
Available Move Moves
Damage vs Bewear View Hitmonlee builds →Close Combat 2x98-115%KO | ||
Sawk Fighting | C | |
Hawlucha Fighting | B | |
Available Moves Moves
Damage vs Bewear View Hawlucha builds →Fly 2x60-71% Low Sweep 2x44-52% | ||
Gardevoir PsychicFairy | B | |
Available Moves Moves
Damage vs Bewear View Gardevoir builds →Moonblast 2x100-118%KO Psybeam 2x69-82% | ||
Drifblim Ghost | C | |
Hitmonlee Fighting | C | |
Available Move Moves
Damage vs Bewear View Hitmonlee builds →Close Combat 2x98-116%KO | ||
Sawk Fighting | C | |
Hawlucha Fighting | B | |
Available Moves Moves
Damage vs Bewear View Hawlucha builds →Fly 2x61-72% Low Sweep 2x44-52% | ||
Gardevoir PsychicFairy | B | |
Available Moves Moves
Damage vs Bewear View Gardevoir builds →Moonblast 2x97-115%KO Psychic 2x93-109%KO | ||
Drifblim Ghost | C | |
Hitmonlee Fighting | C | |
Available Move Moves
Damage vs Bewear View Hitmonlee builds →Close Combat 2x94-111%KO | ||
Hatterene PsychicFairy | B | |
Available Moves Moves
Damage vs Bewear View Hatterene builds →Dazzling Gleam 2x88-104%KO Psybeam 2x72-85% | ||
Indeedee PsychicNormal | C | |
Available Moves Moves
Damage vs Bewear View Indeedee builds →Psychic 2x80-95% Draining Kiss 2x31-36% | ||
Gardevoir PsychicFairy | B | |
Available Moves Moves
Damage vs Bewear View Gardevoir builds →Moonblast 2x98-116%KO Psychic 2x92-109%KO | ||
Hitmonchan Fighting | C | |
Available Move Moves
Damage vs Bewear View Hitmonchan builds →Focus Punch 2x10⁸-127%KO | ||
Drifblim Ghost | C | |
Hatterene PsychicFairy | B | |
Available Moves Moves
Damage vs Bewear View Hatterene builds →Dazzling Gleam 2x90-106%KO Psybeam 2x73-87% | ||
Indeedee PsychicNormal | C | |
Available Moves Moves
Damage vs Bewear View Indeedee builds →Psychic 2x81-95% Draining Kiss 2x30-36% | ||
Musharna Psychic | C | |
Available Moves Moves
Damage vs Bewear View Musharna builds →Future Sight 2x110-129%KO Moonblast 2x59-69% | ||
Gardevoir PsychicFairy | B | |
Available Moves Moves
Damage vs Bewear View Gardevoir builds →Moonblast 2x100-118%KO Psychic 2x95-112%KO | ||
Hitmonchan Fighting | C | |
Available Move Moves
Damage vs Bewear View Hitmonchan builds →Focus Punch 2x10⁹-128%KO | ||
Hatterene PsychicFairy | B | |
Available Moves Moves
Damage vs Bewear View Hatterene builds →Psychic 2x10²-120%KO Dazzling Gleam 2x90-107%KO | ||
Drifblim Ghost | C | |
Braviary Normal | C | |
Available Moves Moves
Damage vs Bewear View Braviary builds →Sky Attack 2x116-136%KO Superpower 2x66-78% | ||
Gardevoir PsychicFairy | B | |
Available Moves Moves
Damage vs Bewear View Gardevoir builds →Future Sight 2x126-148%KO Moonblast 2x100-118%KO Focus Blast 2x84-99% | ||
Kadabra Psychic | B | |
Available Moves Moves
Damage vs Bewear View Kadabra builds →Future Sight 2x121-143%KO Drain Punch 2x16-19% | ||
Mienshao Fighting | B | |
Available Moves Moves
Damage vs Bewear View Mienshao builds →High Jump Kick 2x10⁹-128%KO Bounce 2x48-57% | ||
Heracross BugFighting | B | |
Available Moves Moves
Damage vs Bewear View Heracross builds →Close Combat 2x100-118%KO Aerial Ace 2x34-40% | ||
Mienshao Fighting | B | |
Available Moves Moves
Damage vs Bewear View Mienshao builds →Close Combat 2x100-118%KO Bounce 2x48-57% | ||
Braviary Normal | C | |
Available Moves Moves
Damage vs Bewear View Braviary builds →Sky Attack 2x116-136%KO Superpower 2x66-78% | ||
Gardevoir PsychicFairy | B | |
Available Moves Moves
Damage vs Bewear View Gardevoir builds →Future Sight 2x126-148%KO Moonblast 2x100-118%KO Focus Blast 2x84-99% | ||
Kadabra Psychic | B | |
Available Moves Moves
Damage vs Bewear View Kadabra builds →Future Sight 2x121-143%KO Dazzling Gleam 2x54-64% Drain Punch 2x16-19% | ||
Heracross BugFighting | B | |
Available Moves Moves
Damage vs Bewear View Heracross builds →Close Combat 2x100-118%KO Aerial Ace 2x34-40% | ||
In Sword & Shield, Machamp can KO Bewear with Close Combat (117-138%). Gardevoir threatens a KO with Moonblast (103-121%). Togekiss deals 84-99% with Dazzling Gleam.
Machamp Fighting | B | |
Recommended Build AbilityGuts ItemFlame Orb NatureAdamant Moves
Damage vs Bewear View Machamp builds →Bullet Punch13-16% Knock Off11-12% Close Combat 2x117-138%KO | ||
Gardevoir PsychicFairy | B | |
Recommended Build AbilityTrace ItemChoice Scarf NatureTimid Moves
Damage vs Bewear View Gardevoir builds →Moonblast 2x10³-121%KO Psychic 2x98-115%KO | ||
Togekiss Fairy | B | |
Recommended Build AbilitySerenegrace ItemLeftovers NatureTimid Moves
Damage vs Bewear View Togekiss builds →Air Slash 2x79-93% Dazzling Gleam 2x84-99% | ||
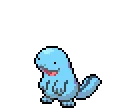
Bewear Evolutions
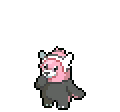
Evolved from Stufful. Bewear is the final form in this two-stage line. A massive partner pool for breeding via one egg group. Eggs are quick to hatch. HP grew the most through evolution (+50 over Stufful), and Bewear peaks at 500 total stats. View every chain in the Evolution Chart.
How to Evolve
Breeding
Breed with Bewear to get Stufful eggs easily using 152 partners from the Ground egg group. Notable egg moves include Defense Curl, Force Palm, Rollout and 1 more.


SwSh Bewear Best Moveset
Contact damage halved by AbilityFluffy, effectively doubling physical bulk at the cost of 2x Fire weakness. 125 Attack at 120 HP behind Normal/Fighting TermStab gives the moveset devastating power with enormous effective physical bulk. B-tier because 60 Speed goes second and Fire attacks cut through the Fluffy protection.
Best Build
Bewear best EVs are HP and Attack
Physical Tank Moveset
- Drain Punch
- Double Edge
- Earthquake
- Darkest Lariat
Recommended Teammates
Moves List
Breeding opens up real options for Bewear. Defense Curl and Force Palm come exclusively from egg moves, and they're worth the effort. The rest of the kit covers basics through Giga Impact and Hyper Beam and coverage across 9 types.
How to Read the Moves Table
Tabs
- Level-Up
- Learned by leveling up.
- TM
- Taught by a Technical Machine.
- Egg
- Inherited via breeding.
- Tutor
- NPC tutor (cost: items, BP, money).
- Reminder
- An NPC reteaches any move this Pokemon could have learned by leveling up.
- Transfer
- Carried over from an older game using Pokemon HOME.
- Event
- Given out through Mystery Gift events.
Visual Signals
CAT (Category)
How the move deals damage and which stats it uses.
A small dot on the icon's corner marks the move as contact. That triggers abilities like Static, Flame Body, Rough Skin, or Iron Barbs, plus items like Rocky Helmet and Sticky Barb.
Tier (S to D)
Each move's competitive rank in RankedBoost's system. TM, Egg, and Tutor sort by tier by default (best first). On Level-Up, click the Tier header to do the same.
PWR (Power)
Base damage. Numbers shown in a type color include STAB (base × 1.5). Hover any colored number to see the math.
— means no power (status moves) or variable power.
Sorting & Filter
Click any column header to sort. Level-Up opens with Lv 1 at the top. TM, Egg, and Tutor open with the highest-tier moves at the top.
Search filters by move name or type. The Filter button limits the list to STAB, Physical, Special, or Status moves.
Level-Up Moves
TM Moves
Egg Moves
Tutor Moves
Base Stats
Once it accepts you as a friend, it tries to show its affection with a hug. Letting it do that is dangerous—it could easily shatter your bones.
The moves it uses to take down its prey would make a martial artist jealous. It tucks subdued prey under its arms to carry them to its nest.
Bewear Sword & Shield Guide
For Sword & Shield, we rate Bewear C-Tier: a niche pick in Sword & Shield's meta. At 500 BST, it fits the wallbreaker role. Drain Punch with Leftovers is the standard set.
In Sword & Shield, Bewear's biggest threats include Machamp (Fighting), Talonflame (Flying), and Espeon (Psychic), all carrying super-effective STAB moves. Fairy-type attackers are also a problem.
Fluffy is the go-to ability for Bewear. It damage from contact moves is halved. Its hidden ability Unnerve can work in specific setups. Klutz is the other option. Pick based on what your team needs.
At base 60 Speed, it won't be moving first often. On offense, Bewear is a physical attacker with base 125 Attack. Defensively? Enough bulk to take a hit or two. Best used as a wallbreaker.
For Sword & Shield, the core moveset is Drain Punch, Double Edge, Earthquake, and Darkestlariat. Drain Punch leads at 0% usage. This set covers the wallbreaker role with a mix of damage and utility.
Game Availability
Bewear joined the series in Sun & Moon and has been available in 3 titles so far. With 4 generations of appearances, it's established itself despite the later start.
Click a game to view version-specific details
- Gen 1RB

 Red & Blue
 - Gen 1Y
 Yellow
 - Gen 2GS

 Gold & Silver
 - Gen 2C
 Crystal
 - Gen 3RS

 Ruby & Sapphire
 - Gen 3E
 Emerald
 - Gen 3FRLG

 FireRed & LeafGreen
 - Gen 4DP

 Diamond & Pearl
 - Gen 4Pt
 Platinum
 - Gen 4HGSS

 HeartGold & SoulSilver
 - Gen 5BW

 Black & White
 - Gen 5B2W2

 Black 2 & White 2
 - Gen 6XY

 X & Y
X & Y - Gen 6ORAS

 Omega Ruby & Alpha Sapphire
 - Gen 7SMDebut

 Sun & Moon
 - Gen 7USUM

 Ultra Sun & Ultra Moon
 - Gen 7LGPE

 Let's Go Pikachu & Eevee
 - Gen 8SwSh

 Sword & Shield
 - Gen 8BDSP

 Brilliant Diamond & Shining Pearl
 - Gen 8PLA
 Legends: Arceus
 - Gen 9SV

 Scarlet & Violet
 - Gen 9LZA
 Legends: Z-A
 - Gen 10WW

 Winds & Waves