Stats & Training
Nothing fancy in Camerupt's spread. It leans mixed with Sp. Atk out front. And you'll get 2 Attack and Sp. Atk EVs per KO for it. Follows a medium-fast 1M XP curve.
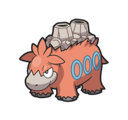
It has volcanoes on its back. If magma builds up in its body, it shudders, then erupts violently.
It has volcanoes on its back. If magma builds up in its body, it shudders, then erupts violently.
Camerupt Weakness
Camerupt's Fire/Ground typing leaves it vulnerable to Water and Ground. Water hits land at 4x, so they're the biggest threat. It shrugs off Electric-type attacks completely. The Fire/Ground typing picks up 5 resistances to work with. Solid Rock reduces SE moves damage, further improving the defensive spread.
| Damage | Types |
|---|---|
| 4x (Critical) | Water |
| 2x (Weak) | Ground |
| 0.5x (Resist) | Fire, Poison, Bug, Steel, Fairy |
| 0x (Immune) | Electric |
Onix RockGround | C | |
Surskit BugWater | D | |
Available Moves Moves
Damage vs Camerupt View Surskit builds →Scald 4x122-146%KO Water Pulse 4x95-114%KO Water Gun 4x68-81% | ||
Psyduck Water | D | |
Obtain MethodCelestic Town Surfing Available Moves Moves
Damage vs Camerupt View Psyduck builds →Surf 4x151-178%KO Waterfall 4x122-146%KO Scald 4x138-162%KO Brine 4x122-146%KO | ||
Phanpy Ground | D | |
Cubone Ground | D | |
Available Moves Moves
Damage vs Camerupt View Cubone builds →Earthquake 2x76-89% Mud-Slap 2x19-24% | ||
Onix RockGround | C | |
Surskit BugWater | D | |
Available Moves Moves
Damage vs Camerupt View Surskit builds →Scald 4x10⁷-129%KO Water Pulse 4x83-100%KO Water Gun 4x60-71% | ||
Buizel Water | D | |
Available Moves Moves
Damage vs Camerupt View Buizel builds →Surf 4x133-157%KO Waterfall 4x133-157%KO Scald 4x121-143%KO Brine 4x95-114%KO | ||
Shellos Water | D | |
Available Moves Moves
Damage vs Camerupt View Shellos builds →Surf 4x133-157%KO Scald 4x121-143%KO Brine 4x95-114%KO Water Pulse 4x95-114%KO | ||
Psyduck Water | D | |
Obtain MethodCelestic Town Surfing Available Moves Moves
Damage vs Camerupt View Psyduck builds →Surf 4x133-157%KO Waterfall 4x121-143%KO Scald 4x121-143%KO Brine 4x10⁷-129%KO | ||
Bibarel NormalWater | C | |
Available Moves Moves
Damage vs Camerupt View Bibarel builds →Surf 4x123-145%KO Scald 4x10⁵-125%KO Waterfall 4x156-185%KO Bulldoze 2x38-46% | ||
Surskit BugWater | D | |
Available Moves Moves
Damage vs Camerupt View Surskit builds →Scald 4x100-119%KO Bubble Beam 4x84-99% Water Pulse 4x78-92% Water Gun 4x56-66% | ||
Buizel Water | D | |
Available Moves Moves
Damage vs Camerupt View Buizel builds →Surf 4x129-152%KO Waterfall 4x129-152%KO Scald 4x112-132%KO Brine 4x95-112%KO | ||
Shellos Water | D | |
Available Moves Moves
Damage vs Camerupt View Shellos builds →Surf 4x123-145%KO Scald 4x112-132%KO Brine 4x89-105%KO Water Pulse 4x84-99% | ||
Psyduck Water | D | |
Obtain MethodCelestic Town Surfing Available Moves Moves
Damage vs Camerupt View Psyduck builds →Aqua Tail 4x123-145%KO Surf 4x134-158%KO Waterfall 4x112-132%KO Scald 4x123-145%KO | ||
Floatzel Water | C | |
Available Moves Moves
Damage vs Camerupt View Floatzel builds →Surf 4x162-191%KO Waterfall 4x179-211%KO Scald 4x145-171%KO Dig 2x59-70% | ||
Quagsire WaterGround | C | |
Obtain MethodGreat Marsh Surfing Available Moves Moves
Damage vs Camerupt View Quagsire builds →Earthquake 2x95-112%KO Aqua Tail 4x174-204%KO Surf 4x134-158%KO Waterfall 4x156-185%KO | ||
Bibarel NormalWater | C | |
Available Moves Moves
Damage vs Camerupt View Bibarel builds →Surf 4x123-145%KO Scald 4x10⁵-125%KO Dig 2x52-62% Waterfall 4x156-185%KO | ||
Wingull Water | D | |
Obtain MethodCanalave City Surfing Available Moves Moves
Damage vs Camerupt View Wingull builds →Scald 4x10⁵-125%KO Brine 4x89-105%KO Water Pulse 4x84-99% Water Gun 4x56-66% | ||
Surskit BugWater | D | |
Available Moves Moves
Damage vs Camerupt View Surskit builds →Scald 4x100-119%KO Bubble Beam 4x84-99% Water Pulse 4x78-92% Water Gun 4x56-66% | ||
Floatzel Water | C | |
Available Moves Moves
Damage vs Camerupt View Floatzel builds →Surf 4x157-185%KO Waterfall 4x176-207%KO Scald 4x143-168%KO Dig 2x58-69% | ||
Quagsire WaterGround | C | |
Obtain MethodGreat Marsh Surfing Available Moves Moves
Damage vs Camerupt View Quagsire builds →Earthquake 2x93-109%KO Aqua Tail 4x166-196%KO Muddy Water 4x128-151%KO Surf 4x128-151%KO | ||
Bibarel NormalWater | C | |
Available Moves Moves
Damage vs Camerupt View Bibarel builds →Surf 4x114-135%KO Scald 4x10⁵-123%KO Dig 2x49-58% Waterfall 4x148-174%KO | ||
Wingull Water | D | |
Obtain MethodCanalave City Surfing Available Moves Moves
Damage vs Camerupt View Wingull builds →Scald 4x10⁵-123%KO Brine 4x85-101%KO Water Pulse 4x80-95% Water Gun 4x57-67% | ||
Surskit BugWater | D | |
Available Moves Moves
Damage vs Camerupt View Surskit builds →Scald 4x100-118%KO Bubble Beam 4x80-95% Water Pulse 4x76-90% Water Gun 4x52-62% | ||
Gastrodon WaterGround | B | |
Available Moves Moves
Damage vs Camerupt View Gastrodon builds →Earthquake 2x89-104%KO Muddy Water 4x163-193%KO Earth Power 2x82-97% Surf 4x163-193%KO | ||
Floatzel Water | C | |
Available Moves Moves
Damage vs Camerupt View Floatzel builds →Surf 4x155-183%KO Waterfall 4x172-203%KO Scald 4x142-167%KO Dig 2x57-68% | ||
Quagsire WaterGround | C | |
Obtain MethodGreat Marsh Surfing Available Moves Moves
Damage vs Camerupt View Quagsire builds →Earthquake 2x90-107%KO Aqua Tail 4x163-193%KO Muddy Water 4x128-151%KO Surf 4x128-151%KO | ||
Wingull Water | D | |
Obtain MethodCanalave City Surfing Available Moves Moves
Damage vs Camerupt View Wingull builds →Scald 4x10²-120%KO Brine 4x83-99% Water Pulse 4x79-94% Water Gun 4x53-63% | ||
Surskit BugWater | D | |
Available Moves Moves
Damage vs Camerupt View Surskit builds →Scald 4x97-115%KO Bubble Beam 4x79-94% Water Pulse 4x75-89% Water Gun 4x53-63% | ||
Gastrodon WaterGround | B | |
Available Moves Moves
Damage vs Camerupt View Gastrodon builds →Earthquake 2x89-105%KO Muddy Water 4x166-195%KO Earth Power 2x83-98% Surf 4x166-195%KO | ||
Floatzel Water | C | |
Available Moves Moves
Damage vs Camerupt View Floatzel builds →Surf 4x153-180%KO Waterfall 4x174-205%KO Scald 4x137-161%KO Dig 2x58-68% | ||
Quagsire WaterGround | C | |
Obtain MethodGreat Marsh Surfing Available Moves Moves
Damage vs Camerupt View Quagsire builds →Earthquake 2x91-107%KO Aqua Tail 4x161-190%KO Muddy Water 4x124-146%KO Surf 4x124-146%KO | ||
Wingull Water | D | |
Obtain MethodCanalave City Surfing Available Moves Moves
Damage vs Camerupt View Wingull builds →Scald 4x99-117%KO Brine 4x83-98% Water Pulse 4x78-93% Water Gun 4x54-63% | ||
Surskit BugWater | D | |
Available Moves Moves
Damage vs Camerupt View Surskit builds →Scald 4x95-112%KO Bubble Beam 4x78-93% Water Pulse 4x74-88% Water Gun 4x50-59% | ||
In Brilliant Diamond & Shining Pearl, Excadrill can KO Camerupt with Earthquake (132-156%). Slowking threatens a KO with Scald (128-150%). Greninja's Hydro Pump also KOs at 336-395%.
Excadrill GroundSteel | A | |
Recommended Build AbilityMold Breaker ItemLeftovers NatureJolly Moves
Damage vs Camerupt View Excadrill builds →Earthquake 2x132-156%KO Rapid Spin22-26% | ||
Slowking WaterPsychic | A | |
Recommended Build AbilityRegenerator ItemColbur Berry NatureRelaxed Moves
Damage vs Camerupt View Slowking builds →Scald 4x128-150%KO | ||
Greninja WaterDark | A | |
Recommended Build AbilityBattlebond ItemChoice Specs NatureTimid Moves
Damage vs Camerupt View Greninja builds →Dark Pulse61-72% Ice Beam46-54% Hydro Pump 4x336-395%KO | ||
Landorus Ground | B | |
Recommended Build AbilitySheerforce ItemLife Orb NatureTimid Moves
Damage vs Camerupt View Landorus builds →Sludge Bomb22-25% Psychic43-51% | ||
Brilliant Diamond & Shining Pearl Evolution
Camerupt is what Numel becomes. Breed it for Numel eggs (average hatch time). A massive partner pool for breeding via one egg group. Eggs are average hatch time. The evolution from Numel pushed Camerupt to 460 total stats. Attack saw the largest single gain at +40. View every chain in the Evolution Chart.
How to Evolve
Breeding
Breed with Camerupt to get Numel eggs easily using 131 partners from the Ground egg group. Notable egg moves include Ancient Power, Body Slam, Defense Curl and 12 more.


Brilliant Diamond & Shining Pearl Camerupt Best Moveset
Flamethrower is the safe click most turns. Choice Specs locks Camerupt into it but rewards with boosted special damage with move lock. Modest nature and max HP and Sp. Atk EVs maximize that first hit. Magmaarmor helps on the margins.
Best Build
Camerupt best EVs are Sp. Atk and HP
Special Wallbreaker Moveset
- Earth Power
- Toxic
- Stealth Rock
- Flamethrower
Recommended Teammates
Moves
You'll want to breed for Ancient Power and Body Slam on Camerupt. These egg moves aren't just nice to have. Combined with STAB from Eruption and Overheat, they expand what Camerupt can actually threaten in practice.
Level-Up Moves
TM Moves
Egg Moves
Tutor Moves
How to Get Camerupt in Brilliant Diamond & Shining Pearl
Camerupt starts showing up in endgame routes at decent spawn rates across 18 encounter spots. The list below is sorted so you can pick what fits your current progress without scrolling through everything.
Where To Catch Camerupt in Brilliant Diamond & Shining Pearl
Numel is your first catch on the way to Camerupt. You'll find walking encounters from Lv. 22-63 across 32 total spots in the chain.
 Step 1Catch NumelRoute 227Shining PearlGrass Lv.22-24 Route5%MidRoute 227Brilliant DiamondGrass Lv.22-24 Route5%MidStark Mountain - OutsideShining PearlGrass Lv.22-24 Volcano5%MidStark Mountain - OutsideBrilliant DiamondGrass Lv.22-24 Volcano5%MidBig Bluff CavernBrilliant DiamondGrass Lv.58-63 CavePostPost-gameBig Bluff CavernShining PearlGrass Lv.58-63 CavePostPost-gameRocky CaveBrilliant DiamondGrass Lv.58-63 CavePostPost-gameRocky CaveShining PearlGrass Lv.58-63 CavePostPost-gameSandsear CaveShining PearlGrass Lv.58-63 DesertPostPost-gameSandsear CaveBrilliant DiamondGrass Lv.58-63 DesertPostPost-gameTyphlo CavernBrilliant DiamondGrass Lv.58-63 CavePostPost-gameTyphlo CavernShining PearlGrass Lv.58-63 CavePostPost-gameVolcanic CaveBrilliant DiamondGrass Lv.58-63 VolcanoPostPost-gameVolcanic CaveShining PearlGrass Lv.58-63 VolcanoPostPost-game
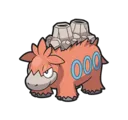 Step 2Camerupt ✓Route 227Shining PearlGrass Lv.55 Route20%PostRoute 227Brilliant DiamondGrass Lv.55 Route20%PostStark Mountain - OutsideBrilliant DiamondGrass Lv.55 Volcano20%PostStark Mountain - OutsideShining PearlGrass Lv.55 Volcano20%PostBig Bluff CavernBrilliant DiamondGrass Lv.58-63 CavePostPost-gameBig Bluff CavernShining PearlGrass Lv.58-63 CavePostPost-gameRocky CaveBrilliant DiamondGrass Lv.58-63 CavePostPost-gameRocky CaveShining PearlGrass Lv.58-63 CavePostPost-gameSandsear CaveBrilliant DiamondGrass Lv.58-63 DesertPostPost-gameSandsear CaveShining PearlGrass Lv.58-63 DesertPostPost-gameTyphlo CavernBrilliant DiamondGrass Lv.58-63 CavePostPost-gameTyphlo CavernShining PearlGrass Lv.58-63 CavePostPost-gameVolcanic CaveBrilliant DiamondGrass Lv.58-63 VolcanoPostPost-gameVolcanic CaveShining PearlGrass Lv.58-63 VolcanoPostPost-gameStark Mountain - EntranceBrilliant DiamondGrass Lv.56 Volcano5%PostStark Mountain - EntranceShining PearlGrass Lv.56 Volcano5%PostStark Mountain - InteriorBrilliant DiamondGrass Lv.58 Volcano5%PostStark Mountain - InteriorShining PearlGrass Lv.58 Volcano5%Postor evolve from Numel (Step 1)
Camerupt Guide
In Brilliant Diamond & Shining Pearl, Camerupt works as an attacker with 460 BST behind it. C-Tier on our list: a niche pick in Brilliant Diamond & Shining Pearl's meta. Earthpower with Choice Specs is the standard set.
Mega Evolution isn't available in Brilliant Diamond & Shining Pearl, but Camerupt does have a Mega form in Gen 6-7 games (X/Y, ORAS, Sun/Moon). Mega Camerupt hits 560 BST.
In Brilliant Diamond & Shining Pearl, watch for Milotic (Water) and Swampert (Ground) when using Camerupt. They all hit it super-effectively with STAB. Milotic is the most dangerous since Water moves deal 4x damage. Only 2 weaknesses means fewer dedicated counters to worry about. At base 40 Speed, Camerupt won't outrun any of these threats so switching to a resist is usually the safer play.
Magma Armor prevents freezing. That's the one you want on Camerupt. Anger Point is the hidden ability. Niche, but it has its uses. Solid Rock works too if your team needs something different.
Camerupt is a special attacker with base 105 Sp. Atk. Enough bulk to take a hit or two, too. Speed tells the real story. Base 40 Speed is low. Priority moves or Trick Room are the way to go. Fits the attacker role.
Game Availability
Available since Ruby & Sapphire, Camerupt appears in 15 games spanning 8 generations. Beyond its original form, it gained a Mega form in Generation 6.
Click a game to view version-specific details
- Gen 1Y
 Yellow
 - Gen 1RB

 Red & Blue
 - Gen 2GS

 Gold & Silver
 - Gen 2C
 Crystal
 - Gen 3RSDebut

 Ruby & Sapphire
 - Gen 3FRLG

 FireRed & LeafGreen
 - Gen 3E
 Emerald
 - Gen 4Pt
 Platinum
 - Gen 4HGSS

 HeartGold & SoulSilver
 - Gen 4DP

 Diamond & Pearl
 - Gen 5BW

 Black & White
 - Gen 5B2W2

 Black 2 & White 2
 - Gen 6XY

 X & Y
X & Y - Gen 6ORASMega

 Omega Ruby & Alpha Sapphire
 - Gen 7USUM

 Ultra Sun & Ultra Moon
 - Gen 7SM

 Sun & Moon
 - Gen 7LGPE

 Let's Go Pikachu & Eevee
 - Gen 8SwSh

 Sword & Shield
 - Gen 8PLA
 Legends: Arceus
 - Gen 8BDSP

 Brilliant Diamond & Shining Pearl
 - Gen 9SV

 Scarlet & Violet
 - Gen 9LZA
 Legends: Z-A
 - Gen 10WW

 Winds & Waves